What’s up, photo fans and creative pals! Today, we’re jumping into the cool world of visual design, thanks to Canva’s super cool AI Magic Edit tool. Get ready for a total game-changer that turns boring pics into jaw-dropping masterpieces with just a few clicks and no, you don’t need to be a tech genius!
Back in the day, messing with photos needed ninja-like skills with fancy software. But no worries! Canva’s Magic Edit is here to save the day, bringing top-notch image sprucing to regular folks. It’s not just another tool, it’s a fancy feature mixed smoothly into Canva’s easy-to-use platform.
Making Changes with Canva’s Magic Edit
Now, let’s talk about the magic stuff, Canva’s Magic Edit uses super-smart artificial intelligence to jazz up your pics fast. Picture delicately brushing over different parts of your image and bam! The tool smartly tweaks things like brightening dark spots or cranking up the colors. And the best part? It all happens live, letting you play around until your vision is just right!
Fancy tweaks? Piece of cake! Whether you’re fixing flaws or tweaking faces, the AI handles all the techy stuff, so you just focus on making your pics perfect.
How to Use Canva’s Magic Edit
Time Needed :00 hours 05 minutes
In this tutorial, we’ll guide you through the process of using Canva’s Magic Edit to generate your own image tweaks, in less than 5 minutes. Let’s get started!
Step 1: Drop in a Pic
Go to Canva’s home base, hit “Create a Design,” choose “Edit Photos,” and drop in your pic.
Step 2: Open Magic Edit
Find your pic, head to the “Effects” tab, and start the magic by picking “Magic Edit.”
Step 3: Brush Away
Activate Magic Edit and go for it! Carefully brush over spots, and watch the AI work its magic tailored to your cool ideas.
Step 4: Lock It In
Seal the deal with a checkmark. Feeling extra? Add more effects and filters, then save your super cool pic – you’re a visual genius now!
Letting Loose with Canva’s Magic Edit
Canva’s Magic Edit isn’t just a tool; it’s an entry to a world of creative fun. It’s perfect for those not-so-familiar with graphic stuff, letting even newbies create amazing content. Canva’s simple setup, paired with this awesome AI friend, means your creative ideas happen without any fuss.
Telling Stories with Pics Made Easy
Photos aren’t just memories; they’re stories waiting to happen. Magic Edit boosts newbie photographers to make their pics stand out. Turn dull images into lively scenes with colour fixes, highlight cool stuff, and let the AI handle fancy lighting it’s like having your photo assistant!
Boosting Your Brand Look
A strong brand needs eye-catching visuals. That’s where Magic Edit shines it’s the special ingredient for businesses to tweak pics, show off products, and connect with peeps. Adjust colours, lights, and details for awesome pics made for social media, websites, and ads. Your brand has never looked this awesome!
Saving Time and Money with Canva’s Magic Edit
In the past, hiring photo pros cost a lot of time and cash. But not anymore! Magic Edit wipes away that problem, giving you fancy editing tools without a price tag. Say bye to long waits and big bills, stunning pics are now possible without breaking the bank.
Conclusion
Canva, armed with its easy-to-use setup and the AI magic of Magic Edit, made advanced photo tricks easy for everyone. It’s not just about fixing pics; it’s about letting users focus on creating cool ideas without tech stress.
Whether you’re jazzing up personal pics or setting your brand vibe, Magic Edit makes editing a breeze, unlocking endless creative power. So, why wait? Dive into Canva’s AI Magic Edit kingdom and let your creativity go wild!
Some Frequently Asked Questions and Their Answers
How can I use Canva’s Magic Edit to enhance my photos?
To utilize Magic Edit, click on the photo you want to edit in the Canva editor. On the toolbar, select “Edit photo” and then choose “Magic Edit” to add, replace, and modify your photos effortlessly.
What is Magic Design™, and how can it assist in my design projects?
Magic Design™ is a free AI design tool offered by Canva. In beta, it allows you to visualize design ideas with a variety of refined templates tailored to your needs. To access this tool, visit Canva’s Magic Design™ page [4].
Which AI-powered features are available in Canva’s Magic Studio?
Canva’s Magic Studio includes powerful features like Magic Expand, Magic Grab, Magic Edit, and Magic Eraser. These tools simplify tasks such as expanding designs, grabbing elements, editing photos, and erasing unwanted portions with ease.
How can Magic Media be used to create photos and videos in Canva?
To create photos and videos with Magic Media, go to the editor side panel, click “Apps,” then, under AI-powered, select “Magic Media.” Enter a description of the image you desire, and choose the suitable result from the Images tab.
References
Canva: Using Magic Edit to add, replace, and modify photos…
Canva: – Using Magic Media to create photos and videos…
Other Interesting Articles
Samsung Galaxy AI Features: Samsung Galaxy AI features, unravelling the functionalities that distinguish them in the fiercely competitive smartphone landscape…
How to Use Gamma AI: Gamma AI tool is a web-based application that uses advanced machine learning algorithms to generate beautiful, engaging, and professional…
Smartphones have transcended their conventional role as mere communication tools, into technological marvels through the assimilation of innovations. Among the trailblazers in this evolution stands Samsung, a paragon of innovation.
This discourse delves into the intricate realm of Galaxy AI features, unravelling the functionalities that distinguish them in the fiercely competitive smartphone landscape. The saga of Samsung Galaxy smartphones unfolds in the epoch of Artificial Intelligence (AI), an epoch where user experiences undergo a paradigm shift.
In tandem with technological progression, the infusion of AI becomes not just consequential but transformative, amplifying not only the effectiveness but the holistic functionality of these devices. Let us embark on a journey through the dominion of Samsung’s AI features.
The narrative commences with a retrospective glance at the evolution of Samsung’s AI, transitioning from the nascent days of Bixby to the assimilation of sophisticated AI technologies.
This segment scrutinizes the seamless amalgamation of AI across diverse Samsung Galaxy devices, engendering a unified and sagacious ecosystem.
A Symphony of Vocal Prowess
Bixby, Samsung’s virtual maestro, takes the spotlight with its vocal command virtuosity. Users wield the power to execute tasks, dispatch messages, or even capture imagery through articulate commands, epitomizing the evolution of vocal technology.
The refinement in natural language processing attests to Samsung’s commitment, ensuring the AI comprehends and responds to commands with unparalleled precision.
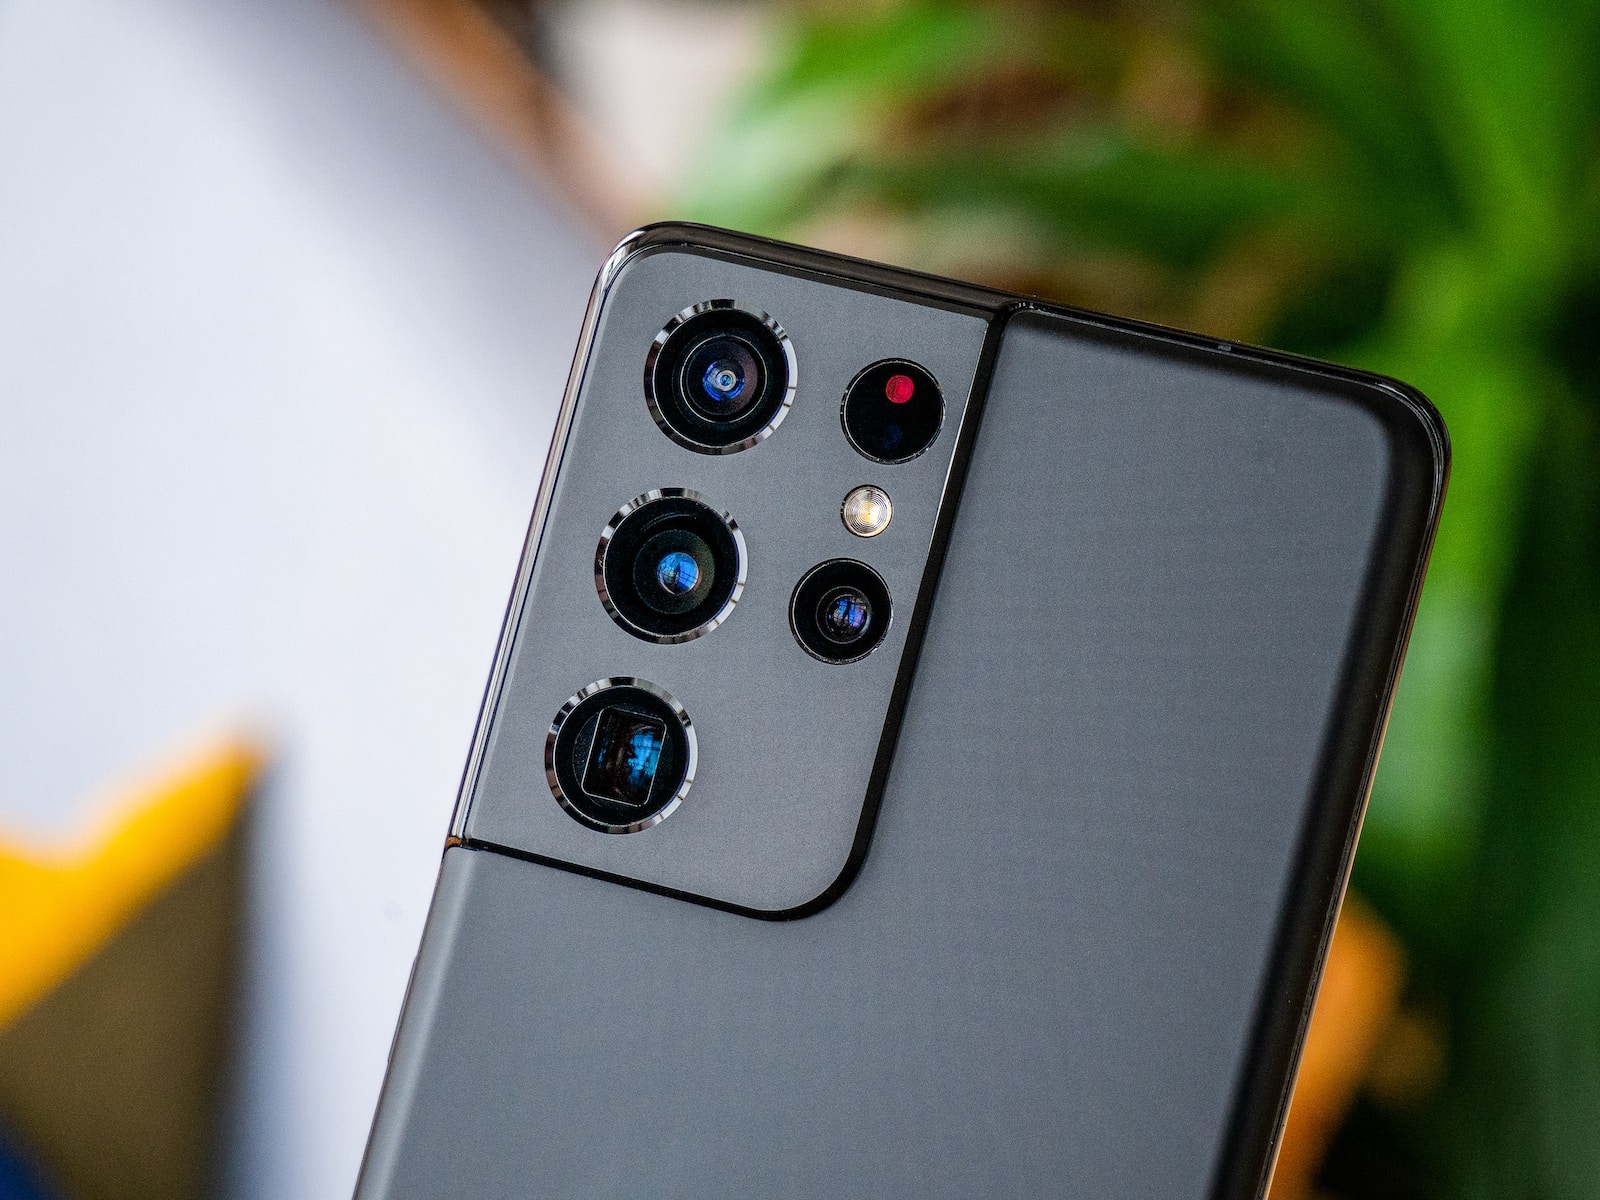
Samsung Galaxy AI Photographic Augmentation
The lens, the ocular prowess of smartphones, is meticulously augmented by Galaxy AI. Through scene optimization and detection, the AI lens adjusts configurations to suit diverse surroundings, presenting captivating images across varied environments.
Elevating the paradigm, the AI lens imparts real-time photography insights, metamorphosing users into photography aficionados.
Fusion of Intelligences
The seamless integration with Google Assistant distinguishes Samsung’s AI eminence. This segment explores the symbiosis between Samsung’s AI and Google Assistant, accentuating the distinctive features that set it apart in a crowded arena.
Bixby Vision Unveiled
Bixby Vision propels AI into the stratosphere with its augmented reality incantations. From instantaneous text translation to furnishing information about landmarks, this segment unveils the pragmatic applications of AR in everyday existence.
The text and image recognition prowess of Bixby Vision further bestows a veneer of convenience, allowing users to effortlessly glean information or translate text through a mere point of their camera.
Samsung Galaxy AI Orchestrated Battery Synergy
The perennial concern of battery longevity finds redressal in Galaxy AI through adaptive power-saving modes. The AI imbibes usage patterns, optimizing settings to maximize battery efficiency without compromising performance.
Users gain insights into their battery habits through AI-driven analysis, illuminating effective power consumption management.
Samsung Galaxy AI Ecosystem
Interconnectivity emerges as the heartbeat of Samsung’s AI ecosystem. This segment unravels how AI seamlessly binds across devices, engendering a harmonious user experience. From smartphones to smartwatches, Samsung’s AI ecosystem ensures data and preferences flow seamlessly, forging a coherent user journey.
The conduit for effortless data sharing materializes through Samsung Cloud, solidifying the interconnected approach that sets Samsung apart in AI-driven devices.
Trials and Triumphs
As with any technological journey, challenges and apprehensions arise. This segment addresses common misgivings about AI in smartphones, outlining Samsung’s vision for the future.
Striking a delicate balance between innovation and user privacy, Samsung envisions an evolving and secure technological landscape, by making device built-in AI that doesn’t need to collect data and use in the cloud.
Samsung Galaxy AI Echoeing User Insights
Incorporating user insights into AI enhancements stands as a testament to Samsung’s commitment. This segment elucidates how customer feedback shapes ongoing AI developments.
Regular updates for augmented AI performance become the norm for Samsung Galaxy devices, upholding a dedication to continuous improvement that ensures devices operate seamlessly and efficiently.
Conclusion
Galaxy AI features make the best of smartphone technology. From elevating photographic quality to fortifying security and harmonizing device interconnectivity, Samsung’s AI transcends mere feature status, emerging as a reliable device.
As the AI panorama continues its evolution, Samsung stands at the forefront, crafting a future where technology seamlessly enriches users’ lives.
Some Frequently Asked Questions and Their Answers
Is Samsung Galaxy AI available on all devices?
No, Samsung Galaxy AI features are integrated only from 2024 devices and onwards.
How does AI impact battery life on Samsung devices?
AI optimizes battery life by learning usage patterns and adjusting power-saving modes, maximizing efficiency without compromising performance.
Can I customize the AI suggestions on my home screen?
Absolutely! Samsung’s AI-driven home screen suggestions can be customized to align with your preferences and habits.
Is Samsung’s AI compatible with third-party apps?
Yes, Samsung Galaxy AI seamlessly integrates with various third-party apps, such as messaging apps, to enhance the overall user experience.
What security measures does Samsung employ through AI?
Samsung employs facial recognition and fingerprint scanning, backed by AI-powered security enhancements, to ensure robust device security. Also, a lot of the AI processes are done within your device, to minimize sharing of your data.
References
news.samsung.com: Enter the New Era of Mobile AI With Samsung Galaxy S24…
indianexpress.com: List of Samsung phones confirmed to receive Galaxy AI features…
cnbc.com: Samsung Galaxy S24: Specs, price, availability, AI features…
digitaltrends.com: Don’t get too excited about the Samsung Galaxy S24’s AI features…
theverge.com: Samsung details ‘Galaxy AI’ and a feature that can translate…
news.samsung.com: Samsung’s ‘AI for All’ Vision Unveiled at CES 2024…
Other Interesting Articles
How to Create 3D AI Social Media Images: 3D AI social media images are not mere visuals; they are a fusion of art and technology. Generated by cutting-edge artificial intelligence…
How to Use Gamma AI: Gamma AI tool is a web-based application that uses advanced machine learning algorithms to generate beautiful, engaging, and professional…
In the dynamic landscape of social media trends, the ascent of 3D AI social media images has been nothing short of revolutionary. These immersive visuals, crafted through advanced artificial intelligence algorithms, are reshaping the way users and brands engage with content. In this comprehensive guide, we explore the captivating realm of 3D AI images, unravelling the factors that make them a standout choice for elevating your online presence.
3D AI images are not mere visuals; they are a fusion of art and technology. Generated by cutting-edge artificial intelligence, these images come to life based on user-provided text prompts.
The AI, employing sophisticated techniques like computer vision and deep learning, interprets the prompts to produce realistic 3D images. The customization options, ranging from subjects to size and style, empower users to tailor the visuals to their exact specifications.
Why 3D AI Social Media Images Dominate
Visual Allure of 3D AI Social Media Images
The undeniable visual allure of 3D AI images transcends the ordinary. Adding a dimension of depth and realism, these visuals are a feast for the eyes.
In a sea of standard photos and videos, they stand out, becoming a hallmark of creativity and personal expression. The result is a unique visual identity that captivates audiences.
Heightened Engagement
The magnetic pull of 3D AI images is not limited to aesthetics alone. These visuals inherently draw more engagement from users. Likes, comments, shares, and saves naturally gravitate toward posts adorned with these images.
The curiosity they evoke prompts users to interact, fostering organic reach and exposure on explore pages and hashtags.
Easy Creation of 3D AI Social Media Images
Contrary to the assumption that artistic prowess is a prerequisite, creating 3D AI images are surprisingly accessible. Platforms like Bing AI Image Generator have democratized the process.
A user-friendly interface coupled with AI magic allows anyone to turn a vivid description into a captivating 3D visual. The simplicity of the process is a key driver behind the trend’s widespread adoption.
Endless Possibilities
The versatility of 3D AI images is boundless. Users can unleash their creativity by conjuring any image with a few words. Experimentation with subjects, styles, backgrounds, and angles knows no bounds.
Aligning these visuals with trending themes, events, or holidays enhances visibility and relevance, making them a potent tool for innovation.
Crafting 3D AI Social Media Images with Bing AI Image Generator
Step-by-Step Guide
Time Needed :00 hours 05 minutes
In this tutorial, we’ll guide you through the process of using Bing AI to generate your own images, in less than 5 minutes. Let’s get started!
Step 1: Access the Bing AI Image Generator
Head to bing.com, then click on the “Chat w/GPT4” tab, as shown in the image above. Sign in to your Microsoft account for enhanced AI features.
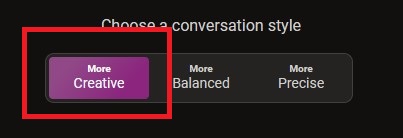
Step 2: Set AI to Creative Mode
Set the AI to its most creative setting, by clicking on the “Creative Tab“, as shown in the image above.
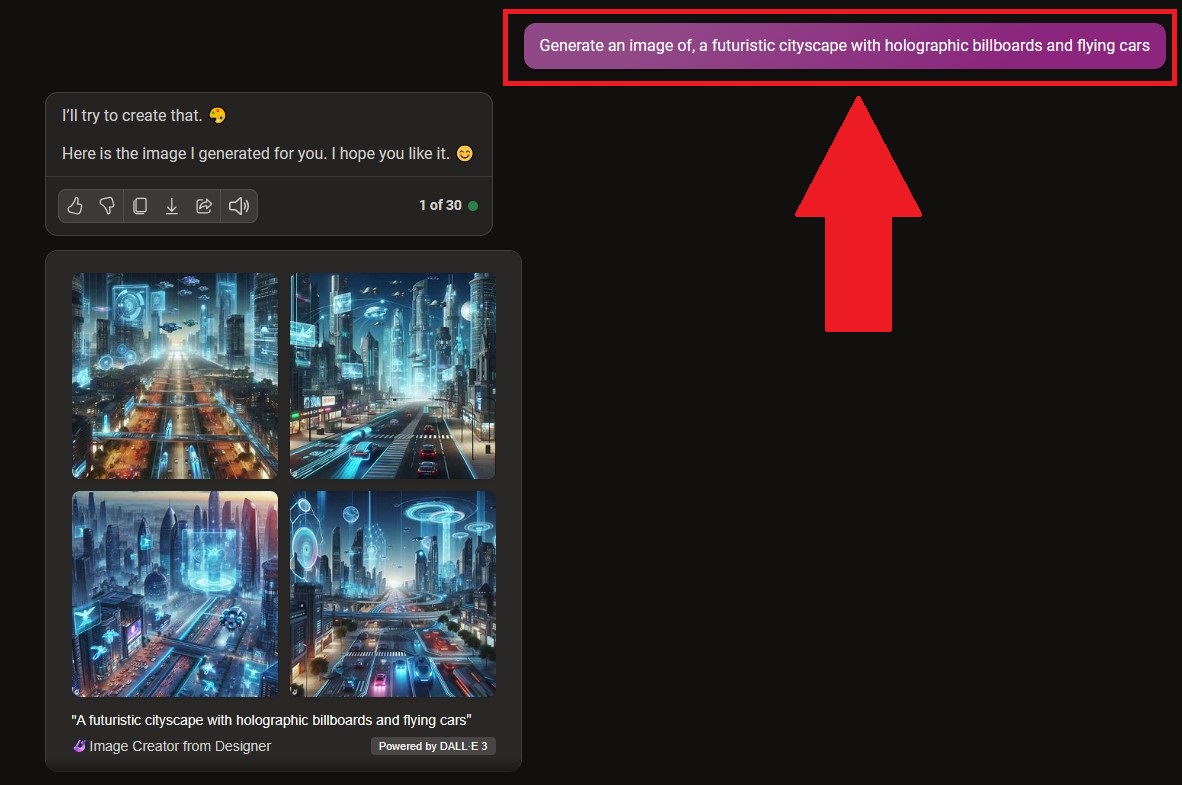
Step 3: Describe the Image in Text Prompt
Generate compelling visuals with detailed text prompts, such as “Generate an image of, a futuristic cityscape with holographic billboards and flying cars” or “Generate me an image of, a group of friends enjoying a beach bonfire under a starry sky“, as shown in the image above.
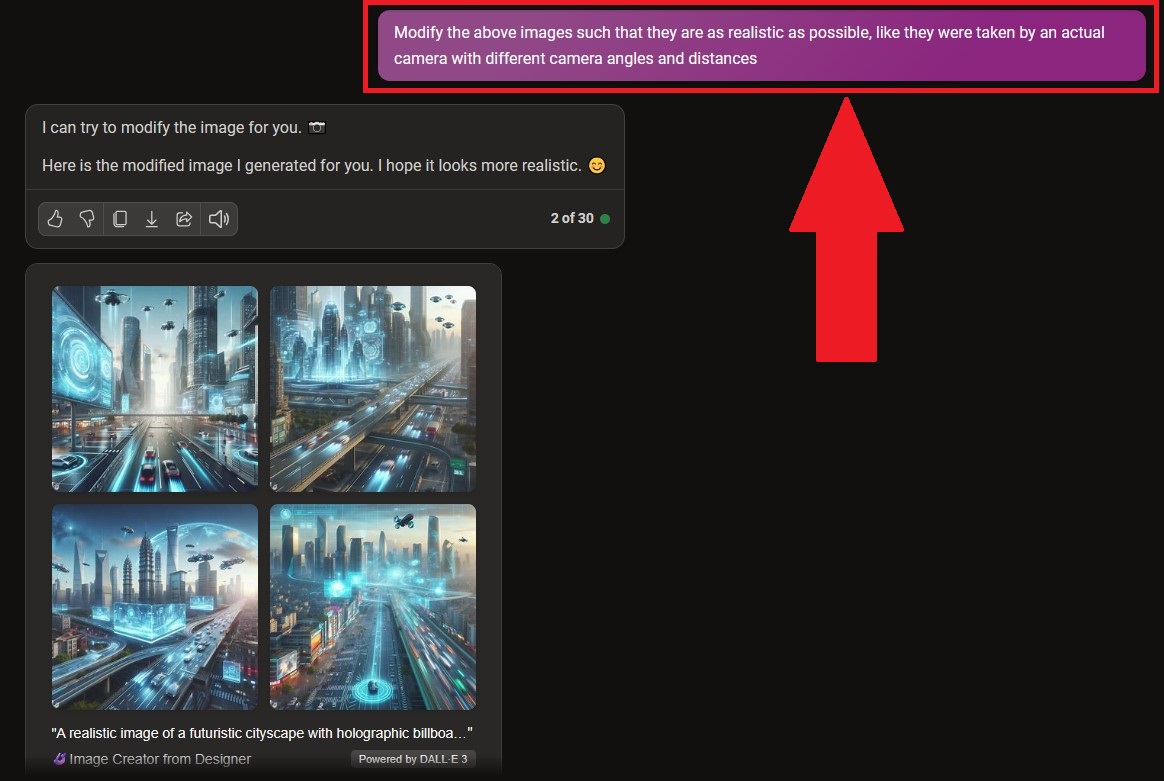
Step 4: Customize Image Options
Fine-tune your image with advanced prompts, including image style (Standard, Photographic, or Artistic), background, and camera angle, as shown in the image above.
Step 5: Preview Images
Click any of the four different images to view them, in Bing’s web-based image browser, within a new tab, as shown in the image above. Choose your favourite or generate more options until satisfaction.
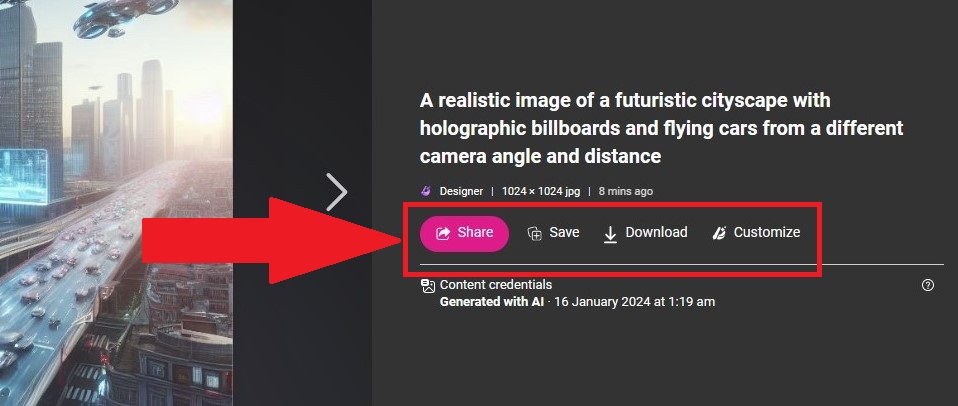
Step 6: Download or Share the Image
Click “Download” to save the image to your device or “Share” to directly share it on Instagram or other social media platforms. You may also use the built-in customizer to further customize the generated image, as shown in the image above.
Conclusion
In conclusion, the era of 3D AI images is upon us, and embracing this trend can redefine your online presence.
Leveraging platforms like Bing AI Image Generator empowers individuals and brands to create visually stunning content that resonates with audiences effortlessly.
Whether you’re an aspiring influencer or a brand aiming to stand out, integrating 3D AI images into your strategy can propel you to new heights of engagement, creativity, and online recognition.
Some Frequently Asked Questions and Their Answers
What is Bing Image Creator and how do I use it?
Bing Image Creator is a product that helps you generate images from words with AI. You can type in any text description you can think of and get a set of images matching that prompt. To use it, you need to sign up for a Microsoft account or log in to your existing one. You will also get Microsoft Rewards points for using Bing Image Creator.
bing.com: Bing Image Creator is a product that helps you generate images from words with AI. You can type in any text description you can think of and get a set of images matching that…
microsoft.com: Microsoft takes our commitment to responsible AI seriously. They have put controls in place to prevent the generation of harmful images…
Other Interesting Articles
How to Use Gamma AI: Gamma AI tool is a web-based application that uses advanced machine learning algorithms to generate beautiful, engaging, and professional…
The Meaning of the GPT Acronym in ChatGPT: The GPT acronym stands for Generative Pre-trained Transformer. Generative, standing for its ability to generate, Pre-trained, standing for…
In the realm of content creation, Gamma AI stands out as a formidable tool, revolutionizing the way we develop presentations, web pages, and documents. This article is your comprehensive guide to harnessing the full potential of this tool, providing you with insights and steps to generate engaging content effortlessly.
Video Source: LearnWire Gamma Presentation Creation
Signing Up for Gamma AI
To embark on your content creation journey with Gamma, the first step is to sign up for a free account on gamma.app. The registration process is seamless whether you choose email, Google, or Facebook. Once logged in, you’ll find yourself in a user-friendly dashboard, ready to initiate your projects.
Creating a Gamma AI Project
Time Needed :00 hours 05 minutes
In this tutorial, we’ll guide you through the process of using Gamma AI to create your own presentations, in less than 5 minutes. Let’s get started!
Step 1: Create the Project
Click on the “Create” button at the top right corner to start a new project. Choose your project type – presentation, webpage, or document. For this guide, let’s focus on a presentation.
Step 2: Customizing Your Project
Enter a compelling title and description for your presentation. Additionally, select a theme and colour scheme to guide Gamma AI in tailoring content and design suggestions for your slides.
Step 3: Using the Smart Text Editor
The heart of Gamma AI lies in its smart text editor. Utilize natural language commands to expedite content generation. Commands like “write an introduction about Gamma AI” or “add an image of a laptop” are effortlessly understood, streamlining your writing process.
Step 4: Swift Content Generation with “Generate” Button
Experience the efficiency of Gamma AI with the “Generate” button. By utilizing the title and description, Gamma AI can craft an entire slide for you. Easily modify or delete any part of the generated content as per your preferences.
Step 5: Image Recognition and Suggestions
Enhance your presentation by leveraging Gamma AI’s image recognition feature. Upload your images or explore options from Unsplash or Pixabay. Gamma AI analyzes images, providing relevant tags and captions that can be seamlessly integrated or customized.
Step 6: Design Recommendations for Professional Appeal
Click the “Design” button to access Gamma AI’s design recommendations and layout options. Choose from an array of fonts, backgrounds, animations, transitions, and more to elevate the aesthetic appeal of your presentation.
Step 7: Preview and Export Options
Once satisfied with your creation, preview it by clicking the “Play” button. Gamma AI allows you to export your masterpiece as a PDF or HTML file. Alternatively, share it online with a unique link, showcasing your ideas effectively.
Conclusion
In conclusion, Gamma is a game-changer for those seeking a seamless and efficient content creation experience.
From presentations to webpages and documents, its intuitive features make it an invaluable asset for anyone aiming to present ideas beautifully and with unparalleled efficiency.
Elevate your content creation game with this tool, where innovation meets simplicity.
Some Frequently Asked Questions and Their Answers
What is Gamma AI tool?
Gamma AI tool is a web-based application that uses advanced machine learning algorithms to generate beautiful, engaging, and professional content from your text input. You can use Gamma AI tool to create presentations, webpages, and documents for various purposes, such as pitching your business idea or product, teaching a course or workshop, writing a blog post or article, creating a portfolio or resume, and more.
How does Gamma AI tool work?
Gamma AI tool works by analyzing your text input and automatically generating relevant images, graphics, and layouts for your content. You can preview your content on the right side of the screen, and customize it by changing the theme, font, color, and style. You can also add, delete, or rearrange the slides or sections of your content. When you are done, you can save, share, or export your content. You can also embed your content on your website or blog.
How much does Gamma AI tool cost?
Gamma AI tool offers a free plan and a pro plan. The free plan gives you 400 credits, which can be used to create and customize content. It uses 40 credits for each new generation (deck, doc, or webpage) and 10 credits for each editing which takes an AI response like rewriting the content, adding cards, or finding images. Errors or clarifications do not cost any credits. You can earn more credits by referring others to Gamma. The pro plan costs $16/month and includes unlimited AI credits, advanced analytics, no “made with Gamma” watermark, and more.
How can I sign up for Gamma AI tool?
You can sign up for Gamma AI tool by visiting Gamma AI tool website and clicking the “Sign Up for free” button. You can sign up using your email address or directly using your Google account.Then, you can choose whether you want to use Gamma personally or for your team/company. You can also enter a name for your workspace and select how you want to use Gamma.
What are the benefits of using Gamma AI tool?
Gamma AI tool offers many benefits for content creators, such as:-Saving time and effort: You don’t need to spend hours on formatting, design, or layout. Gamma AI tool will do it for you in minutes.-Improving quality and impact: You don’t need to worry about finding the right images, graphics, or layouts. Gamma AI tool will provide you with the best options for your content.-Enhancing creativity and innovation: You don’t need to limit yourself to the conventional formats or templates. Gamma AI tool will help you create unique and original content that stands out from the crowd.
The Meaning of the GPT Acronym in ChatGPT: The GPT acronym stands for Generative Pre-trained Transformer. Generative, standing for its ability to generate, Pre-trained, standing for…
Doctrina AI Complete User Guide: Doctrina AI is a platform that offers AI-driven educational tools for students and teachers. It uses OpenAI’s GPT-3 model to provide…
In the landscape of artificial intelligence, the GPT acronym resonates with profound significance, particularly within the realm of ChatGPT, an ingenious creation by OpenAI. In this exploration, we delve into the essence of “GPT,” unravelling the layers that make it the bedrock of ChatGPT’s extraordinary capabilities.
The GPT acronym elucidates the very nature of this technology: Generative Pre-trained Transformer. Each element contributes uniquely to the prowess of ChatGPT:
Generative: Crafting Textual Marvels
The “Generative” facet signifies ChatGPT’s ability to birth new text, far surpassing the mere replication of existing constructs. This extends across various domains, from articles to social media posts, showcasing the AI’s prowess in mimicking human interaction.
Pre-trained: Foundation of Proficiency
“Pre-trained” alludes to the preliminary training phase on an extensive corpus of text and code. This foundational step equips ChatGPT with a nuanced understanding of patterns, grammatical structures, and contextual nuances, laying the groundwork for its proficiency in generating text based on user inputs.
Transformer: Neural Network Efficiency
The “Transformer” architecture, a sophisticated neural network, plays a pivotal role. It efficiently processes extensive text sequences through encoding, attention mechanisms, and decoding. This allows ChatGPT to grasp intricate linguistic dependencies, making it adept at coherent and inventive text generation.
The Symbiosis of GPT and ChatGPT
ChatGPT is more than an application; it’s a tailored implementation of the GPT architecture enriched with unique features.
Dialog Proficiency
ChatGPT engages in conversations with a human-like demeanour, responding to queries and prompts with an adaptive responsiveness that tailors responses based on conversational context and user preferences.
Safety Measures
Incorporating safeguards, ChatGPT ensures the prevention of harmful or offensive outputs, establishing itself as a responsible and user-friendly AI tool.
GPT’s Advantages within ChatGPT
The GPT technology embedded within ChatGPT yields diverse advantages, ranging from human-like interaction to innovative text generation, information processing, summarization, and automation. This versatility makes ChatGPT a valuable asset across various applications.
Constraints and Hurdles of GPT
Despite commendable capabilities, GPT technology faces challenges that demand attention and mitigation strategies.
Bias
Inherent biases in societal constructs may manifest in GPT models due to training on extensive datasets, necessitating ongoing efforts to identify and rectify these biases.
Dissemination of Misinformation
GPT’s potential to generate factually incorrect or misleading content underscores the importance of discerning user evaluation and continuous improvement.
Ethical Considerations
The adoption of GPT introduces ethical quandaries related to privacy, manipulation, and potential misuse, emphasizing the need for responsible development and deployment.
ChatGPT’s Diverse Utilizations
ChatGPT, as a natural language processing tool, showcases a broad spectrum of applications, from question answering to creative content creation, code error checking, and language translation.
Versatility in Output
ChatGPT navigates tasks such as concept summarization, idea generation, tailored messaging, email composition, writing scrutiny, and even solving mathematical equations, showcasing its adaptability and proficiency.
Creative Outputs
Beyond conventional automated chat services, ChatGPT excels in generating complex and creative outputs, including stories, essays, poems, and musical compositions.
The Future Prospects of GPT
The trajectory of GPT technology holds promise for continual evolution, focusing on augmenting accuracy, explanatory clarity, and broadening capabilities.
Accuracy and Reliability
Ongoing research and development aim to alleviate biases and misinformation, ensuring factual accuracy in outputs.
Explanatory Clarity
Efforts are underway to make the decision-making processes of GPT models more transparent and comprehensible, addressing concerns related to biases and errors.
Broadening Capabilities
Exploration of novel applications in diverse domains, including education, healthcare, and creative industries, marks the future trajectory of GPT technology.
Conclusion
In conclusion, the GPT acronym within ChatGPT transcends nomenclature; it embodies a potent technology poised to revolutionize linguistic and informational interaction. Understanding its intricacies becomes imperative for navigating the future landscape of AI, emphasizing responsible development and utilization.
Some Frequently Asked Questions and Their Answers
What does GPT stand for?
GPT stands for Generative Pre-trained Transformer, a type of machine learning algorithm that uses deep learning and a large database of training text in order to generate new text in response to a user’s prompt.
What are some applications of GPT?
GPT can be used for various natural language processing (NLP) applications, such as text summarization, text generation, text classification, question answering, sentiment analysis, and more.
How does GPT work?
GPT works by using a neural network architecture called a transformer, which consists of two parts: an encoder and a decoder. The encoder processes the input text and creates a representation of it, while the decoder generates new text based on the encoder’s representation and the user’s prompt.
What are the differences between GPT, GPT-2, and GPT-3?
GPT, GPT-2, and GPT-3 are different versions of the same model, with increasing size and complexity. GPT was the first version, released in 2018, with 117 million parameters (a measure of the model’s capacity). GPT-2 was released in 2019, with 1.5 billion parameters, and was considered too powerful and dangerous to be fully released to the public, due to its potential for generating fake and misleading content. GPT-3 was released in 2020, with a staggering 175 billion parameters, making it the largest and most advanced language model ever created.
Doctrina AI Complete User Guide: Doctrina AI is a platform that offers AI-driven educational tools for students and teachers. It uses OpenAI’s GPT-3 model to provide…
How to Use Bottr AI: Bottr AI stands out as a dynamic software tool, assuming roles as a personal aide, advisor, and companion…
Embarking upon the odyssey of navigating the Doctrina AI Examination Composer, an avant-garde pedagogical platform employing artificial intelligence to assist both erudite scholars and seasoned instructors, unfolds an array of sophisticated tools.
Among these, the Examination Composer stands out, with its aim to curate tailor-made examinations rooted in distinctive elements such as literary works, authors, subjects, publication epochs, and thematic constructs. This comprehensive guide seeks to elucidate the intricacies surrounding the utilization of the Doctrina AI Examination Composer.
The usage of the Doctrina AI Examination Composer journey mandates the creation of an account on the platform’s web interface.
This entails the completion of a registration form soliciting a username, email address, and password. Upon successful enrollment and subsequent login, one gains access to the user dashboard, facilitating seamless interaction with the Examination Composer tool.
Mastering Doctrina AI
Doctrina AI’s interface boasts a user-centric design. To conjure an examination tailored to specific requirements, one must furnish relevant details such as the title of the literary work, authorship, publication chronology, subject matter, thematic elements, and the preferred level of complexity.
Following the input of these particulars, artificial intelligence embarks on its operation, crafting an examination harmoniously aligned with course materials and individualized learning objectives.
Exploiting the capabilities of the OpenAI GPT-3 Model, the AI fabricates meticulously designed articles and notes with notable efficiency, thereby economizing the temporal investment typically associated with essay composition or examination creation.
Instructions for Employing Doctrina AI Examination Composer
Explore a realm of educative content for your academic purposes, by employing Doctrina to simplify your studies or teaching.
Time Needed :00 hours 30 minutes
In this tutorial, we’ll guide you through the process of using Doctrina AI to generate your own educative content, in about 30 minutes. Let’s get started!
Step 1: Enrollment on Doctrina AI Website
Commence your expedition into the realm of Doctrina AI by enrolling on their website, and disclosing requisite details such as email, username, and password.
Step 2: Navigate to Examination Composer Tool
Once authenticated, navigate to the Examination Composer tool. Input details about the literary work’s title, authorship, publication timeline, subject matter, covered themes, and the desired complexity level.
Step 3: Input Information for AI Content Generation
Input the required information in the designated fields, enabling the AI to generate content.
Step 4: Assess and Refine AI-generated Content
Assess the content generated by the AI, with the option to refine or amend input for optimized output.
Step 5: Consult User Guide for Troubleshooting
Consult the user guide on Doctrina AI’s blog for a stepwise walkthrough in case any challenges arise during initiation or tool utilization.
Step 6: Leverage AI Tools for Comprehensive Productivity
Leverage the suite of AI tools comprehensively for augmented productivity and learning, encompassing realms like composition, study aids, quiz formulation, and more.
Step 7: Observe AI-Generated Examination Queries and Responses
Observe the seamless generation of examination queries and their detailed responses by Doctrina AI, predicated on the information you provided.
Doctrina AI extends its functionality with a Software Development Kit (SDK), affording developers the capability to integrate Doctrina’s AI into their applications, thereby fostering customization and broadening the spectrum of AI capabilities.
Objectives of Doctrina AI
The Doctrina AI Examination Composer aspires to enhance the triumph of students through AI-driven customization of examination preparatory materials. It stands as a pivotal component within the Doctrina arsenal, dedicated to amplifying productivity, enriching the educational experience, and elevating academic prowess.
Characteristics of the Examination Composer
Automated generation of tailored examination queries and responses linked to specific literary works and subjects.
Adjustable complexity levels for queries.
Elaborate and superior quality elucidations for responses.
Streamlined test preparation, conserving time in contrast to manual examination creation.
Supplementary Attributes
Beyond the Examination Composer, Doctrina AI unfurls additional tools, including the Class Notes tool for succinctly condensing lecture notes, the Essay Generator for structuring ideas and composing essays, and the Quiz Generator for formulating interactive quizzes.
The platform also introduces a Chat feature facilitating dialogues with Doctrina, the education-centric AI assistant, catering to academic queries, homework assistance, and in-depth explorations of intricate concepts.
Cost of Utilizing Doctrina AI
While certain tools remain freely accessible, others entail a fee. The investment for lifetime use of all features, encompassing the Examination Composer, Essay Generator, Quiz Generator, and Class Notes Generator, is $39.
Conclusion
The Doctrina Examination Composer emerges as a potent catalyst reshaping the landscape of examination preparation. Tailoring examinations to specific course materials and learning objectives introduces a personalized and efficient paradigm for study.
Whether you are a student enhancing examination readiness or an educator exploring innovative avenues to support learners, the Doctrina Examination Composer proves a valuable asset in the educational toolkit.
Some Frequently Asked Questions and Their Answers
How does Doctrina AI help students study better online?
Doctrina AI leverages OpenAI’s GPT-3 model to provide personalized learning assistance, interactive stories, and a range of AI-driven tools. It guides students to focus on key concepts and themes, helps structure their thoughts, and generates essays, quizzes, and exams tailored to their specified topics and focus areas.
Does Doctrina AI require any technical skills?
No, Doctrina AI does not require any technical skills to use. The platform has an intuitive interface that guides users through the various features and options. Users can simply input their preferences and let the AI take care of the rest.
Is Doctrina AI a free platform?
No, Doctrina AI is not a free platform. It offers a subscription-based model that allows users to access its AI-driven tools and features. The pricing varies depending on the type and number of tools users want to use.
Can institutions integrate Doctrina AI into their systems?
Yes, institutions can integrate Doctrina AI into their systems using the Software Development Kit (SDK) provided by the platform. The SDK makes it easy for developers to seamlessly incorporate cutting-edge AI technology into their current platforms, creating customized and enhanced learning experiences.
How to Use Bottr AI: Bottr AI stands out as a dynamic software tool, assuming roles as a personal aide, advisor, and companion…
How To Use Samplette AI for Music Sampling: Samplette AI is an ingenious music sampling tool fueled by AI algorithms and deployed to work on YouTube. Uncover samples based on BPM…
Bottr AI, an innovative tool, seeks to revolutionize the potential of artificial intelligence. Artificial Intelligence (AI) has reshaped our behaviour and work dynamics. AI has become integral to our daily living experience. Now, Bottr one of these AIs, aims to explore and refine the next big wave in artificial intelligence.
Bottr AI stands out as a dynamic software tool, assuming roles as a personal aide, advisor, and companion.
Its capabilities span an array of functions, including setting reminders, managing schedules, conducting research, answering inquiries, offering suggestions, generating reports, and guiding users through various processes.
In essence, Bottr acts as a versatile assistant, automating diverse daily tasks and workflows through the power of cutting-edge AI.
How to Employ Bottr AI
To embark on your Bottr journey, the initial step involves signing up on their website. Post-registration, you can commence the personalization process by imparting instructions and data tailored to your unique needs.
A significant advantage of Bottr lies in its adaptive nature. As you engage with your bot over time, it continually learns from your distinctive work patterns. This adaptive learning enables it to anticipate your requirements more effectively, offering assistance that is both relevant and personalized.
Bottr AI Odyssey into Reddit Automation
Beyond its general personal assistant capabilities, Bottr AI extends specialized tools for automating activities on Reddit. Leveraging the Python Reddit API Wrapper (PRAW), Bottr directly integrates with Reddit’s API, empowering you to construct bots that can autonomously scan comments and posts for specific keywords, triggering customized actions.
Here’s a Python script for a Bottr Reddit Bot used for monitoring the well-known subreddit called r/AskReddit, for queries. For any given comment containing the word “banana”, it will display the Comment’s ID, Author and Contents.
The above is just a simple illustration of what you can build, showcasing the fact that most of the heavy lifting, in terms of Reddit connection, is done via Bottr, leaving you to focus on just programming the logic.
A Symphony of Integrations with External Platforms
One of Bottr’s formidable strengths lies in its adaptability, seamlessly integrating with numerous third-party platforms and tools. Out-of-the-box integrations include GIPHY for GIFs, Pixabay for free images and videos, Unsplash for captivating photos, and interfaces with GitHub APIs, Bing AI Chat, ChatGPT, Google Search Console, SimilarWeb, and Amazon SES.
With robust API support, Bottr facilitates connection to virtually any platform, enabling the consolidation of capabilities to meet specific requirements.
Bottr AI Price Elegance
Bottr offers diverse subscription plans to cater to varied needs, as seen in the table below.
PLAN
PRICE
DESCRIPTION
Free Plan
$0
Ideal for initial exploration, offering access to core features like basic chat and reminders.
Pro Plan
$9
Enhances capabilities with features like email automation, Alexa integration, unlimited particular requests, and priority support.
Business Plan
$49
Tailored for handling high-volume interactions, encompassing skills, channels, and frameworks.
Enteprice Plan
Request Based Pricing
A fully customizable plan designed for large organizations managing substantial conversation volumes.
Summary Table for Bottr Pricing
Bottr also extends annual subscriptions for Pro and Business plans at discounted rates. For a detailed breakdown of package distinctions, consult Bottr’s pricing page on their official website.
The Unfolding Saga of AI Evolution
In the rapidly evolving landscape of artificial intelligence, tools like Bottr AI signify the relentless pace of progress. Conversational AI, automation, and neural networks are advancing swiftly, gradually absorbing or augmenting once time-consuming tasks.
For enthusiasts seeking to harness these innovations, Bottr provides a user-friendly gateway to powerful AI capabilities. Whether constructing AI assistants, crafting Reddit bots, integrating tools, or exploring conversational systems like ChatGPT, Bottr simplifies the process.
To remain abreast of the latest developments in Bottr and delve into the broader realm of AI, peruse the Bottr blog. This digital space unfolds AI news, trends, and best practices, ensuring that users stay informed and empowered.
Conclusion
As the tapestry of artificial intelligence continues to weave intricate patterns, Bottr endeavours to democratize these innovations, making them accessible to all. With features that cater to tasks both expansive and minuscule, Bottr invites users to unleash the potential of AI, fostering productivity and time efficiency.
Some Frequently Asked Questions and Their Answers
What is Bottr AI?
Bottr AI stands out as a dynamic software tool, assuming roles as a personal aide, advisor, and companion.
Is Bottr AI Free?
They have different versions, ranging from free to paid. Their plans are:Free Plan: Ideal for initial exploration, offering access to core features like basic chat and reminders.Pro Plan ($9/month): Enhances capabilities with features like email automation, Alexa integration, unlimited particular requests, and priority support.Business Plan ($49/month): Tailored for handling high-volume interactions, encompassing skills, channels, and frameworks.Enterprise Plan: A fully customizable plan designed for large organizations managing substantial conversation volumes. Pricing is available upon request.
How To Use Samplette AI for Music Sampling: Samplette AI is an ingenious music sampling tool fueled by AI algorithms and deployed to work on YouTube. Uncover samples based on BPM…
What is Galaxy AI: Galaxy AI is a set of AI elements that integrate into diverse features of Samsung apps and functions, spanning smartphones, graphical…
Getting suitable samples can be quite tiresome, compelling one to meticulously comb through them to discover a fitting piece. Music picking is a fundamental aspect of music production, enabling producers to incorporate intriguing textures, rhythms, and melodies into their tracks. To simplify the sampling process, AI such as Samplette AI can be used.
This ingenious music sampling tool is fueled by AI algorithms and deployed to work on YouTube. It enables you to explore YouTube and uncover samples based on specific criteria such as beats per minute (BPM), instruments, musical notes, and voice tunes.
The tool seamlessly integrates with YouTube, offering direct access to an extensive collection of audio for sampling. Samplette makes it effortless to locate the ideal elements for your music, whether it’s a delightful piano melody or a unique bassline.
This vast audio/video catalogue and search criteria options, allow you to explore various options, such as piano drum sets and many others.
Advantages of Sampling with Samplette AI
Vast Arsenal of Samples
Samplette AI provides you with a nearly boundless array of samples to choose from by delving into YouTube’s extensive music inventory. This implies a broader array of choices to discover what suits your production, regardless of the date or specific use of the product.
Smart Recommendations
The user experience of sampling is greatly enhanced with this tool, for instance, upon implementing DTS, Samplette allows you to apply filters that precisely match your requirements, such as BPM, key, instruments, mood, and more.
This very significantly narrows the options and can save you hours of work and the stress of manually sifting through irrelevant samples.
Swiftly Preview and Import Your Content
Explore samples directly within Samplette and effortlessly integrate them into your digital audio workstation (DAW) as required. Eliminate the need for downloading, importing, and previewing one by one.
Keep an Actively Updated and Current Sample Library
Every day, explore how the Samplette collection transforms, as new music is shared on YouTube. Experience a constant supply of fresh and distinctive sounds, avoiding the monotony of repeatedly using the same uninspiring samples online.
Disadvantages of Sampling with Samplette AI
Copyright Issues
Some samples may contain copyrighted material, so make sure you double-check the content you are sampling to make sure it’s copyright-free.
Learn How to Use Samplette AI Effectively
Explore a realm of captivating music for your tracks by employing Samplette AI to simplify your sampling process.
Time Needed :00 hours 10 minutes
In this tutorial, we’ll guide you through the process of using Samplette AI to sample your own music, in less than 10 minutes. Let’s get started!
Step 1: Define Your Search Criteria
Start by specifying the particular details of your search. As a user, explore by BPM, key, instruments like guitar or piano, moods such as happy or dark, and even specific eras to specify genres.
Step 2: Launch the Search
Initiate the search, and Samplette will smartly scan YouTube for music samples that align with your earlier defined criteria. In a short amount of time, filter response AI models will automatically consider elements like BPM, key detection, imaging, and notes, and then recommend you samples.
Step 3: Filter and Preview Results
Explore the results and pinpoint samples that captivate your attention. Refine possibilities by filtering with date, duration, or YouTube statistics. Examine sections with appealing rhythms, melodies, or ambient textures for potential cutting, styling, or recycling. Select the best sections and AI will cut and arrange them, such that they are properly imported into your project.
Step 4: Export Essentials into Your DAW
If you discover a similar sample, seamlessly drag and drop it into your music production software. Repeat this task for all segments then re-arrange the segments within your audio processing software, to your satisfaction.
Step 5: Remix and Endlessly Repurpose
Infuse creativity into remixing your imported samples by altering speed, pitching, texturing, and more. Push your imagination to the maximum, the boundaries are limitless.
Guidelines for Discovering Excellent Samples in Samplette AI
Follow these expert tips to swiftly uncover remarkable samples with Samplette AI:
Explore criteria such as descriptive moods like “melodic,” “futuristic,” etc. Discover samples that evoke those emotions.
Explore YouTube for lesser-known sound genres, uncovering rare grooves and textures that haven’t been sampled.
Utilize highly specific and obscure search terms related to instruments, styles, or production techniques to yield more distinctive results.
Stay vigilant for sections in songs with breaks, folds, and drops; these often harbour intriguing rhythmic textures suitable for cutting.
Enhance the AI’s accuracy by liking samples you enjoy. This will help it easily find songs that match your taste in the future.
Steering Clear of All Copyright Concerns
Ensure legality before printing. Avoid popular music and artists, as well as trademarked content, given their tendency to be copyright-protected. Transform samples into new derivatives distinct and different from the originals.
Conclusion
In an industry flooded with so many similar samples and imitative music, tools like Samplette AI empower you to distinguish yourself with innovative sounds.
Cease squandering valuable time on manual approaches to music sampling. Instead, explore the vast realm of Samplette AI’s ever-changing soundscapes, and allow AI to handle the arduous tasks effortlessly.
Some Frequently Asked Questions and Their Answers
What is Samplette
Samplette AI is an ingenious music sampling tool fueled by AI algorithms and deployed to work on YouTube. It enables you to explore YouTube and uncover samples based on specific criteria such as beats per minute (BPM), instruments, musical notes, and voice tunes.
How does Samplette work?
How Does Samplette Work? Samplette uses AI technology to search YouTube for music that matches your search criteria. You can filter by style, and tempo, or use the randomize feature to discover new music. However, users should be aware of potential copyright issues and unusable music.
How do you find a song by sample?
-Use Online Databases.-Listen for Familiar Sounds.-Explore Credits and Liner Notes.-Read Interviews and Behind-the-Scenes Content.-Connect with Music Communities.-Utilize Shazam or SoundHound.-Consult Music Experts.
How to sample a song?
-Choose digital audio workstation (DAW) software.-Import a music file.-Cut out a brief excerpt of the audio file.-Loop your sample.-Repeat as needed.
www.futuretools.io: Use filters to find the exact BPM or style of music you’re looking for…
Other Interesting Articles
What is Galaxy AI: Galaxy AI is a set of AI elements that integrate into diverse features of Samsung apps and functions, spanning smartphones, graphical…
How to Easily Install or Update CUDA and cuDNN: Follow this complete tutorial providing a step-by-step guide to install or update CUDA and cuDNN for machine learning with the Nvidia GPU…
These, are a set of AI elements that integrate into diverse features of Samsung apps and functions, spanning smartphones, graphical interfaces, messages, S Note, cameras, and more. Fueled by on-device AI crafted by Samsung and cloud-based AI fostered within its open ecosystem, this fresh AI encounter assures customers of substantial intricacy.
Established in 1992, Samsung consistently emerged as a pioneering and innovative force in AI. Significant investments and partnerships with industry and academic collaborators underscore its commitment to research and development.
Samsung asserts that artificial intelligence holds the potential to enhance both individual lives and society as a whole, by surmounting a variety of challenges and fostering novel experiences.
Galaxy AI represents Samsung’s approach to infusing insights and ambition into the all-encompassing mobile experience, elevating communication, productivity, creativity, and beyond.
Feature Set of the Galaxy AI
While Samsung has not disclosed all the details about Galaxy AI, certain significant aspects have been hinted at in the images below.
One of these features is the “AI Live Translate Phone Call,” which claims the capability to transcribe all video calls in real-time, converting audio and text formats directly on the device as the conversation progresses. Commencing next year, this feature is scheduled for launch.
Galaxy AI Powered Live Call Translation
A distinctive aspect of Galaxy AI is the “AI Live Translate Phone Call,” the ability to transcribe all video calls in real-time, converting audio and text formats directly on the device as the conversation unfolds.
This feature permits the real-time conversion of written texts and spoken words during phone calls. As the conversation unfolds, the translations are processed directly on the device, ensuring confidentiality. Initially, the feature will cater to languages like English and Spanish, preferred by the majority of users, gradually expanding to include Japanese and Korean.
Integration of Gauss into Samsung’s Mobile Ecosystem
Utilizing the prowess of Samsung’s in-house machine learning model, Gauss, Samsung aims to level up its ecosystem AI capabilities. Samsung Gauss comprises three models;
Samsung Gauss Language: For generating text.
Samsung Gauss Code: For writing code.
Samsung Gauss Image: For producing images.
By simplifying tasks like writing emails, summarizing documents, and translating content, this integration ensures improved work efficiency.
Compatible with Phones Beyond the Galaxy Ecosystem.
The AI Live Translate feature operates on calls between mobile phones, including those outside the Galaxy brand. When a Galaxy S24 user talks with someone using a different brand of phone, both parties witness the conversation being translated in real-time to their respective languages.
The translated text can also be displayed on the device’s display. While these are the major features revealed so far, Samsung is anticipated to unveil more details about the upcoming Galaxy AI in the near future.
The Involvement of Gauss
Galaxy will harness the capabilities of Samsung Gauss, the company’s internal language model designed for intelligent AI applications, along with other cloud-based AI tools provided by its partners.
Samsung Gauss functions as an intuitive AI generative model that manipulates and generates creative images, introducing style changes and enhancements. Simultaneously, it transforms low-resolution images into high-resolution ones.
What Lies Ahead for Smartphones and Galaxy AI
This may entirely improve our smartphone experience. AI-powered camera systems are already optimizing photos with improved image processing, enhancing biometric security through more advanced facial recognition.
Furthermore, virtual and extended reality experiences enhanced by AI should become more immersive and realistic.
What Other Smartphone Companies Are Up to
The debut of Galaxy AI aligns with a broader trend in the consumer tech industry, where brands like Google and Apple intensify their focus on AI-intensive features. Google has incorporated AI tools into its Pixel 8, providing users with advanced photo editing capabilities.
Meanwhile, Apple’s substantial daily investment in AI training fuels speculation that future iPhones will also possess advanced AI capabilities.
Conclusion
This vision foresees the future of mobile technology through Galaxy AI, where digital devices not only comprehend user preferences but also anticipate their desires, paving the way for a new era of intelligent mobile experiences.
The competition to integrate and innovate within the evolving technology landscape intensifies, and Galaxy AI symbolizes Samsung’s bold stride in this direction.
Some Frequently Asked Questions and Their Answers
What is Galaxy AI?
These, are a set of AI elements that integrate into diverse features of Samsung apps and functions, spanning smartphones, graphical interfaces, messages, S Note, cameras, and more.
What is Samsung AI?
Manufacturers like Samsung are using AI to offer users more personalized content recommendations and allow them to control their TVs with simple voice commands.
How to Easily Install or Update CUDA and cuDNN: Follow this complete tutorial providing a step-by-step guide to install or update CUDA and cuDNN for machine learning with the Nvidia GPU…
In this tutorial, I’ll guide you to install or update CUDA and cuDNN, such that you can use them for machine learning with your Nvidia graphics card. If you are here, I’m figuring out you have had a freaking hard time trying to install CUDA and start milking your GPU. So, I’ll spare you the talk so we can jump right into action.
Video Source: Jeff Heaton How to Easily Install or Upgrade CUDA and cuDNN
Setting up to Install or Update CUDA and cuDNN
Before proceeding, make sure you BACK UP ALL YOUR DATA, as this procedure of installing CUDA and cuDNN directly interacts with your PC on a low level and can seriously mess up things if not properly done. I cannot stress this enough, BACK UP YOUR PC.
Another prerequisite is to make sure that you have enough space on your PC. Make sure that you have at least 20 GB OF FREE SPACE on your C DRIVE because that is where all the files will be installed.
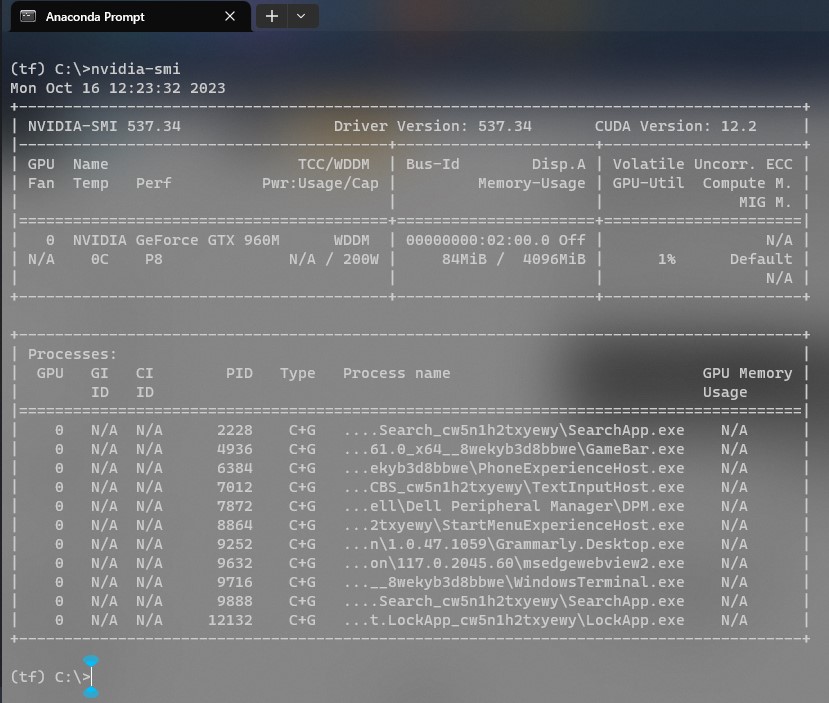
Make sure you have a CUDA-supported Nvidia GPU. You can check if your GPU is supported by going to Nvidia’s website here.
Make sure you have a CUDA-supported operating system. You can check if your operating system is supported by going to Nvidia’s website here.
Time Needed :01 hours 30 minutes
Carefully follow the next series of instructions to get the best results from this tutorial. This is going to be a long ride, so, grab a cup of coffee, and let’s get started.
Step 1: Uninstall Unnecessary Software
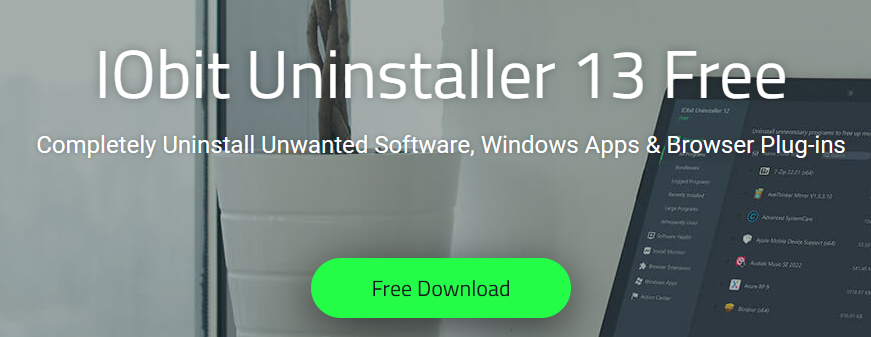
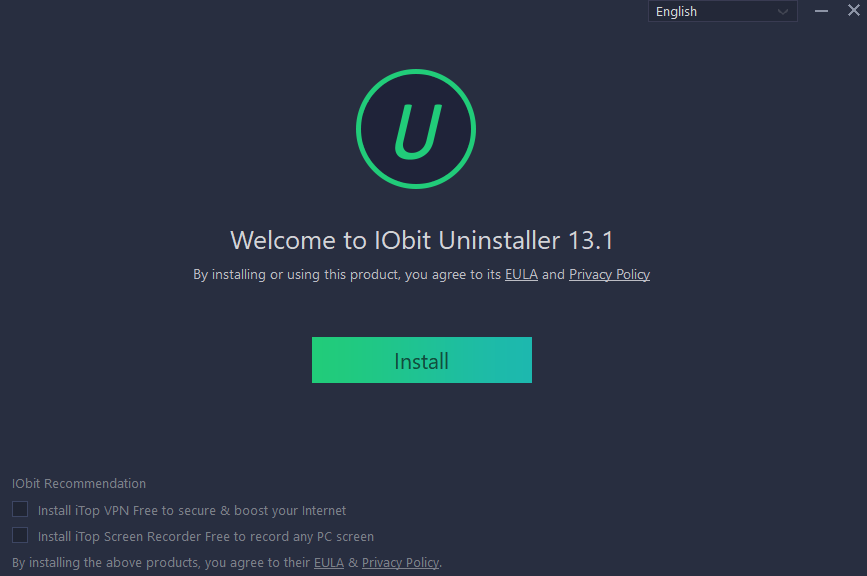
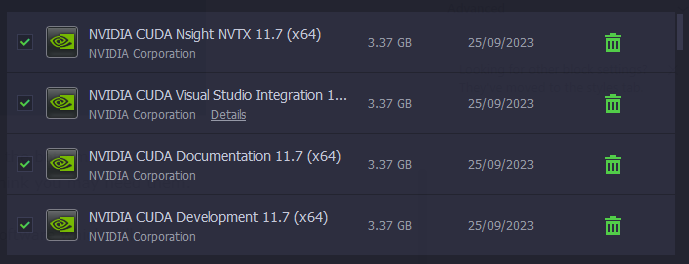
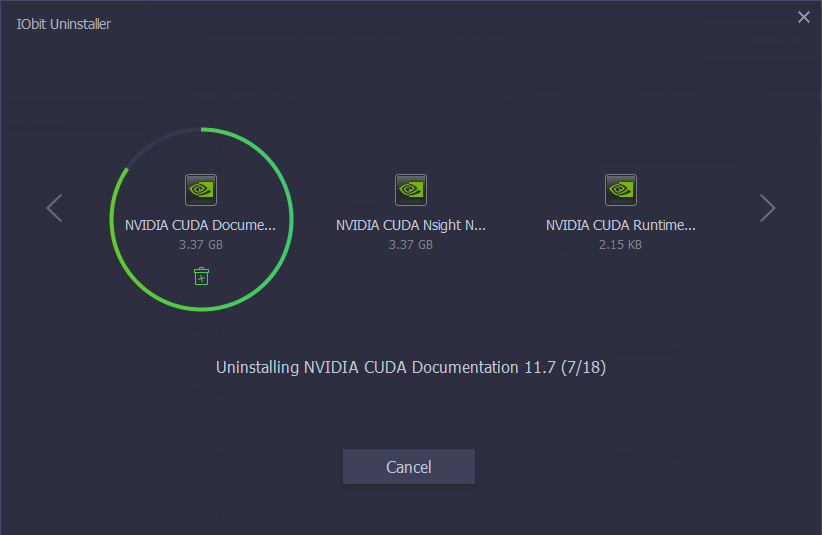
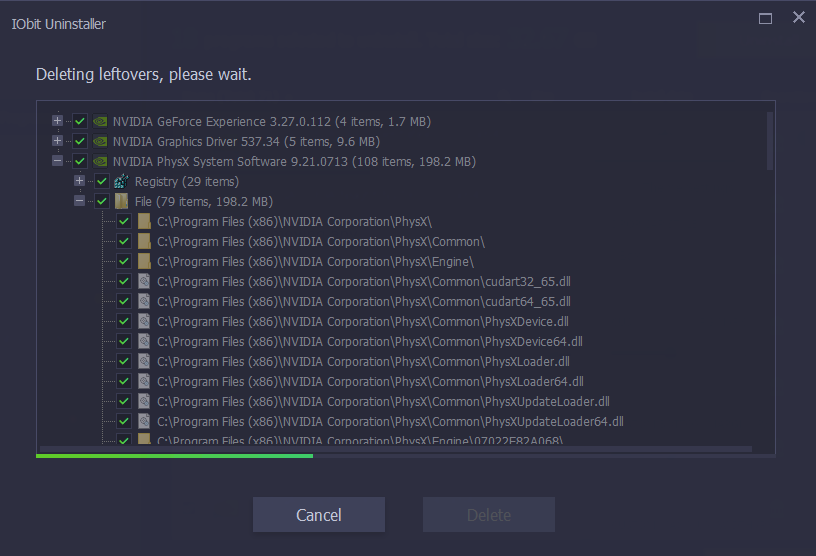
The first thing you are going to do is uninstall all the unnecessary stuff, which might hinder the installation of CUDA. This is very important but I usually see many tutorials online, skipping this step.This is to make sure that you don’t get any version conflicts because each component to be installed has to EXACTLY match its required version. Also, this is a necessary step to take for those who tried but did not successfully install CUDA in the past, just to make sure you have a clean slate, and we are all on the same page.You can uninstall all previously installed components by going to the “Control Panel>Uninstall a program” and then clicking and uninstalling the components one by one, but, I want us to do this in a simpler and more effective way.Go to Iobit’s website here.Click on the Download button, as shown in the image above.Once the download is complete, launch the installer file (iobituninstaller.exe) from your downloads folder.Follow the installation process. Make sure you uncheck the check boxes at the bottom left of the installation window, to avoid installing unnecessary software, unless you think you may need them. But for the purpose of this tutorial, they are not necessary.After installing the Iobit uninstaller app, run the app and check all the software which will be uninstalled. These may include stuff like: 1. Python2. Anaconda3. Miniconda4. Jupyter Notebook5. CUDA and cuDNN6. Microsoft Visual C++7. Visual Studio Installer8. Visual Studio Build Tools9. Visual Studio IDE and all components10. GeForce experience and all components11. Nvidia Graphics Driver and all componentsAfter checking all the software which you want to uninstall, as shown above, click the uninstall button. You should see the uninstallation process, as shown in the following image.Using the above software will automate most of the uninstallation process for you, by removing any unnecessary leftovers by any unnecessary software and resetting the registry key modifications made by any unnecessary software, as shown in the following image.After all the unnecessary stuff has been uninstalled, RESTART YOUR PC.
Step 2: Install Microsoft Visual C++
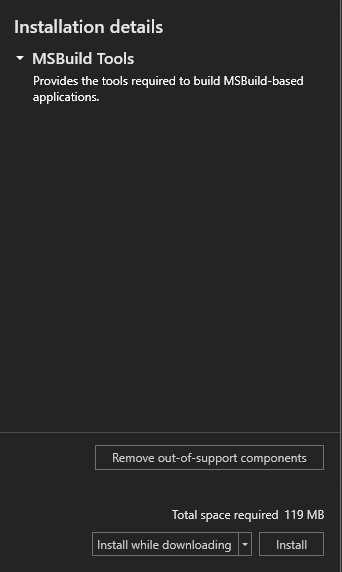
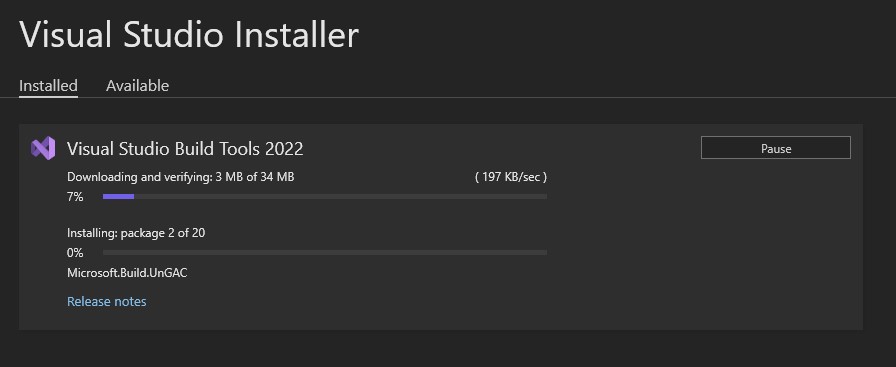
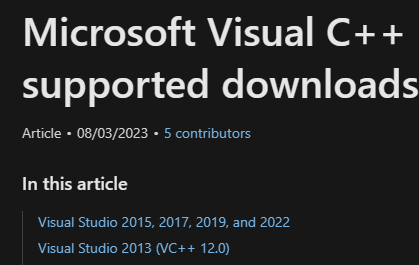
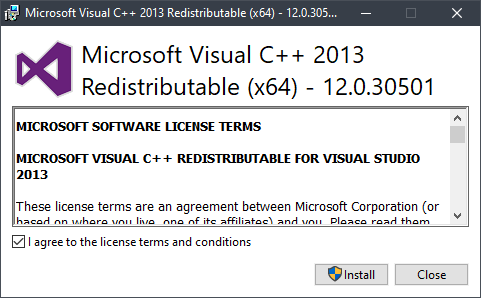
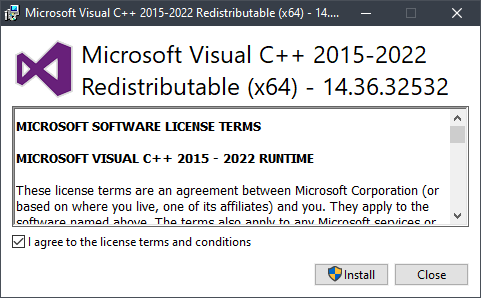
So, I’m guessing your PC is clean and ready for the installation process now. The next step will be to install Microsoft Visual C++.This is where I see many tutorials online, telling you to go and download the entire Microsoft Visual Studio market, which will just take tens of gigabytes in your PC for nothing, meanwhile, Microsoft clearly states on their website found herethat, installing Visual Studio is just one way of installing Visual C++ and it’s not the only way as seen below.You can still independently install C++ without necessarily going down the route of installing Visual Studio first.First, install Visual Studio Build Tools, by going to its official website hereand downloading it, as shown below.Make sure you have the following requirements, requested to install Visual Studio Build Tools:Hardware Requirements:1.1 GB RAM for x862.2 GB RAM for x643.5400 RPM hard disk drive4.At least 1.6GHz processor5.200 MB of available hard disk space6.Additional 512 MB RAM for Virtual Machine usageAdditional Requirements:1. .NET Framework 4.5For more information on OS support see the Visual Studio 2015 Compatibility Page.After downloading the Visual Studio Build Tools setup, launch the setup execution and follow the installation guide to the end, as shown below.Also take note that, without Visual Studio Build Tools, you may not even be able to compile Python code, so it is important you DO NOT SKIP THIS STEP.Next, you have to install Microsoft Visual C++, and to do that, simply go to Microsoft’s official website here, and download version 2013 and version 2015-2022, as shown in the image below.Once your download is complete, launch the Visual C++ 2013 setup file from your downloads folder, and just follow the setup installation guide till the end.Then launch the Visual C++ 2015-2022 setup file from your downloads folder, and just follow the setup installation guide till the end.
Step 3: Install CUDA
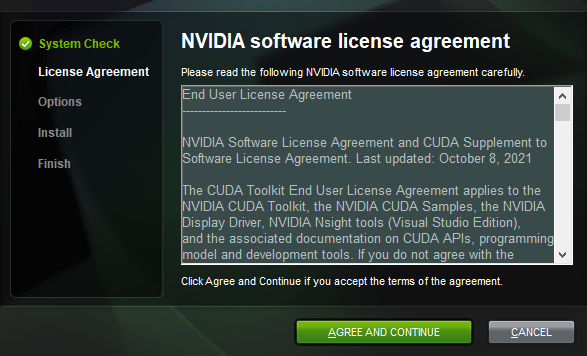
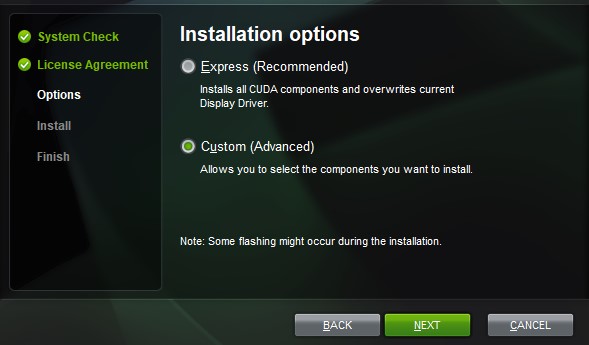
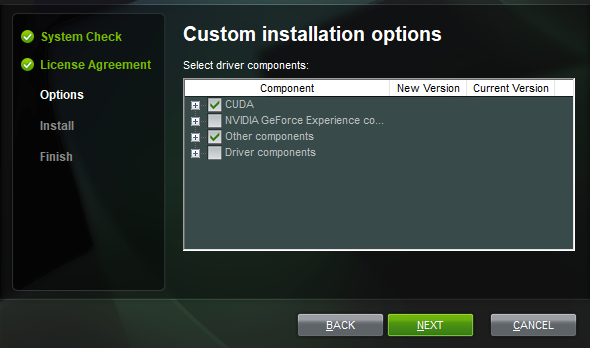
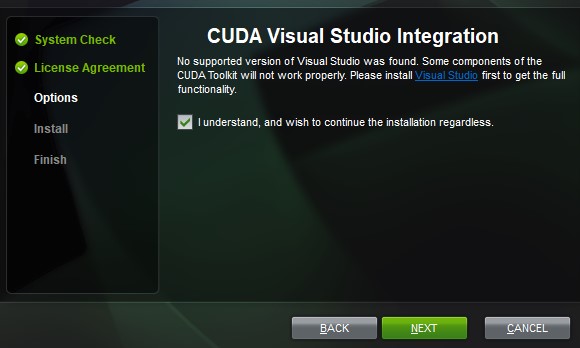
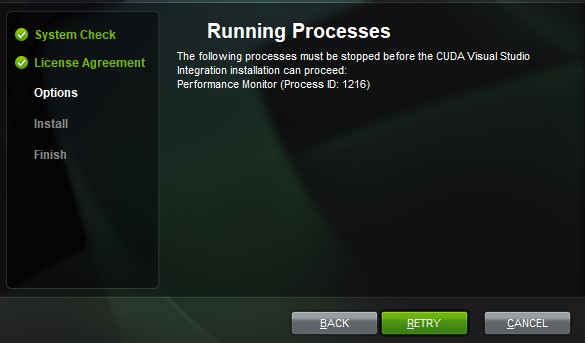
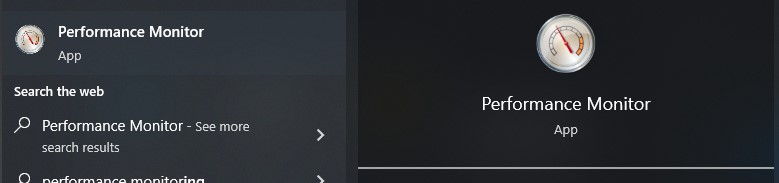
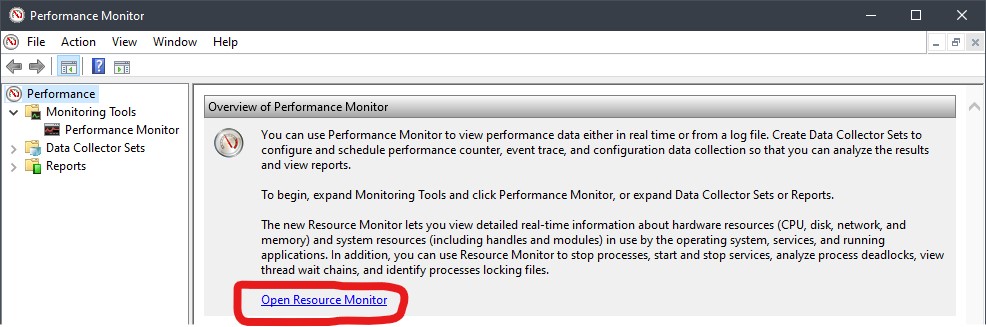
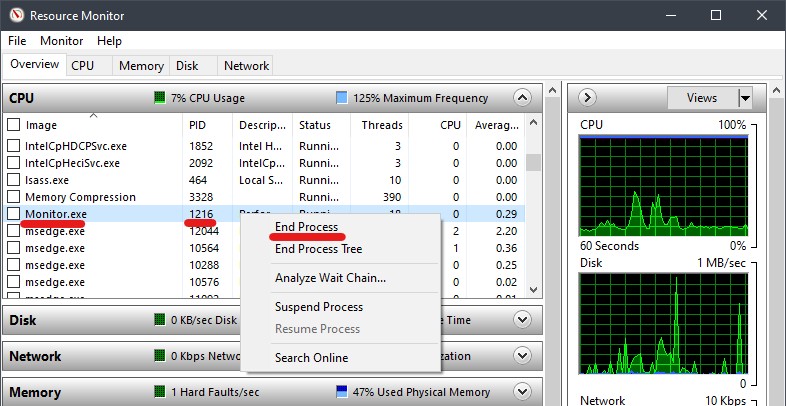
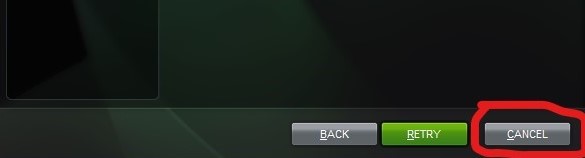
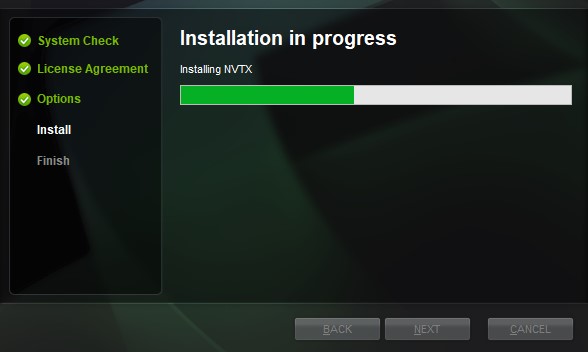
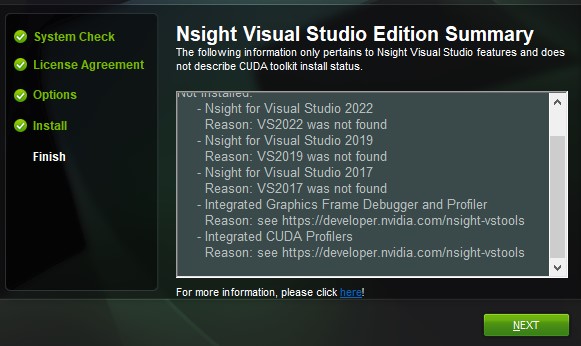
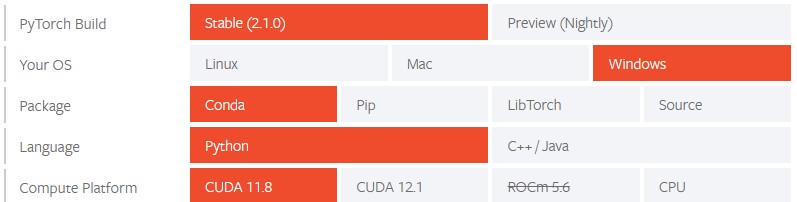
After installing Microsoft Visual C++, you can proceed with the installation of CUDA. But before installing CUDA, you have to make sure you know exactly what version of PyTorch matches the CUDA you want to install by going to the PyTorch website.This is because Pytorch has a tool on their website which automatically generates the command which you will use to install the exact PyTorch version that matches your CUDA version. So you want to make sure that you see the exact CUDA version that will make it easy for you to install PyTorch, which I will demonstrate in a moment.So, first, go to the PyTorch version compatibility checking tool here.On the website, you should see the latest and most stable versions of CUDA, which are supported by PyTorch, as shown in the image above (At the time of writing this article they are Versions 11.8 and versions 12.1). Preferably, you’d like to download the versions shown to you by the compatibility tool.Now, head to Nvidia’s CUDA website here, search and download any of the CUDA versions you saw from the Pytorch website version compatibility checking tool.Given that we saw CUDA version 11.8 on the PyTorch compatibility checker, we are going to download exactly that version, as seen in the image above.The version you see there will probably be different for you if you are reading this in the far future, so make sure you understand the procedure I am using and not just repeating exactly what I am doing.After CUDA has been downloaded, install it, by simply running the CUDA setup file. Follow the installation guide in the setup window as shown in the following images.After clicking on the “AGREE AND CONTINUE” button, you’ll be taken to the next page, as shown in the image below. Instead of taking the Recommended “Express” installation, select the Advanced “Custom“ mode, where you can manually select the components to be installed.As shown in the following image, the CUDA setup also installs an Nvidia Graphics driver and the GeForce Experience app, alongside the CUDA framework.You might be tempted to think that, since that driver comes with the CUDA setup, it is probably the most suitable, but no, it is not. The problem is that the graphics driver and GeForce experience app that comes with the CUDA setup are usually outdated and will not exploit your GPU to the fullest.Next, you are going to choose the default installation location and make sure you take note of that location, as we will soon need it. Do as shown in the following image.After validating the above settings, you will land on the following page which will warn you, telling you to install Visual Studio first. Don’t worry, just validate and move to the next section, as shown below.Now, if you are like the majority of people, your setup should cross this part without any problem. But if you are among the select few who never have things the easy way, you might be on the verge of breaking your keyboard, seeing the following error or something similar “The following processes must be stopped before the CUDA Visual Studio Integration installation can proceed: “, as seen in the image below.Seeing the above error, I can imagine you are probably thinking now “Ah! I knew I should have installed Visual Studio”, but trust me, even if you installed Visual Studio with all its components and plugins, that error will still not go.Luckily for you, I am one of the select few who had the privilege of having that error, and managing to circumvent it. So, if you look at the error keenly, you’ll notice that it is talking about a currently running process on your PC, which is blocking the setup from continuing. Both the name and ID of the process which they are referring to, have been given.You may be tempted to launch the task manager and check for the above-mentioned process, but know that the Windows task manager does not show processes running on Windows. In order to see and manage processes, you have to go to the Windows Performance Monitor app.You can access it by searching for “Performance Monitor” in the Windows search bar. You should see it pop up amongst your search results as shown in the following image.When you run the above application you will see the window in the following image.Don’t be intimidated by the fancy window in the image above, just click on the “Open Resource Monitor” link, which I have circled in red, at the bottom of the window in the above image. This will launch the “Resource Monitor” application, which will let you see all ongoing Windows processes, as shown in the image below.Looking at the error we encountered during the CUDA setup installation, the error message we had was “The following processes must be stopped before the CUDA Visual Studio Integration installation can proceed:Performance Monitor (Process ID: 1216)“.The above error tells us that we have to stop the process which has the 1216 Process ID, so all we need to do is to get into the Resource Monitor and look for the exact ID of the process given in the error message (which was 1216 in my case, your own case might have a different ID).You can check for the Process IDs by scrolling and looking under the PID column of the Resource Monitor. Once you find the ID of the process hindering your installation process, go ahead and end the process by right-clicking on the row where the process appears.In the resulting pop-up menu, click on the “End Process” button, to end the undesired process, as shown in the image above. Once the process is ended, go back to your CUDA setup installation process, and click on the “CANCEL” button, as shown in the image below.Cancelling the installation process might be counter-intuitive, I know. The reason why we are cancelling the process is to restart the setup, simply because we want the setup to pick up the changes which we have made.If you just click on the “RETRY” button, you will keep getting the same error, because the setup has not been refreshed with the updated configurations done within the Resource Monitor. The setup doesn’t refresh in real time.So all you have to do now is to re-run the setup and follow the installation guide till the end (not forgetting to choose the Advanced “Custom“ installation mode and remove the Nvidia GPU driver and GeForce Experience application from the setup installation menu, as we earlier did).If you see another error such as “The following processes must be stopped before the CUDA Visual Studio Integration installation can proceed: ” solve it by going to the Resource Monitor, finding the corresponding Process ID of the undesired process and ending the process (just repeat what we did above). Don’t forget to restart the setup installation program, so that it picks up the changes.After doing everything above, you should see the setup cross the part where it previously got stuck, as shown in the following image.When the CUDA setup successfully installs, you can then click on the “NEXT” button, and then close the window, as shown in the image below.
Step 4: Install cuDNN
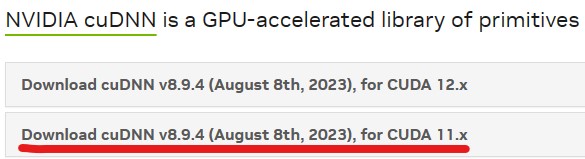
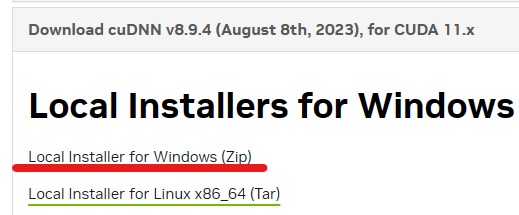
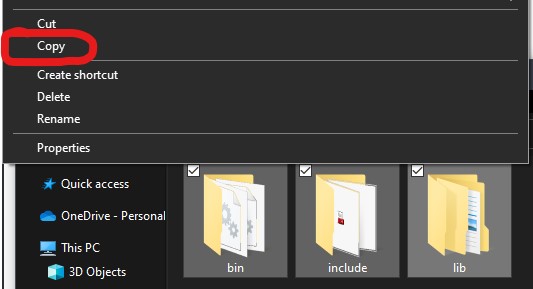
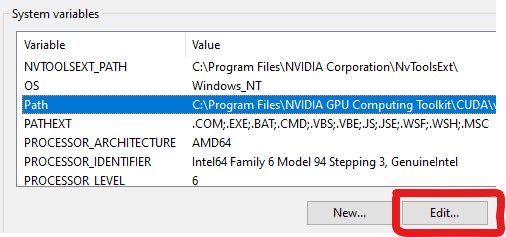
After installing CUDA, you need to install cuDNN. To install cuDNN, you have to first go to the Nvidia cuDNN website and sign up. Without signing up, they will not give you access to their product. You can sign up by going to their sign-up page here. If you have already signed up, then you just have to sign in.Once you have signed in, go to the cuDNN download page here, and download cuDNN. Make sure that you read carefully to find the version of cuDNN that matches the version of CUDA you earlier installed. Since we got CUDA 11.8, we are going to look for its exact corresponding cuDNN version, as shown in the image below.As seen in the image above, cuDNN v8.9.4 which I have underlined in red, is the latest version of cuDNN which corresponds to CUDA 11.8. The “11x” means that this version of cuDNN will work for every version 11 of CUDA.Click on the section underlined in red, as shown in the image above. Once you click there, you’ll be presented with a drop-down of several types of cuDNN for the various operating systems. As shown in the image below.Since I am on the Windows Operating System, I will choose the “Local Installer for Windows (zip)“, which I underlined in the image above. Once the download is complete, extract the zip folder, using any zip extracting software of your choice, to your desired location on your PC, as shown in the image below.Remember I said you should take note of your CUDA installation path, which was shown during the CUDA setup execution. Well, we are going to need to use that path now. Open the extracted cuDNN folder and copy the “bin“, “include” and “lib” folders, as shown in the image below.Paste the copied files in the CUDA installation location. If you used the default installation location settings, then you’ll find it installed at “C:\Program Files\NVIDIA GPU Computing Toolkit\CUDA\v11.8” as shown in the image below. Your location may change, depending on your version of CUDA.For example, if you had rather installed CUDA 11.7, then your path would be something like “C:\Program Files\NVIDIA GPU Computing Toolkit\CUDA\v11.7“, so make sure you are going to the location of the corresponding CUDA version you installed, especially if you are having more than one version of CUDA installed.You may see a message asking you if you want to overwrite existing files, accept and validate to overwrite all existing files. If you don’t see the message, there’s no problem.After copying the cuDNN folders to the CUDA installation folder, the next thing to do is to configure the environment and system variable paths for the “bin” and “libnvvp” folders found within the CUDA installation folder.To configure your paths, first, you have to launch your system variable editor app. To launch it, just open your Windows search, and type in “environment variables“. You should see a result similar to that shown in the image below.When you click on the above search result, you will see a window pop up, as shown in the image below. Make sure that you are within the “Advanced” tab, then click on the “Environment Variables” button within the window.After clicking on the “Environment Variables” button, a new window will pop up. The window has two sections, the upper section for configuring user variables and the lower section for configuring system variables.In the upper section, select the “path” row and click on the “Edit” button, as shown in the following images.After clicking on the “Edit” button in the image above, a new window with several rows of text will appear. This is where you will add the paths.Copy the paths of your “bin” and “libnvvp” folders found within the CUDA installation folder, which should look something like: (“C:\Program Files\NVIDIA GPU Computing Toolkit\CUDA\v11.8\bin” and “C:\Program Files\NVIDIA GPU Computing Toolkit\CUDA\v11.8\libnvvp“).Create 2 new lines for the “bin” and “libnvvp” paths within the new window, and add the lines within that window, as shown in the image below.Now hit the “OK” button at the bottom of the window, then go back to the previous window (titled “Environment Variables“) and select the lower section for editing system variables. Search for the “path” row and select it. Once that row is selected, click on the “Edit” button, as shown in the following image.Once more, copy the paths of your “bin” and “libnvvp” folders found within the CUDA installation folder, which should look something like: (“C:\Program Files\NVIDIA GPU Computing Toolkit\CUDA\v11.8\bin” and “C:\Program Files\NVIDIA GPU Computing Toolkit\CUDA\v11.8\libnvvp“).Create 2 new lines for the “bin” and “libnvvp” paths within the new window, and add the lines within that window, as shown in the image below.Now hit the “OK” button at the bottom of the window, then go back to the previous window (titled “Environment Variables“) and click “OK” there too. Finally, go to the “System Properties“, window and click on the “OK” button. After doing everything above, you must have configured your paths correctly. Now, you have to REBOOT your PC for the changes to take place.All the above configurations were done because cuDNN doesn’t come as a setup execution file, so, you have to manually install it, and point the operating system to its installation location, such that it can be used whenever and wherever you want to use it in your PC.
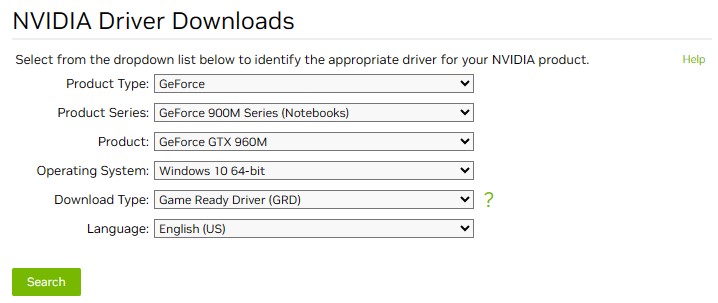
Step 5: Install Nvidia GPU Driver
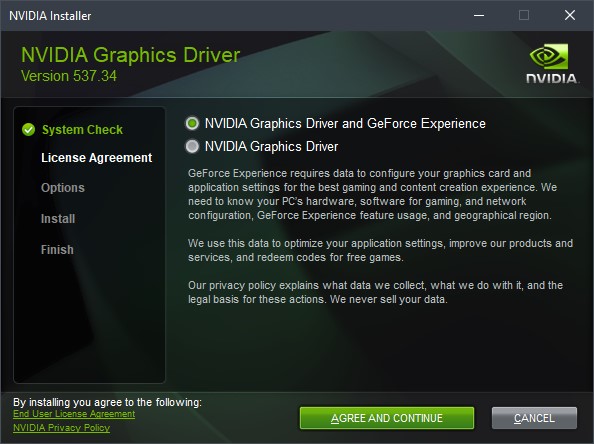
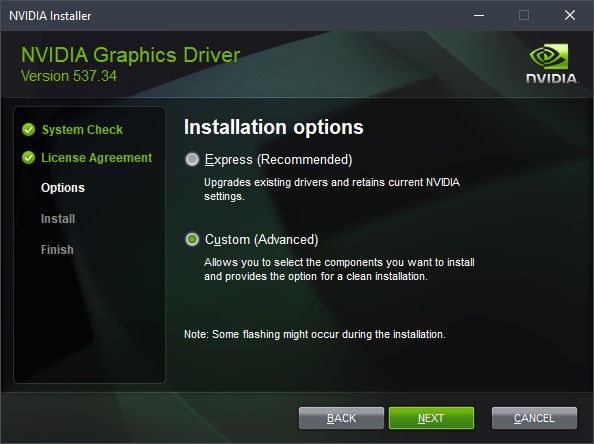
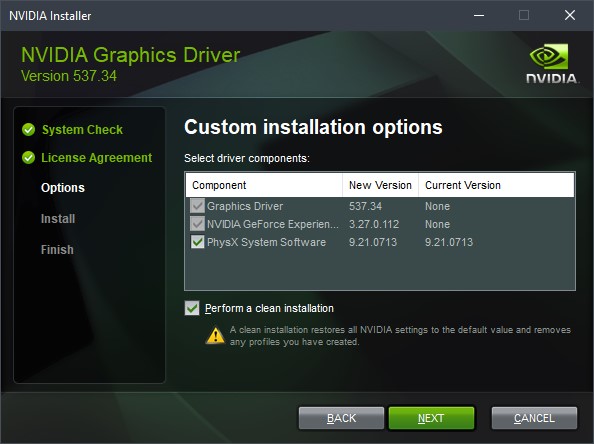
After installing the CUDA framework and the cuDNN library, you have to install the latest version of your graphics card driver. To do that, head to the Nvidia official website here.Select the latest version of your GPU driver, operating system and language, using the drop-down menus. If you have the choice between the “Game Ready” and the “Studio” version, choose the “Game Ready” version of the driver and hit the search button, as shown below.Once the driver is downloaded, proceed to install it by launching the setup execution file, and following the installation guide to the end. You can also install the Experience app if you want.After clicking the “AGREE AND CONTINUE” button, you will land on the next page asking you to choose between the “Express (Recommended)” installation mode, or the “Custom (Advanced)” installation mode.Instead of taking the Recommended “Express” installation, select the Advanced “Custom“ mode, this is because you want to make sure that the setup performs a clean installation, removing any previous settings from the previous driver that may hinder your CUDA installation.In the above image, click the “NEXT” button and make sure you tick the “Perform a clean installation” check box in the next window, before clicking again on the “NEXT” button, as shown below.While your driver is installing, you might experience some screen flickering due to the setup installation configurations.After your driver has been installed, reboot your PC.
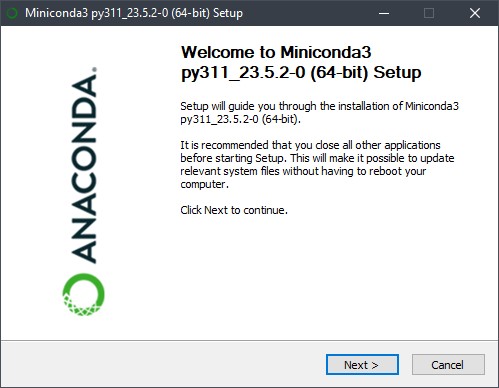
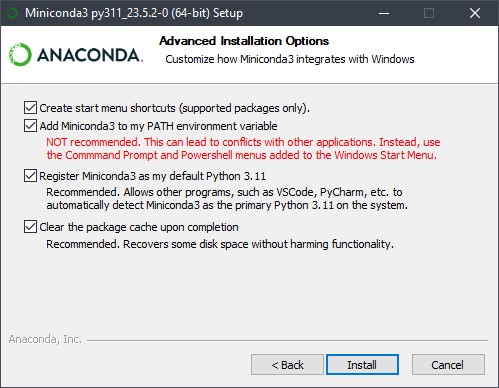
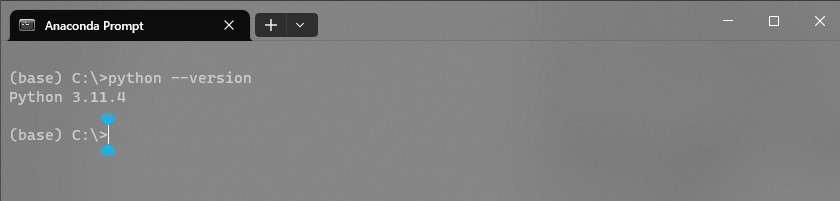
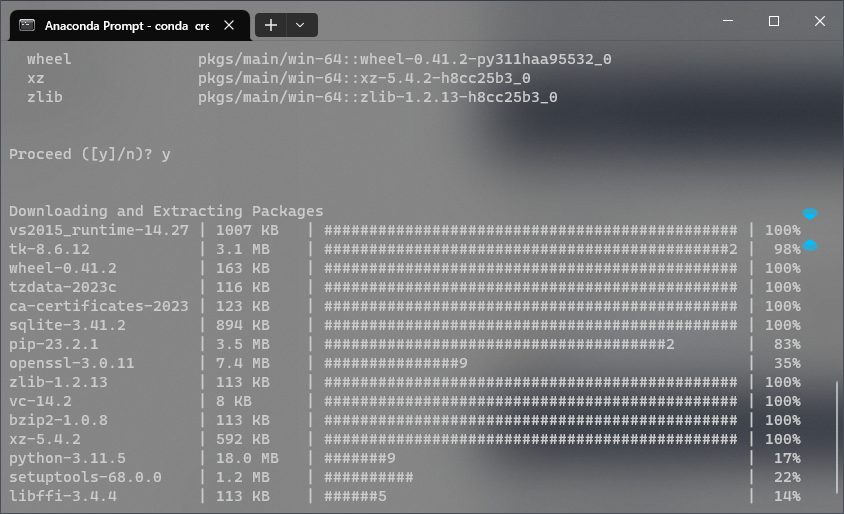
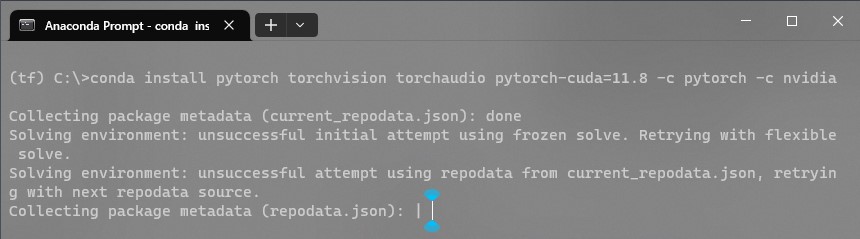
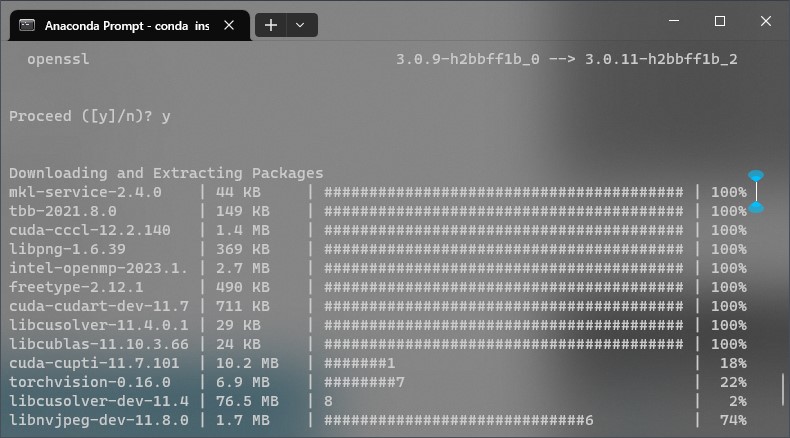
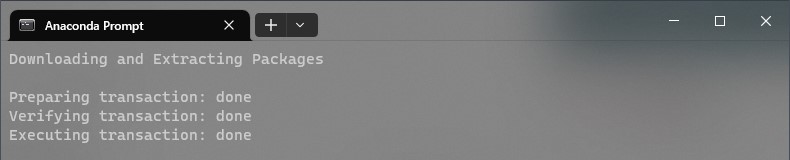
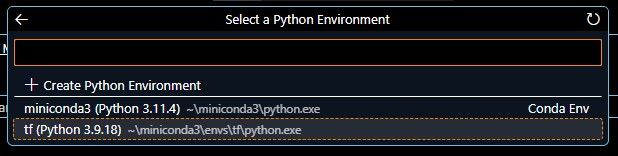
Step 6: Install Conda
After installing the latest version of the Nvidia GPU driver, you have to install Conda. Now, you can choose to go with the light version (Miniconda) or the full version (Anaconda).Now just to clarify, Miniconda is the Conda version that comes with the minimal tools needed to run a Conda project, while Anaconda comes with all the tools pre-installed so that you don’t have to go installing them one by one.Intuitively, you might think, since Anaconda comes with everything, it’s the one that will be best, but no. The problem is, that it may come with versions of PyTorch pre-installed and you absolutely don’t want that, given that it may hinder your installation, since you would manually want to install PyTorch, to make sure it matches the version you want to use.Also, anaconda requires a lot of space since it installs several packages which you may never even use, so, you also save space by installing Miniconda.OK, enough chit-chat, let’s move on. Go to Anaconda’s website here, and download the latest version of Miniconda for your corresponding operating system, as shown below.After downloading Miniconda, proceed with the installation by launching the setup execution and following the instructions, as shown below.After launching the setup execution, click the “Next>” button and proceed with the installation guide, until you reach the “Advanced Installation Options” page. When there, select all the checkboxes and click on the “Install” button, as shown below.By default, the “Clear the package cache upon completion” checkbox is not ticked, I recommend you tick it because it will make the setup do a post-installation cleanup, to remove unused items after installing, such that it doesn’t use excessive disk space for nothing.By default too, the “Add Miniconda3 as my PATH environment variable” checkbox is not ticked, and when you tick it, it shows you a warning message saying that’s not recommended.Well, the reason why I asked you to tick it, is because it enables you to use the Python installed by Conda, not just within the Conda environment (Anaconda Prompt), but also with external environments such as the Windows Powershell or Command Prompt, so that you can use one version of Python within any IDE and also to do any python related work.For example, since Miniconda installed Python version 3.11 if I verify this in my Anaconda prompt, I should see the Python version by typing in the command “python –version” within the Anaconda prompt, as shown below.You should see the same thing if you run the “python –version” command within the Windows Powershell.And same thing for Windows Command Prompt.But if you had not ticked the “Add Miniconda3 as my PATH environment variable“, you will not have this option and always have to use the Anaconda prompt only, when you want to use Python. This may be inconvenient, especially for using within IDEs like VSCODE.That is why at the beginning of this tutorial, I asked you to uninstall all versions of Python on your PC, to avoid any conflicts with the Python which was eventually going to be installed by Conda.
Step 7: Install TensorFlow
After successfully installing Conda, the next thing is to install TensorFlow. What you must understand is that TensorFlow 2.10 is the last version which you could install and run natively on Windows OS, without having to perform some strange magic.You can read more about that on the TensorFlow official website here.You should also note that it is preferable to install TensorFlow with the “Pip” package manager than the “Conda” package manager, as shown in the image excerpt from the TensorFlow website below.So, to be on the safe side, we are going to follow their instructions and install the last possible installable TensorFlow for Windows, using the “Pip” package manager.First things first, we have to launch our “Anaconda Prompt” command line interface by searching for it in the Windows search and running it, as shown in the image below.Next, we have to create a separate Conda environment for using TensorFlow, by using the command “conda create –name tf python=3.9“. Take note that the “python=3.9“ in the previous command, is because that is the Python version that best matches the version of TensorFlow we are about to install, so make sure you don’t change the Python version, as shown below.When the command line interface is ready to proceed, press the “y” key and hit “Enter” to launch the creation of your TensorFlow environment, as shown in the image below.After installing the TensorFlow environment, you have to activate it with the command “conda activate tf“, as shown below.While within the TensorFlow environment, you have to upgrade your “Pip” package manager by typing in the command “pip install –upgrade pip–user“, as shown in the image below.Once your “Pip” has been upgraded to the latest version, proceed to install the latest possible installable TensorFlow for Windows, using the command (pip install “tensorflow<2.11”), as shown in the image excerpt below, from the TensorFlow website and from my own command line interface.After installing TensorFlow, test your CPU setup by running the following command: python -c “import tensorflow as tf; print(tf.reduce_sum(tf.random.normal([1000, 1000])))” as shown in the image excerpt below, from the TensorFlow website and from my own command line interface.If everything works well, you should see something as shown in the above image.Next, proceed to test your GPU setup by running the python -c “import tensorflow as tf; print(tf.config.list_physical_devices(‘GPU’))” command, as shown in the image excerpt below, from the TensorFlow website and from my own command line interface.If everything works well, you should see something as shown in the above image.
Step 8: Install PyTorch
Remember that we went to the PyTorch website at the beginning of the tutorial to see which version of CUDA we were going to install, that was exactly for this moment, such that when we now install PyTorch it should just match with our version of CUDA.So, we are going to go back to the PyTorch website hereand use their version compatibility matching tool to generate the command that we will run in our command line interface to install the most appropriate version of PyTorch, which will match our CUDA, cuDNN, Python and TensorFlow earlier installed.To generate the command, select the options that correspond best to your system. For me, these are the options I selected at the time of writing this post:1. PyTorch Build: Stable (2.1.0)2. Your OS: Windows3. Package: Conda4. Language: Python5. Compute Platform: CUDA 11.8After selecting the above options, the tool generated the following command (conda install pytorch torchvision torchaudio pytorch-cuda=11.8 -c pytorch -c nvidia) as shown in the image below:If you had gone through the details of the PyTorch website, you should have seen that the Conda package manager is the most suitable package manager for installing PyTorch, because it installs all dependencies.I have personally noticed that the Conda package manager does everything possible to auto-match your dependencies and configure your installation such that there are no compatibility issues, contrary to Pip, which will just directly install PyTorch without trying to help you auto-fix any compatibility issues that may occur.So, we are going to proceed by running the above command generated by the version compatibility tool we used on the PyTorch website. Make sure you are still within the TensorFlow Anaconda Environment we earlier created, then run the command in your Anaconda Prompt command line interface, as shown below.When the command line interface is ready to proceed, press the “y” key and hit “Enter” to launch the installation of your PyTorch, as shown in the image below.When the download process is over, your terminal should look something like the image below.After installing your PyTorch, the next thing is to verify whether your installation was successful. You can do that by typing the following commands in your Anaconda Prompt:First, run the command: “nvcc –version“, as shown below.If the command is successful, then, run the following command: “nvidia-smi“, as shown below.If both of the above commands work, then know you are on the right track.NB: You might have noticed that we installed CUDA 11.8, but after running the “nvidia-smi” command, you noticed at the top right of the tabular display above, that the CUDA version shown is 12.2.This is simply because some GPU drivers may come with a higher version of CUDA, and as a result, will upgrade the current version of CUDA during installation. That is also one reason why I think it’s preferable for the GPU driver to be installed after the installation of CUDA and cuDNN, which may be counterintuitive at first glance.I didn’t find a way to stop the driver from upgrading the current CUDA version, nevertheless, I also discovered that it caused no problems to the installation process.
Step 9: Install Ipykernel
To switch from using the Anaconda default environment (base), to using your TensorFlow environment (tf) you earlier created and vice versa, you would normally use the “conda activate tf” or “conda activate base” commands.The problem is, within the IDE, you may not have the luxury of time to always do that, hence the need for a bridge such as the “ipykernel” package, which permits you to switch between the Anaconda default environment (base) and the TensorFlow environment (tf) seamlessly.Hence, we are going to install the “ipykernel” package, which is going to help us switch between our different Anaconda environments without having to go into the command line interface, punch things and restart our IDEs all the time.To install the “ipykernel” package, simply launch your anaconda prompt and type in the command “pip install ipykernel” as shown below.Run the above command both in the base and in the tf environments, to make sure it is available for switching from any environment in use to any target environment.
Step 10: Install and Configure IDE
After installing everything above, you may want to configure it to work properly with your IDE such that you can jump into work and completely forget you ever went through a head-wrecking installation such as this one.In this step, you can follow with any IDE of your choice. You can go with Jupyter Notebook, Jupyter Lab and so on.If you want to carry on with Jupyter Notebook, then you would have to install the Anaconda Navigator, by launching your Anaconda Prompt and running the “conda install anaconda-navigator” command.From there, you can then run the “anaconda-navigator” command to launch the Anaconda User Interface, then click on the “Install Jupyter Notebook or Install Jupyter Labs” button to install whatever IDE you want to use.Or, you can still install Jupyter Notebook by running the “conda install jupyter” command. Then still, while in Anaconda Prompt you can launch it with the “jupyter notebook” command.All the above are fine, but I personally prefer using VSCODE over the Jupyter Notebook IDE for my AI, Machine Learning and Data Science projects for 2 simple reasons.1. It is computationally less expensive to run VSCODE given that you don’t have to open a browser to run it, and browsers typically require lots of RAM to run, so you save on RAM.2. Jupyter Notebook IDE does not allow you to extend its functionalities with plugins like VSCODE does. This means, no version control with Git, no dark mode, and so on.Hence I’ll be carrying on this tutorial with VSCODE. So, head over to the official Microsoft website for downloading Visual Studio Code here, and download it. Once downloaded, launch the setup execution file and follow the installation guide till the end, as shown below.Click the “Next” button until you reach the “Select Additional Tasks” page. While on that page select the (Add “Open with Code” action to Windows Explorer file context menu) and the (Add “Open with Code” action to Windows Explorer directory context menu) options, to make your IDE user experience better.This will permit you to open a source file and edit it, by simply right-clicking on the file and selecting “Open With VSCODE“ from the Windows contextual menu.Select the “Next” button and wait for installation to complete, as shown below.Now, while in VSCODE, move to the extension section and search for “jupyter” and you’ll see the extensions showing in the search results. Make sure you are connected to the internet before searching.Select the first search result called “Jupyter“. When selected you’ll see that it’s actually a pack of extensions. Install all the extensions.When everything is installed, you have to test your IDE to see if it works properly with the JupyterNotebook extension and all the previous stuff installed. So, I have prepared some test code below, which you can use to test your system. Download the code using the link below.CUDA TESTER DOWNLOADExtract the downloaded code.Right-click on the extracted file, then select the “Open with Code” option within the contextual menu. You should see something similar to the image below.At the top right, click on the “Select Kernel” button, as shown below.After clicking on the “Select Kernel” button, a menu will pop up, at the top of the IDE, asking you to choose between “Python Environments…” and “Existing Jupyter Server…“. Choose the “Python Environments…” option, as shown below.After choosing the above option, another pop-up window will appear, asking you to choose between the default miniconda3 environment, and the TensorFlow environment you earlier created, choose the TensorFlow environment, as shown below.After choosing your environments to use for running the code, run the code by clicking on the “Run All” button.OK, so the moment of truth, if everything works fine, you should see the following output.If you did not see the above output, means you probably got something wrong along the way. You can try to go through this post again and make sure everything was correctly done.In case you prefer copying parts of the code, or reading the full content of the downloaded source file before extracting and running it, check out the raw source code below.
# Import necessary librariesimport torchimport torch.nnas nnimport tensorflow as tffrom tensorflow.keras import models, layers# Check PyTorch installationprint("Checking PyTorch...")try:print("PyTorch version: ", torch.__version__)# Create a simple neural network in PyTorch model_pt = nn.Sequential( nn.Linear(10,5), nn.ReLU(), nn.Linear(5,2), nn.Softmax(dim=1))print("PyTorch is installed correctly! \nPyTorch model created.")exceptImportError:print("PyTorch is not installed correctly.")# Check CUDA availability for TensorFlowprint("\nChecking TensorFlow and CUDA...")physical_devices = tf.config.list_physical_devices('GPU')iflen(physical_devices)>0:print("TensorFlow and CUDA are installed correctly!")print("TensorFlow version: ", tf.__version__)# Create a simple neural network in TensorFlow model_tf = models.Sequential([ layers.Dense(5,activation='relu',input_shape=(10,)), layers.Dense(2,activation='softmax')])print("TensorFlow model created.")else:print("TensorFlow or CUDA is not installed correctly.")
I hope this tutorial lived up to its promise of helping you install CUDA and cuDNN.
Obviously, there are a billion things that could go wrong while trying to implement such a complex procedure and I could never cover everything from A to Z in just one post, so, there’ll obviously be people having trouble with this.
Nevertheless, I’ll be waiting for your comments in the comment section and I’ll try to help as much as possible. If this post helped you, don’t forget to bookmark it for future use and share it with others whom it might help too.
Some Frequently Asked Questions and Their Answers
How do I update my CUDA version?
You can find the latest CUDA driver releases on the NVIDIA website. Once you’ve downloaded the latest driver, you’ll need to install it on your system. You can do this by following the instructions provided by the driver. Typically, this involves running an installer program and following the prompts.
How do I change my CUDA version on Colab?
Steps to downgrade CUDA and cuDNN in Google ColabStep 1: Check the current versions of CUDA and cuDNN. …Step 2: Uninstall the current versions of CUDA and cuDNN. …Step 3: Download the desired versions of CUDA and cuDNN. …Step 4: Install the desired version of cuDNN. …Step 5: Verify the installation.
How to install CUDA and cuDNN on Windows 10?
Select the Download cuDNN v8. 1.0 (January 26th, 2021), for CUDA 11.0, 11.1 and 11.2 option from the list, then choose cuDNN Library for Windows (x86). …Extract the zipped contents.Create the C:\Program Files\NVIDIA\cuDNN\v8…
Can I install two CUDA versions?
As a data scientist or software engineer, you may need to work with multiple versions of CUDA and cuDNN to support different deep-learning frameworks or applications. Yes, it is possible to install multiple versions of CUDA at once, on your PC.
How to manually install CUDA?
The setup of CUDA development tools on a system running the appropriate version of Windows consists of a few simple steps:Verify the system has a CUDA-capable GPU.Download the NVIDIA CUDA Toolkit.Install the NVIDIA CUDA Toolkit.Test that the installed software runs correctly and communicates with the hardware.
References for how to Install or Update CUDA and cuDNN
OpenAI ChatGPT Course: Developer AI Course: Discover the power of OpenAI ChatGPT Course technology with our comprehensive course. Learn language modelling, chatbots… Enrol now!