Touchjet Wave + Lily
Introduction
As tech lovers, we at TERRA-X are all in for anything tech and the world is getting flooded with new and innovative ideas everyday.
Some are just surprising while others are just so mind racking that they beat the entire default logic.
Ever heard of a device that can turn your TV into a big tablet? Probably not, which is where Touchjet wave comes along. Let’s see how it holds up.
What Makes Touchjet Wave + Lily So Fantastic?
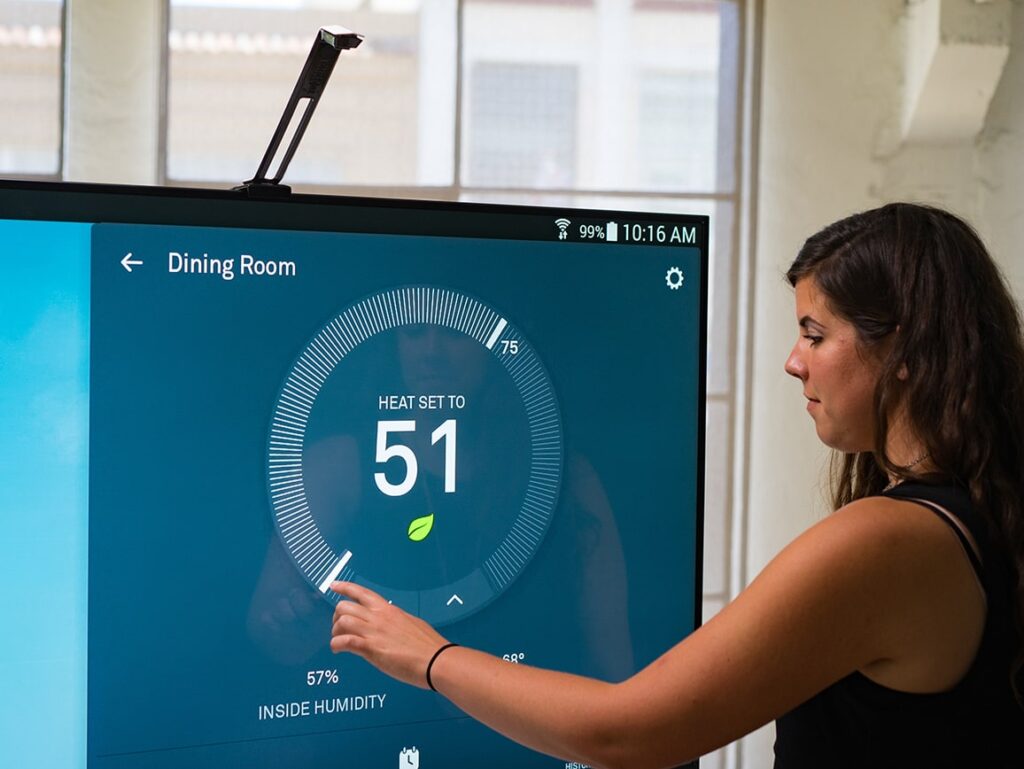
As earlier mentioned, turning your TV into a big touch screen should be a game-winner all by itself.
Nevertheless, it gives your phone access to get in on the fun too through its personal app. so basically you can manipulate your phone from your TV screen. Mind-blowing right?.
Seeing how the touch screen feature of the smartphone has been its major selling point amongst other things Touchjet Wave + Lily, allows your TV regardless of whether it’s a smart TV or not to obtain this feature.
How Does Touchjet Wave + Lily Work?
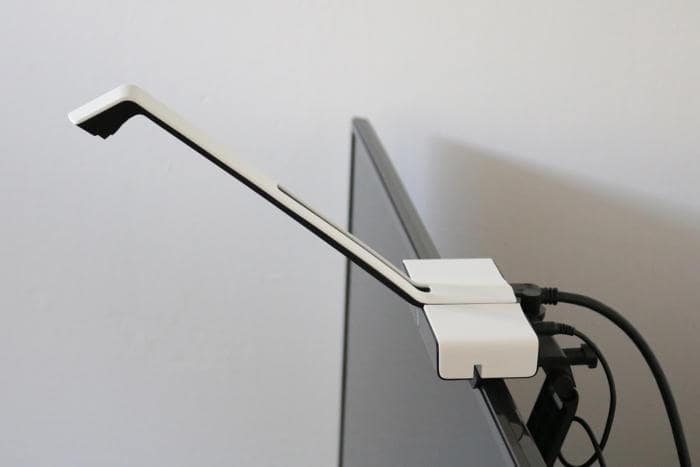
There are basically three components involved:
- The Android box that sits on top of the TV.
- An infrared emitter, which attaches to the top of the Android box.
- An infrared sensor, that attaches to the TV’s bezel at the bottom of the display.
The Wave’s touch function basically works by reading the interruption of the infrared beam caused by your hand or fingers.
We have provided a full break down of how you can set up your Touchjet Wave + Lily on your own, cheers.

Touchjet Wave + Lily
Getting Started With Touchjet Wave + Lily
- Gently clean the screen, frame and back of your TV to remove any dust or dirt before installing the Touchjet Wave + Lily.
- Find the center of your TV. Many models have their logo centered at the top or bottom, which you can use for reference.
- Twist the Angle Adjustment Knob on the top of the Android Box clockwise until it clicks, then about one-half rotation back counterclockwise.
- Twist the Bracing Knob on the side of the Stabilizing Arm 2-3 rotations counterclockwise so that the Bracing Rod can move freely.
- Add the Velcro Tape to the Velcro Pad. Do not remove the Protective Film yet.
Centralise and Secure the Android Box
- Align and hold the Android Box centered on top of your television. The white arrow on the base below the box indicates the center of the unit to help with this. Press the base fat against the TV frame and hold the box in place for the next step.
- Slide the Alignment Tool underneath one side of the Android Box with its foot flat against your screen. A snug ft means that the laser projectors in the WAVE unit are correctly aligned with the screen of your TV.
- Press the Bracing Rod firmly onto the back of the TV. There should be no gap. Tighten the Bracing Knob to fasten the rod in place.
- Remove the Protective Film from the Velcro Tape attached to the Velcro Pad and keeping the Android Box in place. Press it firmly onto the back of your TV.
- Slide the Alignment Tool out from underneath the box to remove it.
Connect HDMI and Power Supply
HDMI
Insert one end of your HDMI cable into the HDMI Port on the back of the Android
Box, and the other into an HDMI Port on your TV. Note: the plug will not go all the way into the box, do not try to push it in further once the red power light comes on.
Power Supply
- Insert the DC plug on the WAVE AC Adapter cord into the DC Input connector on the back of the Android Box.
- Insert the AC plug into a 120V AC power outlet. Note: we recommend plugging your WAVE into a power strip so that you can easily turn the device on and off.
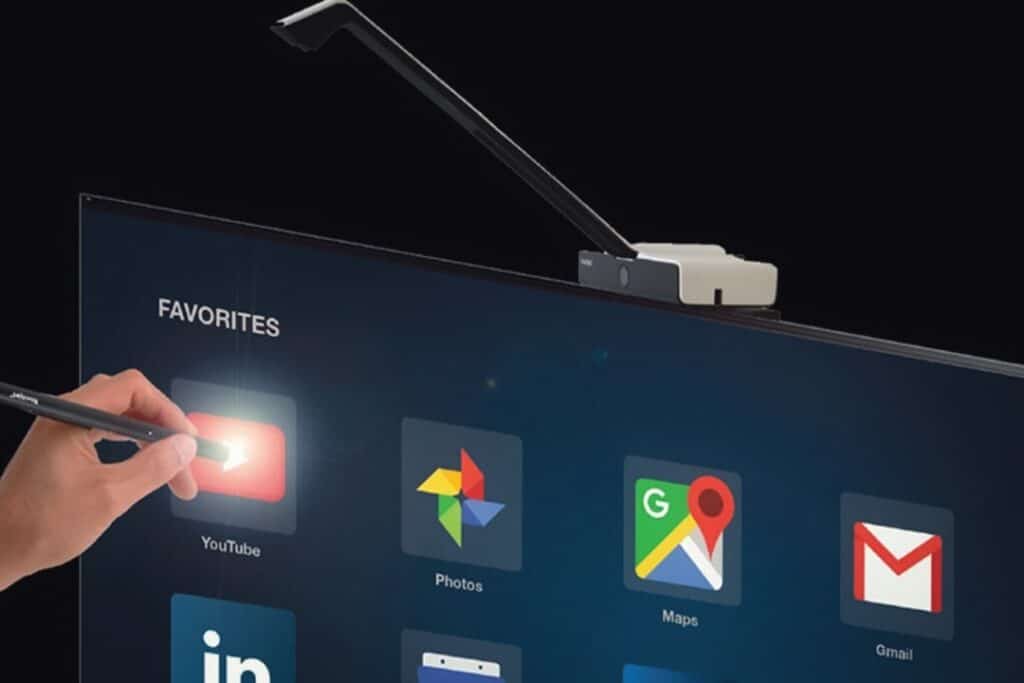
Connect the Touchjet Wave + Lily Arm and Align the Infrared Wall
- Connect the Touchjet Wave + Lily Arm to the top of the Android Box by carefully place the lip at the base of the arm into the rectangular opening atop the box. The Touchjet Wave + Lily Arm should snap into place so that there is no gap between the arm and the box.
- Green Light – indicates that the Android Box is in the correct position.
- No Light – ensure that the WAVE arm is snapped into place tightly and that the Alignment Tool can still fit between the box and the TV.
- Yellow Light – can indicate that you have adjusted too far. Twist the Angle Adjustment Knob clockwise until the light turns green.
- Red Light – slowly turn the Angle Adjustment Knob counterclockwise until the sensor.
Image Source: Pinterest
Pairing Your Phone or Tablet With the WAVE
- Download the free Touchjet App using your smartphone or tablet. You will use this as a smart remote to complete the setup process for the WAVE.
- Turn on your TV and set its input source to the HDMI channel connected to the WAVE.
- Go to your phone or tablet’s Wi-Fi settings menu and connect to the Wi-Fi hotspot broadcast by your WAVE (see left and center images below). Note: The name of this network should also appear in the top right corner of the WAVE screen.
- Open the Touchjet App on your smartphone or tablet. Under Touchjet Devices, you will see your WAVE listed. Tap Touchjet WAVE-XXXX to connect the two devices (see right image). You may need to refresh the page using the button in the top right corner and wait a moment for the WAVE to appear on the device list.
Adjust Your Screen Size
- Using the app menu within the Touchjet App on your phone or tablet, launch the WAVE’s display Settings app.
- Using the touch pad function, select Display Position.
- Now tap the – / + to adjust the screen size until it fits your TV screen.
Touch Screen Calibration
- In the Settings menu of the Touchjet App, press Start Calibration.
- You can now set aside your phone or tablet, as the next few steps will be done directly on your TV screen using touch.
- You are about to teach your WAVE where it will find the borders of your screen and what to
- perceive as touch. As such, it is important to avoid sending the WAVE unwanted IR signals during calibration. You should make sure no very bright lights shine on your screen during the process, and that you minimize movements off to the sides of the TV until you finish.
- For best results, stand in front of your TV and press the indicated circles on the screen with one finger, straight on.
Touchjet Wave + Lily
What Users Say About the Touchjet Wave + Lily?
Despite its ingenuity and unique nature, most customers don’t appear too happy with the end product. We gathered some of the most common praise points and areas of criticism below.
Pros
- Great way to let kids play games.
- Very helpful in a presentation as simply tapping on the screen is miles better than clicking on your computer.
Cons
- The sensor isn’t accurate enough and often misses the mark by an inch or two.
- Difficult to set up.
- Very noisy.
- Very few apps that it can support.
- not very affordable
Requirements
Below are some extra information on the Touchjet Wave + Lily.
Hardware Requirements
- 2.0GHz Quad-Core ARM Cortex-A9.
- 2GB DDR3 Memory.
- 16GB Flash Storage.
- Optical Touch Sensor built in.
- Wi-Fi (802.11 b/g/n).
- Bluetooth 4.0 BLE.
- An optical touch sensor built in, supports four touchpoints.
- 2 LILY Digital Pens.
Software Requirements
- Touchjet UI.
- Android 4.4 Kitkat.
- Use Touchjet App on Smartphone (iOS / Android) for Remote Control.
- Touchjet Present for Interactive Presentations (Access PDF, Powerpoint and Video files).
Display Requirements
- HDMI input.
- Display between 20″ – 65″ capable of 1080p or 720p at 60/50Hz, 4K @ 24/25/30Hz.
- Note: Bright ambient light will cause false touch signals.
- Ports.
- HDMI output.
- 2 USB 2.0 host port.
TV Requirements
- Flat-screen TV or monitor with HDMI port up to 65 inches.
- The top of the TV (where WAVE clamps onto) should be less than 2 inches thick.
Source: BXBK | Urban Outdoor Survival Magazine
Conclusion on Touchjet Wave + Lily
As we mentioned earlier, we’re all in with tech and love to see innovative ideas come to life.
The Touchjet Wave + Lily definitely has a brilliant Idea with poor implementation and their customer service isn’t really good coupled with the steep price so as of now it’s not worth the sacrifice.
References of Touchjet Wave + Lily
Other Interesting Articles
- Cowin E7 Active Noise Cancelling Headphones Review
- YANGHX Floating Globe: Magnetic Levitation Globe
- Lerou Head Massaging Robot: Portable Massage Machine
- Airblock Drone Review [Analysis & Overview]
Frequently Asked Questions And Their Answers
What is the price of the Touchjet Wave + Lily on Amazon
Touchjet Wave + Lily costs $215.00 on Amazon
What is the price of the Touchjet Wave + Lily on eBay?
Touchjet Wave + Lily costs $199.00 on ebay.