20.7 C
Yaoundé
07:31:38 Friday, 20 September, 2024
Home Blog Page 8

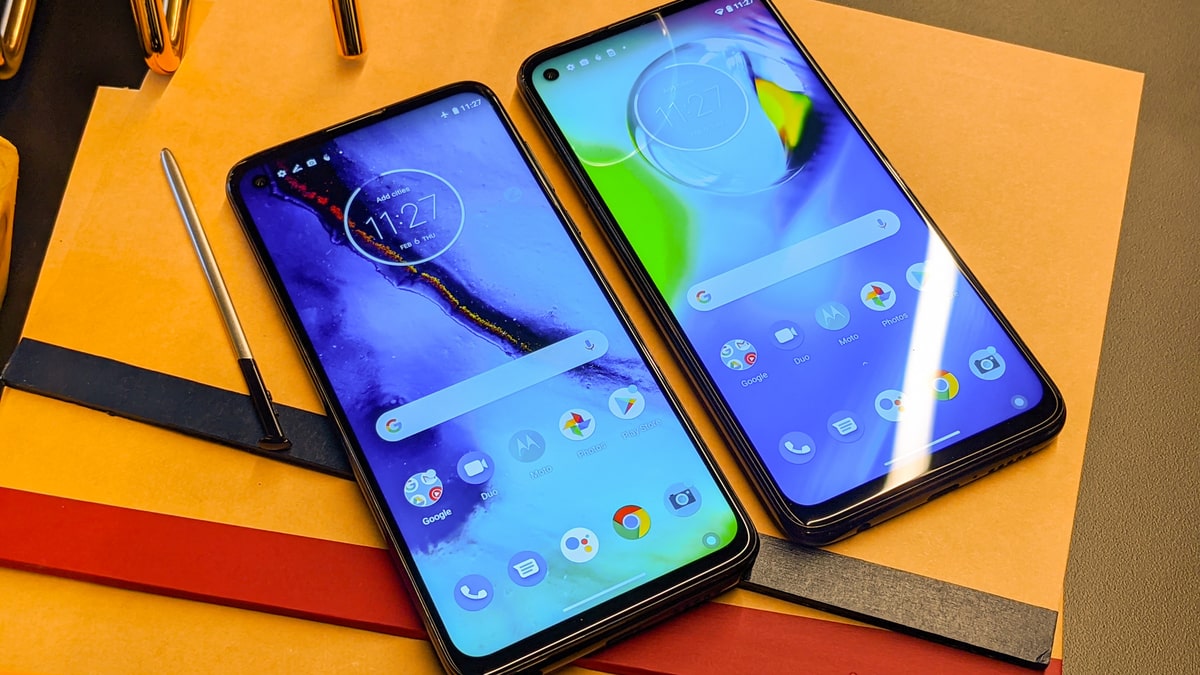
Moto G7 Optimo Maxx VS Moto G Power

0
Moto G7 Optimo Maxx VS Moto G Power
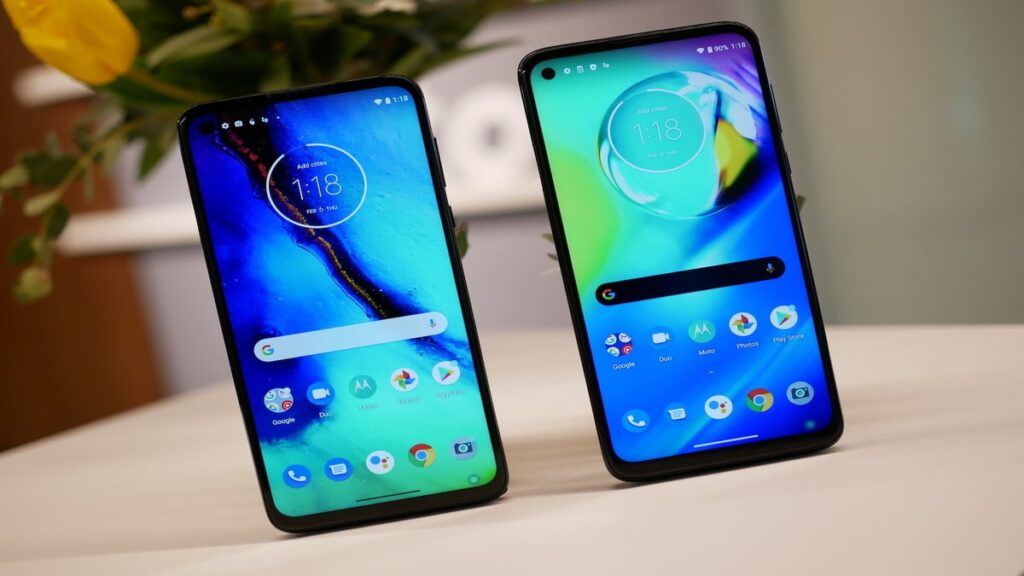
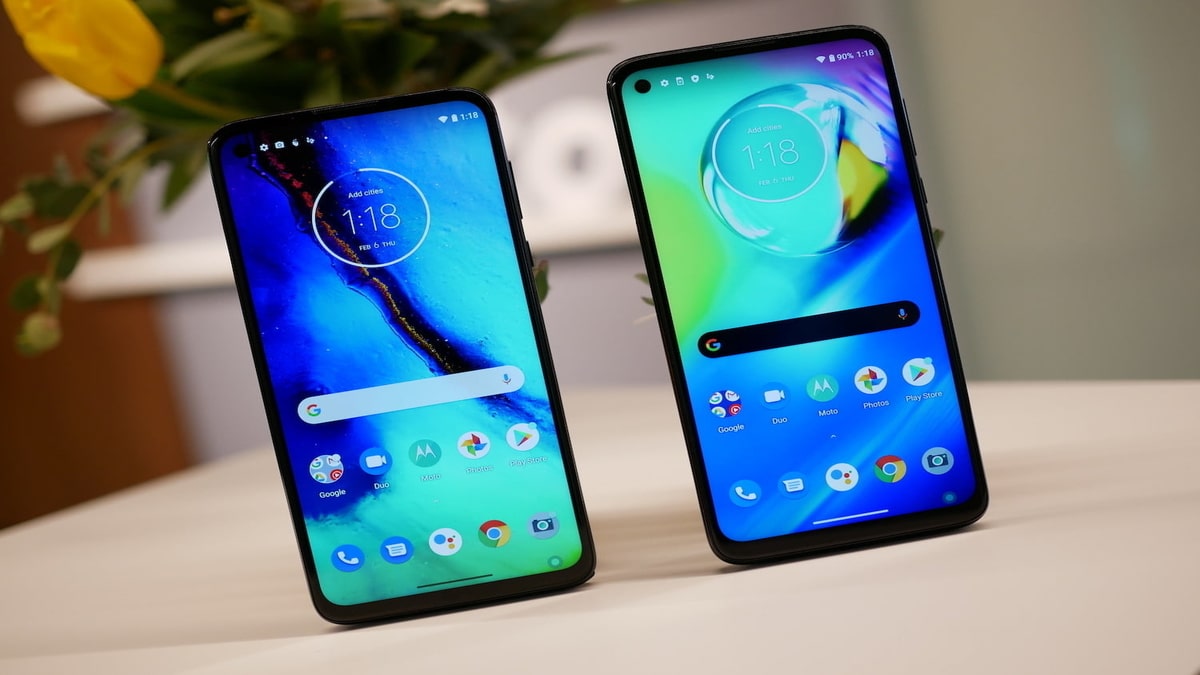
Image Source: Daily Trends

Moto G7 Optimo Maxx VS Moto G Power

Introduction

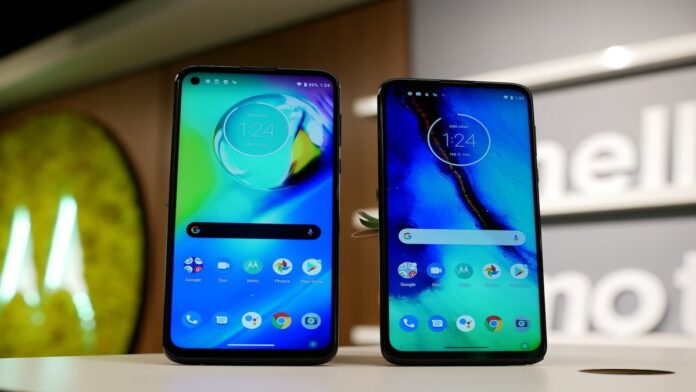
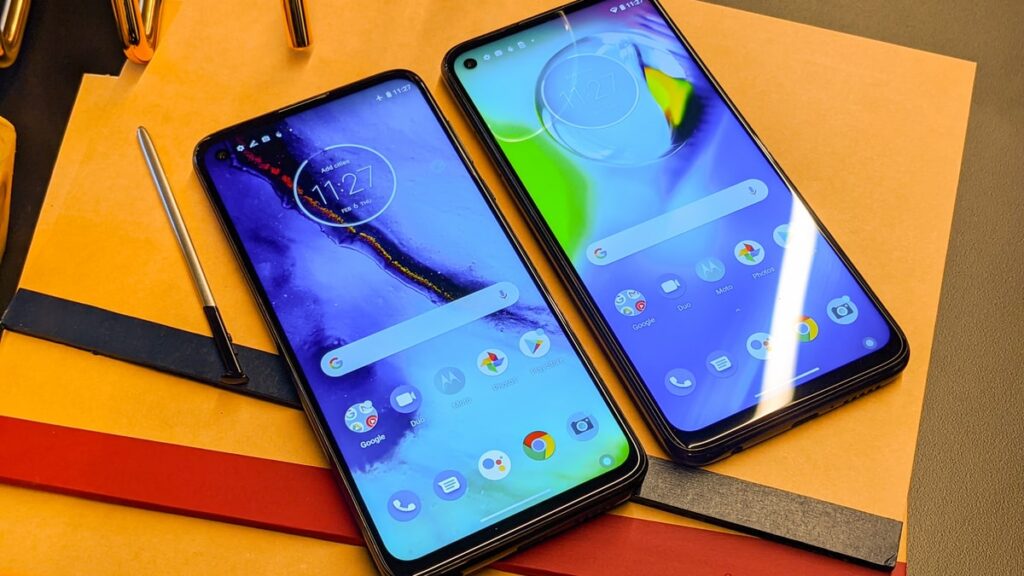
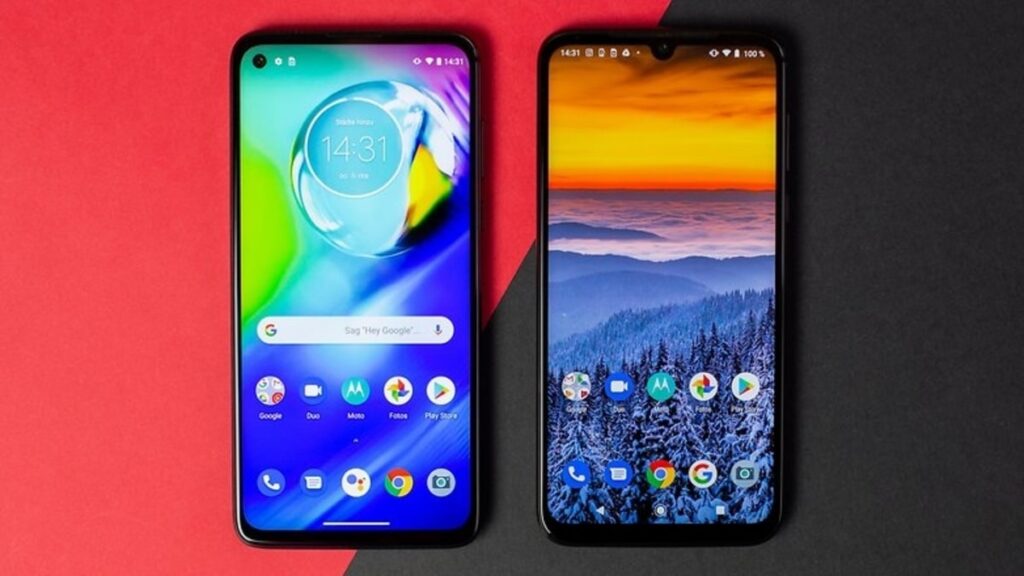
For the past 2 years, Motorola has been releasing new smartphone variants in the Moto G7 series. For consumers looking to buy any of these smartphones, it can be a headache to distinguish them and make the right choice. This brings us to our today’s comparison of the Moto G7 Optimo Maxx vs the Moto G Power.


  • Moto G7 Optimo Maxx VS Moto G Power
  • Moto G7 Optimo Maxx VS Moto G Power
  • Moto G7 Optimo Maxx VS Moto G Power

Generally speaking, it would not hurt not to know which one is better or worse, but for anyone ready to buy either of these phones, knowing the slightest details and differences will help them make a better choice in buying either of the phones.

Previously we covered LG K31 Rebel, so you may want to check it out here.

Comparison of Moto G7 Optimo Maxx and Moto G Power

So, do these smartphones only differ with model names or what? What is actually the difference between these 2 phones? And moreover, which of them is better?

The answer to those questions in the previous paragraph will not just be obvious by giving a look or two at both phones.

To answer the earlier asked questions, we will have to carry out an in-depth analysis of the specifications (performance, physical attributes, cameras, battery lives, displays etc) of both smartphones.

Specifications of Moto G7 Optimo Maxx and Moto G Power

Within this subsection, we will be covering the overall capabilities of the Moto G7 Optimo Maxx vs the Moto G Power.

Physical Attributes

The Moto G Power has a maximum width of 7.58 cm, a maximum length of 15.98 cm, a maximum thickness of 0.96 cm and an overall dimension of 116.28 cm cube.

The length of the Moto G Power is about the size of an average pocket. This makes it suitable to carry around, even without a purse or bag.

The 116.28 cm cube body of the Moto G Power, embodies a 199 g weight. Being almost 200 g, this phone can feel quite heavy to carry around in your hand, a purse or bag.

As for the Moto G7 Optimo Maxx, its maximum width is 7.6 cm, its maximum length is 16.08 cm, its maximum thickness is 0.94 cm and its overall dimension is 120.01 cm cube.

Video Source: Maxiroc
Moto G7 Power VS Moto G Power

The length of the Moto G7 Optimo Maxx makes it a little big for a pocket but should fit just fine in a purse or bag.

The 120.01 cm cube body of the Moto G7 Optimo Maxx has a 198 g weight. Just like the Moto G Power, the Moto G7 Optimo Maxx can feel quite heavy to carry in your hand, a purse or small bag since it is around 200 g.

Looking at the weight and size of both phones, the Moto G Power has a smaller size but weighs a little more than the Moto G7 Optimo Maxx. This makes the Moto G Power fall within the same portability range as the Moto G7 Optimo Maxx.

Software

In terms of software capabilities, the Moto G Power uses Android 10 (Android Q) operating system, has a Face Recognition software, a Navigation software, a Voice Command software and an Intelligent Personal Assistant.

As for the Moto G7 Optimo Maxx, in terms of software, it features Android 9.0 (Android Pie) operating system, has a Face Recognition software, a Navigation software, a Voice Command software and an Intelligent Personal Assistant, as the Moto G Power.

These 2 phones come very close in terms of software, and the only but biggest difference between them are their operating systems. The Moto G Power’s Android 10 operating system clearly surpasses the Moto G7 Optimo Maxx’s Android 9 operating system.

CPU & GPU

In terms of CPU, the Moto G Power uses a 2000 MHz Qualcomm Snapdragon 665 SM6125 (Trinket), 2019, 64 bit, octa-core, 11 nm processor. Its GPU is a Qualcomm Adreno 610 GPU, with dedicated graphics memory of 500 MB.

As for the Moto G7 Optimo Maxx, in terms of CPU, it posses a 1800 MHz processing frequency, which is delivered by a 14 nm Qualcomm Snapdragon 632 octa-core 64-bit processor. Its GPU is a Qualcom 125 MB dedicated Qualcomm Adreno 506 GPU.

Here, we can again clearly see that there is absolutely no contest. The Moto G Power’s 2000 MHz CPU and 500 MB dedicated GPU absolutely crush the Moto G7 Optimo Maxx’s 1800 MHz CPU and 125 MB dedicated GPU.

RAM & STORAGE

Throwing a look at RAM, the Moto G7 Optimo Maxx has an LPDDR3 SDRAM chip with a frequency of 933 MHz. The memory of its RAM is 3 GB.

Talking about the Moto G power, it has an LPDDR4 SDRAM chip with a frequency of 1866 MHz. The memory of its RAM is 4 GB.

As for the storage of both phones, the Moto G Power has 64 GB internal storage capacity, while the Moto G7 Optimo Maxx has 32 GB internal storage capacity.

From the above memory comparison, we can see that, once more, the Moto G Power’s 1866 MHz frequency and 4 GB RAM, clearly surpasses the Moto G7 Optimo Maxx’s 933 MHz frequency and 3 GB RAM.

Display

The Moto G Power’s display has a 379 pixel density, a full horizontal bezel width of 0.67 cm, a diagonal display of 16.25 cm, a diagonal display area of 83.8% and resolution of 1080 x 2300. The display of this phone also has a special feature of being scratch resistant.

The Moto G7 Optimo Maxx’s display has a 279 pixel density, a full horizontal bezel width of 1.04 cm, a diagonal display of 15.75 cm, a diagonal display area of 76.9% and resolution of 720 x 1570. This phone also features a gorilla screen, which is highly scratch resistant.

Again, the Moto G power surpasses the Moto G7 Optimo Maxx, in terms of display. From the previous paragraphs above, we can clearly see that the Moto G power’s display has a higher pixel density, a bigger diagonal display, a higher diagonal display area ratio and a higher resolution.

Audio of Moto G7 Optimo Maxx and Moto G Power

Looking at the audio capacity of both smartphones, the Moto G Power and the Moto G7 Optimo Maxx have almost the same input and output capacity. They both have stereo microphones and 3.5 mm audio output jack.

The difference between these two phones lies in their loudspeakers.The Moto G Power has a stereo loudspeaker, while the Moto G7 Optimo Maxx has a mono loudspeaker.

In general, stereo, implies sound in all directions (360 degree transmission), while mono implies sound in a limited direction (defined transmission angle).

Taking the previous paragraph into consideration, it implies that the Moto G Power’s loudspeaker will produce a better user sound experience with a 360 degree sound transmission, than the Moto G7 with a defined sound transmission angle.

Specific Absorption Rate

The Moto G Power has a SAR head of 1.19 W/kg, a SAR body of 1.430 W/kg and a SAR hotspot of 1.44 W/kg. In comparison, the Moto G7 Optimo Maxx has a SAR head of 0.42 W/kg, a SAR body and hotspot of 1.44 W/kg.

In general, the lower the specific absorption rate, the better it is for human health. Taking into consideration the SAR of both phones, we see that the Moto G7 Optimo Maxx has a lower SAR head, and body than the Moto G Power. In terms of SAR hotspot, they have the same measurement.

The specific absorption rate is a quite broad and complicated topic, which we are not going be looking at in detail, but you can always get more understanding of it here.

Navigation System

Both the Moto G7 Optimo Maxx and the Moto G Power have sophisticated incorporated navigation systems, with complimentary GPS services and supported GLONASS protocols.

However, there’s a slight advantage the Moto G Power has over the Moto G7 Optimo Maxx. The Moto G Power’s navigation systems also supports the Galileo Services, meanwhile the Moto G7 Optimo Maxx’s navigation system does not.

Camera

The camera prowess of the Moto G Power excels, with a rear camera of 15.9 MP, an image sensor pixel size of 1.12 micrometers, an aperture of f/1.7 and a 1.0 x digital zoom.

It has a 4k video recording capability, precisely 3840 x 2160 pixels at 30 frames per seconds. It also has a front camera which can produce up to 15.9 MP of image quality.

On the other hand the camera prowess of the Moto G7 Optimo Maxx excels with a rear camera of 12.0 MP, an image sensor pixel size of 1.25 micrometers, an aperture of f/2.0 and an 8.0 x digital zoom.

It has a 4k video recording capability, precisely 3840 x 2160 pixels at 30 frames per seconds. It also has a front camera which can produce up to 8.0 MP of image quality.

In terms of camera, the Moto G7 Optimo Maxx surpasses the Moto G Power with its optical zoom capabilities, while the Moto G Power surpasses the Moto G7 Optimo Maxx with its larger aperture and image pixel capabilities. Apart from the camera capabilities of both phones which we have just mentioned, their other capabilities are the same.

Sensors of Moto G7 Optimo Maxx and Moto G Power

In terms of sensors, both smartphones have sophisticated incorporated sensor systems, such as their in-built compasses, their in-built accelerometers and their in-built gyroscopes.

They also incorporate biometric sensors such as, fingerprint sensors, proximity sensors and light sensors.

Security

If you are the type who is keen about security weaknesses, don’t worry. Both the Moto G7 Optimo Maxx and the Moto G Power, have a wide variety of security options such as;

  • Pin lock.
  • Face lock.
  • Password lock.
  • Fingerprint lock.
  • Find my device (with google maps).

Battery

The Moto G Power and the Moto G7 Optimo Maxx both use in-built Lithium ion polymer battery technology with high capacities of up to 5000 mAh.

Connectivity

The Moto G Power can be used in both urban and remote areas of many countries, as it supports most of the preferred cellular bands of many companies in many countries. It supports the following connectivity specifications.

Network:

  • USB: 2.0
  • Bluetooth: 5.0
  • SIM CARD: Nano-SIM (4FF)
  • Wireless LAN: 802.11a, 802.11n, 802.11g, 802.11n, 802.11ac.

Complementary Services:

  • Voice transmission
  • Voice speaker
  • Vibrate
  • Speakerphone
  • ANC
  • HD Voice

Supported Cellular Data Links:

  • GPRS
  • EDGE
  • UMTS
  • W-CDMA
  • HSUPA
  • HSUPA 5.8
  • HSDPA
  • HSPA+ 21.1
  • HSPA+ 42.2
  • DC-HSDPA
  • cdmaOne
  • CDMA2000 1x
  • CDMA2000 1xEV-DO
  • CDMA2000 1xEV-DO Rev A
  • LTE 100/50
  • LTE 150/50
  • LTE 300/50
  • LTE 450/50
  • LTE 600/50

Supported Cellular Bands:

  • GSM850GSM850
  • GSM900GSM900
  • GSM1800GSM1800
  • GSM1900GSM1900
  • UMTS850
  • UMTS900
  • CDMA800
  • CDMA1900
  • CDMA800
  • LTE2100
  • LTE1900
  • LTE1800
  • LTE1700/2100
  • LTE850
  • LTE2600
  • LTE900
  • LTE700
  • LTE800
  • LTE1900
  • LTE850
  • TD-LTE2600
  • TD-LTE1900
  • TD-LTE2300
  • TD-LTE2500
  • LTE1700/2100
  • LTE600

Likewise, the Moto G7 Optimo Maxx can be used in both urban and remote areas of many countries, as it supports most of the preferred cellular bands of many companies in many countries. It should also be noted that both phones support similar connectivity specifications.

The Moto G7 Optimo Maxx supports the following connectivity specifications.

Network:

  • USB: 2.0
  • Bluetooth: 4.2
  • SIM CARD: Nano-SIM (4FF)
  • Wireless LAN: 802.11b, 802.11g, 802.11n.

Complementary Services:

  • Voice transmission
  • Voice speaker
  • Vibrate
  • Speakerphone
  • ANC
  • HD Voice
  • VoLTE

Supported Cellular Data Links:

  • GPRS
  • GPRS C12, EDGE
  • EDGE MSC12, UMTS
  • HSUPA
  • HSUPA 5.8
  • HSDPA
  • HSPA+ 21.1
  • HSPA+ 42.2
  • DC-HSDPA
  • cdmaOne
  • CDMA2000 1x
  • CDMA2000 1xEV-DO
  • CDMA2000 1xEV-DO Rev A
  • LTE 100/50
  • LTE 150/50
  • LTE 300/50
  • LTE 450/50
  • LTE 600/50

Supported Cellular Bands:

  • GSM850GSM850
  • GSM900GSM900
  • GSM1800GSM1800
  • GSM1900GSM1900
  • UMTS850
  • UMTS900
  • CDMA800
  • CDMA1900
  • CDMA800
  • LTE2100
  • LTE1900
  • LTE1800
  • LTE1700/2100
  • LTE850
  • LTE2600
  • LTE900
  • LTE700
  • LTE800
  • LTE1900
  • LTE850
  • TD-LTE2600
  • TD-LTE1900
  • TD-LTE2300
  • TD-LTE2500
  • LTE1700/2100
  • LTE600

Price & Package

The Moto G Power generally costs a warping price of about $ 249.99, which is quite expensive, compared to the Moto G7 Optimo Maxx, which costs just about $ 180.

Both the Moto G7 Optimo Maxx and the Moto G Power come with a wall charger travel adapter, a Micro USB cable and a user manual in each of their sales package.

  • The user manual of the Moto G Power can be found here.
  • The user manual of the Moto G7 Optimo Maxx can be found here.

What Users May Not Like About The Moto G7 Optimo Maxx

  • Bluetooth version is just 4.2.
  • Battery is non-user replaceable.
  • Does not support Galileo services.
  • Does not support WI-FI protocols: 802.11 a and ac.
  • Ingress protection from solid materials: Non-Standard.
  • Ingress protection from liquid substances: Nonstandard.

What Users May Not Like About The Moto G Power

  • Abscence of optical zoom.
  • Battery is non-user replaceable.
  • Photos are disrupted due to noise.

Moto G7 Optimo Maxx VS Moto G Power Summary

Well, we are about to close this article. But before we close, we will like to summarise all our points with a quick chart and quick summary tables, in order to help you have better a grasp of the literature.

Pros of the Moto G7 Optimo Maxx

  • Good Audio.
  • Good display.
  • Great battery.
  • Excellent price.
  • Good software.
  • Good portability.
  • Excellent camera.
  • Excellent sensors.
  • Excellent Security.
  • Good Connectivity.
  • Great performance.
  • Excellent SAR rating.
  • Good navigation system.

Cons of the Moto G7 Optimo Maxx

  • Bluetooth version is just 4.2.
  • Battery is non-user replaceable.
  • Does not support Galileo services..
  • Ingress protection from solid materials: Non-Standard.
  • Ingress protection from liquid substances: Non-standard.

Pros & Cons Summary Table of the Moto G7 Optimo Maxx

PROSCONS
GOOD AUDIOBLUETOOTH VERSION IS JUST 4.2
GOOD DISPLAYDOES NOT SUPPORT GALILEO SERVICES
EXCELLENT BATTERYDOES NOT SUPPORT WI-FI PROTOCOLS: 802 a & c
EXCELLENT PRICEINGRESS PROTECTION FROM SOLID MATERIALS: NON-STANDARD
GOOD SOFTWAREINGRESS PROTECTION FROM LIQUID SUBSTANCES: NON-STANDARD
GOOD PORTABILITY
EXCELLENT CAMERA
EXCELLENT SENSORS
EXCELLENT SECURITY
EXCELLENT CONNECTIVITY
GREAT PERFORMANCE
EXCELLENT SAR RATING
GOOD NAVIGATION SYSTEM
Moto G7 Optimo Maxx Pros & Cons Summary Table

Pros of the Moto G Power

  • Good price.
  • Great display.
  • Great Security.
  • Excellent Audio.
  • Excellent battery.
  • Great SAR rating.
  • Excellent camera.
  • Excellent sensors.
  • Excellent software.
  • Excellent portability.
  • Excellent Connectivity.
  • Excellent performance.
  • Great navigation system.

Cons of the Moto G Power

  • Digital zoom is absent.
  • Battery is non-user replaceable.

Pros & Cons Summary Table of the Moto G Power

PROSCONS
GOOD PRICELACK OF DIGITAL ZOOM
GREAT DISPLAYBATTERY IS NON-USER REPLACEABLE
GREAT SECURITY
EXCELLENT AUDIO
EXCELLENT BATTERY
GREAT SAR RATING
EXCELLENT CAMERA
EXCELLENT SENSORS
EXCELLENT SOFTWARE
EXCELLENT PORTABILITY
EXCELLENT PERFORMANCE
GREAT NAVIGATION SYSTEM
Moto G Power Pros & Cons Summary Table

Specifications [SPECS] Summary Table of the Moto G7 Optimo Maxx VS Moto G Power

Find a summary of all the specifications of the Moto G7 Optimo Maxx VS Moto G Power in the table below.

TOPICDOMAINMOTO G7 OPTIMO MAXXMOTO G POWERBETTER DEVICE
PORTABILITYWIDTH7.6 cm7.58 cmMoto G Power
LENGHT16.08 cm15.98 cmMoto G Power
THICKNESS0.94 cm0.96 cmMoto G7 Optimo Maxx
DIMENSION120.01 cm cube116.28 cm cubeMoto G Power
MASS198 g199 gMoto G7 Optimo Maxx
SOFTWAREANDROID 10 OSMoto G Power
NAVIGATION————–
FACE RECOGNITION————–
VOICE COMMAND————–
PERSONAL ASSISTANT————–
PERFORMANCECPUQualcomm Snapdragon 632 SDM632
1800 MHz
Qualcomm Snapdragon 665 SM6125 [Trinket]
2000 MHz
Moto G Power
GPU83.8%mm Adreno 506 GPUQualcomm Adreno 610 GPU
Moto G Power
DEDICATED GPU125 MB500 MBMoto G Power
RAMLPDDR3 SDRAM
933 MHz
3 GB
LPDDR4x SDRAM
1866 MHz
4 GB
Moto G Power
STORAGE32 GB64 GBMoto G Power
DISPLAYPIXEL DENSITY279 PPI397 PPIMoto G Power
DISPLAY AREA UTILISATION76.9%83.8%Moto G Power
FULL HORIZONTAL BEZEL WIDTH1.03 cm0.67 cmMoto G Power
DIAGONAL DISPLAY15.75 cm16.25 cmMoto G Power
RESOLUTION720 x 15701080 x 2300Moto G Power
AUDIOLOUDSPEAKERMonoStereoMoto G Power
MICROPHONEStereoStereo————–
AUDIO OUTPUT3.5 mm3.5 mm————–
SARSAR HEAD0.42 W/kg1.19 W/kgMoto G7 Optimo Maxx
SAR BODY1.44 W/kg1.43 W/kgMoto G7 Optimo Maxx
SAR HOTSPOT1.44 W/kg1.44 W/kg————–
SAR TRANSMISSION————–————–————–
NAVIGATION SYSTEMGPS————–
A-GPS————–
QUICK GPS————–
GLONASS————–
GALILEO SERVICEMoto G Power
GEOTAGGING————–
SIMULTANEOUS GPS————–
CAMERABACK CAMERA QUALITY12.0 MP15.9 MPMoto G Power
PIXEL SIZE1.25 micrometers1.12 micrometersMoto G Power
APERTURE SIZEf/2.00f/1.70Moto G Power
DIGITAL ZOOMx 8.0x 1.0Moto G7 Optimo Maxx
VIDEO RESOLUTION3840 x 21603840 x 2160————–
VIDEO FPS30 FPS30 FPS————–
FRONT CAMERA QUALITY8.0 MP15.9 MPMoto G Power
CONNECTIVITY3G————–
5G————–
NFC————–
UTMS————–
WI-FI————–
LTE————–
BLUETOOTH————–
SENSORSFINGER PRINT————–
PROXIMITY————–
LIGHT SENSOR————–
BUILT-IN ACCELEROMETER————–
BUILT-IN GYROSCOPE————–
BUILT-IN COMPASS————–
SECURITYPIN LOCK————–
FACE LOCK————–
PASSWORD LOCK————–
FINGERPRINT LOCK————–
FIND MISSING DEVICE————–
OTHER SECURITY————–————–————–
BATTERYBATTERY CAPACITY5000 mAh5000 mAh————–
PURCHASEPRICE$ 180249.99Moto G7 Optimo Maxx
Moto G7 Optimo Maxx VS Moto G Power Specifications [SPECS] Summary Table

Overall Rating of the Moto G7 Optimo Maxx

Based on all the above analysis, the Moto G7 Optimo Maxx has been given an average rating of 7.9/10.

We calculate our average by adding each individual score of each topic, [as shown in the chart and in the table above] and dividing the scores by the sum of the total scores of all topics, then multiplying the result by 10, to give a score out of 10.

NB: Chart may not be available on the AMP version of our website. If you are on AMP and not seeing the chart, but wish to view it, scroll down to the end of the page and click the “Exit Mobile Version” button.
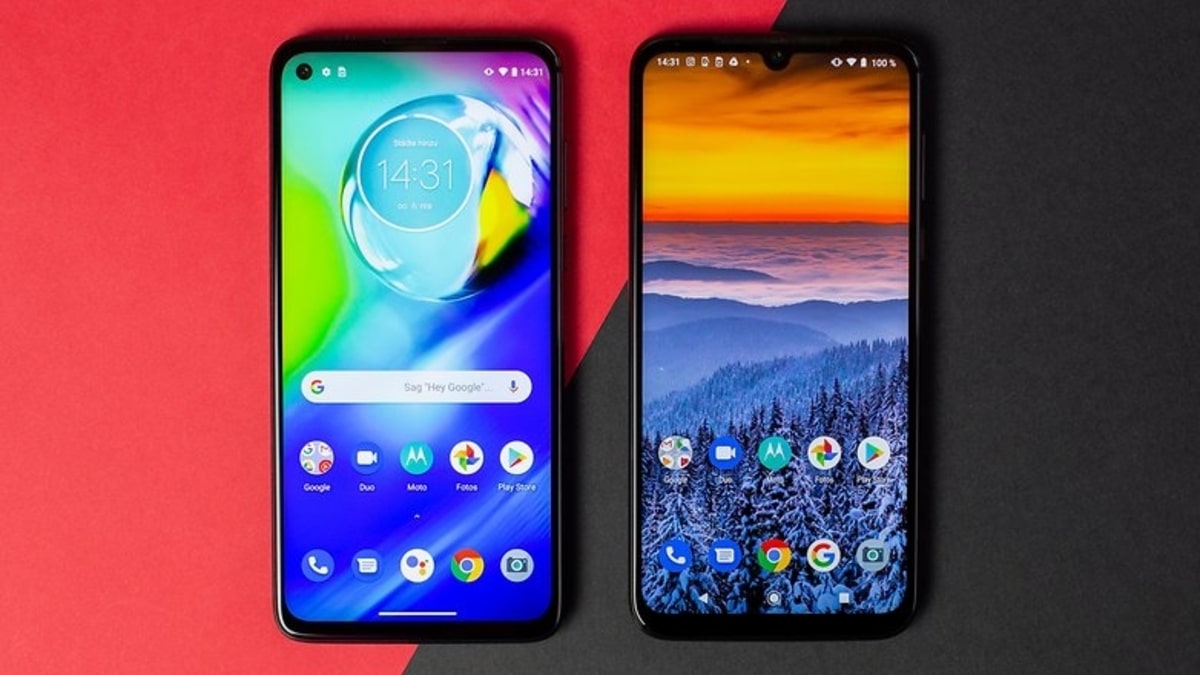
EXPERT RATING

7.9 / 10

Rating: 7 out of 10.

Overall Rating of the Moto G Power

Based on all the above analysis, the Moto G Power has been given an average rating of 8.3/10.

We calculate our average by adding each individual score of each topic, [as shown in the chart and in the table above] and dividing the scores by the sum of the total scores of all topics, then multiplying the result by 10, to give a score out of 10.

NB: Chart may not be available on the AMP version of our website. If you are on AMP and not seeing the chart, but wish to view it, scroll down to the end of the page and click the “Exit Mobile Version” button.
EXPERT RATING

8.2 / 10

Rating: 8 out of 10.

Extra Information on Moto G7 Optimo Maxx VS Moto G Power

Release Date

  • The Moto G7 Optimo Maxx was announced on the 10th of June 2019 and was released by the end of June 2019.
  • The Moto G Power was announced on the 7th of February 2020 and was released within May 2020.

References

IMAGES:

ARTICLES:

Conclusion

In the end of our analysis of the Moto G7 Optimo Maxx VS Moto G Power, we clearly observe that the Moto G Power is with no contest at all, better than the Moto G7 Optimo Maxx, in terms of performance.

But the Moto G7 Optimo Maxx is economically better, given that its cost for performance is way higher than that of the Moto G Power’s.

If you are more concerned about performance and less about budget, then the Moto G Power is…

DEFINITELY THE BETTER OPTION

Other Interesting Articles

Frequently Asked Questions And Answers

  1. How big is the Moto G7 Optimo Maxx?

    The Moto G7 Optimo Maxx has a maximum width of 7.6 cm, a maximum length of 16.08 cm, a maximum thickness is 0.94 cm and its overall dimension is 120.01 cm cube.

  2. Which is the best Moto G to buy?

    If you are more concerned about performance and less about budget, then the Moto G Power is definitely the better option.

  3. What makes the Motorola water resistant?

    It possesses an ingress protection from liquid substances.

  4. Is Moto G Power same as Optimo Maxx?

    No, as shown in our Moto G7 Optimo Maxx VS Moto G Power article, these 2 phones greatly differ from each other.

  5. Is Motorola Moto G7 Optimo Maxx a good phone?

    Yes, it is a good phone, and will perform most, if not all tasks demanded by the average user. And relatively to it’s performance, it is sold at a very good price.

  6. Is the Moto G7 Optimo Maxx waterproof?

    No, it is not. But it possesses an ingress protection from liquid substances, which actually means it can resist damage caused by liquids splashes on it.

LG K31 Rebel Review [Specs & Analysis]

0
LG K31 Rebel Review [Analysis & Specs]
Image Source: LG

LG K31 Rebel Review [Specs & Analysis]

Introduction

Of recent, LG has been releasing new variants of the LG K series. For consumers looking to buy this smartphone, it can be a headache to know exactly which is which, and make the right choice when buying them. This brings us to our today’s review of the LG K31 Rebel.


  • LG K31 Rebel Review [Analysis & Specs]
  • LG K31 Rebel Review [Analysis & Specs]
  • LG K31 Rebel Review [Analysis & Specs]

Generally speaking, it wouldn’t hurt not to know any technical details about the LG K31 Rebel, but for anyone ready to buy this phone, knowing the slightest details and differences will help them make a better choice when buying this phone.

Previously we covered Moto G7 Optimo Maxx VS Moto G7 Power, so you may want to check it out here.

Overview of LG K31 Rebel

Well, if you have not yet left this website and are still here reading this article, it means you are probably curious about certain aspects of this phone. certain questions like; what actually makes up or brings down this smartphone? Is this smartphone even worthy to buy?

The answers to the questions in the previous paragraph will not just be obvious by giving a look or two at this phone.

To answer the earlier asked questions, we will have to carry out an in-depth analysis of the specifications (performance, physical attributes, cameras, battery lives, displays etc) of this smartphone.

Specifications of LG K31 Rebel

Within this subsection, we will be covering the overall capabilities/abilities of the LG K31 Rebel.

Physical Attributes

The LG K31 Rebel has a maximum width of 7.11 cm, a maximum height of 14.78 cm, a maximum thickness of 0.86 cm and an overall dimension of 90.37 cm cube.

The length of this phone is about the size of an average pocket. This makes it suitable to carry around, even without a purse or bag.

The 90.37 cm cube body of this phone, embodies a 146 g weight. Being way under 200 g, this phone feels comfortable when carried around in your hand, purse or bag.

Video Source: Kevin Breeze
LG K31 REBEL

Software

The LG K31 Rebel has the major software characteristics of a performant smartphone. It has the Android 10 (Android Q) Operating System installed in it. It also incorporates pre-installed software like:

  • Navigation Software.
  • Voice Command Software.
  • Face Recognition Software.
  • Personal Intelligent Virtual Assistant.

CPU & GPU

In terms of CPU and GPU, the LG K31 Rebel really packs a punch, which is really surprising for a smartphone with such a modest price.

This phone has a 2000 MHz processing frequency, which is delivered by a 12 nm Arm Cortex-A53 octa-core 64-bit processor. It also uses an IMG PowerVR GE8320 as its GPU, which is actually quite good at handling highly demanding mobile games.

RAM & STORAGE

Throwing an eye at the RAM, the LG K31 Rebel has an LPDDR3 SDRAM chip with a size of 2 GB.

As for the Storage capacity, the LG K31 has 32 GB of disk capacity. While it has quite good internal storage capacity, not all of it is usable. The phone will permit you to use only about 17 GB of internal storage.

At this point in time you may be thinking that the storage may be one of the downs of this phone, but no, it is not much of a big deal.

Actually you can solve the storage problem by buying a relatively cheap microSDXC. The phone supports storage capacity expansion using micro SD cards of up to 32 GB.

Display

Talking about probably the most important part of the LG K31 Rebel’s hardware, we are going to be taking a closer look at this phone’s pixel density and resolution.

The display area used by the LG K31 Rebel is about 77.1% of its display area, which is quite high, considering the average display area usage is about 70%. This gives room for more content to be displayed and interacted with, on the screen.

The LG K31 Rebel’s display technology type is an IPS LCD. It has a display size of 5.7 inches. Its resolution is 1520 x 720 pixels (Full HD) and finally, its screen ratio is 19:9, its pixel density of 295 PPI.

From the above specifications, you can see that it has a screen which is more oriented towards providing a great user experience. The screen provides the user with a good video and image experience, with it’s high pixel density and Full HD resolution.

Audio System of the LG K31 Rebel

Looking at the audio system of the LG K31 Rebel, it has a stereo microphone, mono loudspeakers and 3.5 mm jack audio output. It also has an additional microphone which filters out noise.

Specific Absorption Rate [SAR]

The LG K31 Rebel has a SAR head of 0.47 W/kg, a SAR body of 0.91 W/kg, a Simultaneous Transmission SAR of 1.26 W/kg and a hotspot SAR of 1.02 W/kg.

In general, the lower the specific absorption rate, the better it is for human health. Taking into consideration the SAR of this phone, we see that this phone has an acceptable SAR for head, body, transmission and hotspot.

The specific absorption rate is a quite broad and complicated topic, which we are not going be looking at in detail, but you can always get more understanding of it here.

Navigation System

The LG K31 Rebel has a simple navigation system incorporated within it. It possesses a GPS and an A-GPS. Well, this is to be expected from all modern phones, so, nothing much to say under this section.

Camera

The camera prowess of this phone excels, with a rear dual camera of 13.0 MP, a pixel size of 1.12 micrometres, an aperture of F1.8 and a sensor size of 1/3″.

It has a Full HD video recording capability, precisely 1920 x 1080 resolution at 30 frames per seconds.

It also has a front camera which can produce up to 5.0 MP of image quality with Full HD standards of 1920 x 1080.

The back camera is just okay in terms of image capturing prowess, but the front camera is just too poor, for a phone of this quality.

Even though the manufacturers decided to balance the weak pixelling of the front camera with a high resolution, the results are still not convincing.

Connectivity

The LG k31 Rebel can be used in both urban and remote areas of many countries, as it supports most of the preferred cellular bands of many companies in many countries. It supports the following connectivity specifications.

LTE (FDD):

  • Bands 2(1900)
  • 4(AWS-1)
  • 5(850)
  • 12(700 a)
  • 13(700 c)
  • 25(1900+)
  • 26(850+)
  • 66(AWS-3)
  • 71(600)

UMTS:

  • Bands 1(2100)
  • 2(1900)
  • 4(1700/2100)
  • 5(850)
  • 8(900)

Network:

  • Bluetooth: 5.0
  • Wi-Fi: 802.11 b, g, n; Wi-Fi Direct, Hotspot
  • USB: microUSB, USB 2.0
  • SIM: Nano SIM
  • UMA (Wi-Fi Calling)
Data Speed:

  • LTE-A Cat 7 (300/100 Mbit/s)
  • HSDPA+ (4G) 42.2 Mbit/s
  • HSUPA 5.76 Mbit/s

LTE (TDD):

  • Bands 41(2600+)

Sensors of LG K31 Rebel

In terms of sensors, this phone has sophisticated incorporated sensor systems, such as its in-built compass, its in-built accelerometer and its in-built gyroscope.

It also incorporate biometric sensors such as, fingerprint sensor, proximity sensor and light sensor.

Security

If you are the type who is keen about security, don’t worry. The LG K31 Rebel has a wide variety of security options, such as;

  • Pin lock.
  • Face lock.
  • Password lock.
  • Fingerprint lock.
  • Find my device (with google maps).

Battery

The LG K31 Rebel uses in-built Lion battery technology with an average capacity of 3000 mAh.

The Battery is not replaceable by the user, so you may have to look for a good maintenance support for your hardware.

Price & Package

This phone generally costs about $ 150, which is as I earlier said, quite a modest price for such a high performance phone.

This phone comes with a wall charger travel adapter, a Micro USB cable and a user manual in its sales package.

What Users May Not Like About The LG K31 Rebel

  • Battery is not user replacable.
  • Does not support dual WI-FI band.
  • Does not support WI-FI protocols: 802.11 a and ac.
  • Only 17 GB of internal storage is available, out of 32 GB in total.

LG K31 Rebel Summary

Well, we are about to close this article. But before we close, we will like to summarise all our points with a quick chart and quick summary tables, in order to help you better digest the literature.

Pros of the LG K31 Rebel

  • Great Audio.
  • Great display.
  • Good battery.
  • Great camera.
  • Great sensors.
  • Excellent price.
  • Great portability.
  • Excellent software.
  • Excellent SAR rating.
  • Excellent performance.
  • Good navigation system.

Cons of the LG K31 Rebel

  • Battery is not user replacable.
  • Does not support WI-FI dual-band.
  • Does not support WI-FI protocols: 802.11 a and ac.
  • Only 17 GB of internal storage is available, out of 32 GB in total.

Pros & Cons Summary Table of the LG K31 Rebel

PROSCONS
GREAT PORTABILITYBATTERY NOT USER REPLACEABLE
EXCELLENT SOFTWAREDOES NOT SUPPORT WI-FI DUAL BAND
EXCELLENT PERFORMANCEDOES NOT SUPPORT WI-FI PROTOCOLS: 802 a & c
GREAT DISPLAYONLY 17 GB OF INTERNAL STORAGE IS AVAILABLE, OUT OF 32 IN TOTAL
GREAT AUDIO
EXCELLENT SAR
GOOD NAVIGATION SYSTEM
GREAT CAMERA
GREAT SENSORS
GOOD BATTERY
EXCELLENT PRICE
LG K31 Rebel Pros & Cons Summary Table

Specifications [SPECS] Summary Table of the LG K31 Rebel

Find a summary of all the specifications of the LG K31 Rebel in the table below.

TOPICDOMAINLG K31 REBEL SPECS
PORTABILITYWIDTH7.11 cm
LENGHT14.78 cm
THICKNESS0.86 cm
DIMENSION90.37 cm cube
MASS200 g
SOFTWAREANDROID 10 OS
NAVIGATION
FACE RECOGNITION
VOICE COMMAND
PERSONAL ASSISTANT
PERFORMANCECPUArm Cortex-A53
2000 MHz
GPUIMG PowerVR GE8320
DEDICATED GPU————–
RAM2 GB LPDDR4 SDRAM
STORAGE32 GB
DISPLAYPIXEL DENSITY295 PPI
DISPLAY AREA UTILISATION77.1%
FULL HORIZONTAL BEZEL WIDTH————–
DIAGONAL DISPLAY————–
RESOLUTION1520 x 720
AUDIOLOUDSPEAKERMono
MICROPHONEStereo
AUDIO OUTPUT3.5 mm
SARSAR HEAD0.47 W/kg
SAR BODY0.91 W/kg
SAR HOTSPOT1.26 W/kg
SAR TRANSMISSION1.02 W/kg
NAVIGATION SYSTEMGPS
A-GPS
QUICK GPS————–
GLONASS
GALILEO SERVICE
CAMERABACK CAMERA QUALITY13.0 MP
PIXEL SIZE1.12 micrometers
APERTURE SIZEF1.8
DIGITAL ZOOM————–
VIDEO RESOLUTION1920 x 1080
VIDEO FPS30 FPS
FRONT CAMERA QUALITY5.0 MP
CONNECTIVITY3G
5G
NFC
UTMS
WI-FI
LTE [FDD]
LTE [TDD]
BLUETOOTH
SENSORSFINGER PRINT
PROXIMITY
LIGHT
BUILT-IN ACCELEROMETER
BUILT-IN GYROSCOPE
BUILT-IN COMPASS
SECURITYPIN LOCK
FACE LOCK
PASSWORD LOCK
FINGERPRINT LOCK
FIND MISSING DEVICE
OTHER SECURITY————–
BATTERYBATTERY CAPACITY3000 mAh
PURCHASEPRICE$ 150
LG K31 Rebel Specifications [SPECS] Summary Table

Overall Rating of the LG K31 Rebel

Based on all the above analysis, the LG K31 Rebel has been given an average rating of 8.2/10.

We calculate our average by adding each individual score of each topic, [as shown in the chart and in the table above] and dividing the scores by the sum of the total of all topics, then multiplying the result by 10, to give a score out of 10.

NB: Chart may not be available on the AMP version of our website. If you are on AMP and not seeing the chart, but wish to view it, scroll down to the end of the page and click the “Exit Mobile Version” button.

EXPERT RATING

8.2 / 10

Rating: 8 out of 10.

Extra Information on LG K31 Rebel

Release Date

LG K31 Rebel was announced on the 10th of August 2020 and was released within November 2020.

References

IMAGES:

ARTICLES:

Conclusion

In the end, our analysis of the LG K31 Rebel clearly points towards very high-end specifications, with a low cost price attached it. So, we can confidently say that this phone is overall very versatile and affordable for its performance.

DEFINITELY WORTH BUYING

Other Interesting Articles

Frequently Asked Questions And Answers

  1. What is the price of the LG K31 rebel?

    The LG K31 Rebel costs about $ 150.

  2. Is the LG K31 rebel sold with a sim?

    Yes, you can decide to buy it with a sim from here:-LG K31 Rebel with airtime bundle on HSNLG K31 Rebel with airtime bundle on QVC

  3. Is the LG K31 rebel sold with airtime?

    Yes, you can decide to buy it with airtime from here:-LG K31 Rebel with airtime bundle on HSNLG K31 Rebel with airtime bundle on QVC

  4. Is the LG K31 rebel sold with a sim and airtime?

    Yes, you can decide to buy it with a sim and airtime from here:-LG K31 Rebel with airtime bundle on HSNLG K31 Rebel with airtime bundle on QVC

  5. Is the LG K31 rebel a good phone?

    Definitely, the LG K31 Rebel is a good phone, because it is overall very versatile and affordable.

  6. Does the LG K31 rebel have wireless charging?

    No, it does not have the ability to wirelessly charge.

  7. When did the LG K31 rebel come out?

    LG K31 Rebel was announced on the 10th of August 2020 and was released within November 2020.

  8. What kind of camera does the LG K31 rebel have?

    The LG K31 Rebel has a back camera quality of 13 MP, a pixel size of 1.12 micrometers, an aperture size of F1.8, a video resolution of 1920 x 1080, a video frame per second rate of 30 FPS and a front camera quality of 5.0 MP.

  9. What kind of processor does the LG K31 rebel have?

    The LG K31 Rebel has a 2000 MHz 12 nm Arm Cortex-A53 octa-core 64-bit processor.

  10. What are the pros and cons of the LG K31 rebel?

    Pros:-Great Audio.-Great display.-Good battery.-Great camera.-Great sensors.-Excellent price.-Great portability.-Excellent software.-Excellent SAR rating.-Excellent performance.-Good navigation system.Cons:-Battery is not user replacable.-Does not support WI-FI dual-band.-Does not support WI-FI protocol 802.11 a and ac.-Only 17 GB of internal storage is available, out of 32 GB in total.

  11. What kind of memory does the LG K31 rebel have?

    The LG K31 Rebel has an LPDDR3 SDRAM chip with a size of 2 GB.

Kaspersky Causing Blue Screen [SOLVED]

0
Kaspersky Causing Blue Screen
Image Source: Bleeping Computer Kaspersky Causing Blue Screen

Kaspersky Causing Blue Screen of Death

[BSOD]

Introduction

Kaspersky is an excellent anti-virus that grants users lots of protection. Their protection ranges from offline to online quality services, which has gained the trust of many users.

But some times Windows OS users may encounter an error known as BSOD (Blue Screen of Death) during or after installing Kaspersky. In this article, we are going to show you how to fix Kaspersky causing blue screen in less than 30 minutes.


https://www.youtube.com/watch?v=Ptf9CSvWSr8
Video Source: SureCanDo
Kaspersky Causing Blue Screen

Description

When this error occurs, the screen background will suddenly become blue and will display a message like ”Your PC ran into a problem, and needs to restart. We’re just collecting some error info, and then we’ll restart for you”.

This message may also come along with an error code like ”0xc000002fa”. This tends to be frustrating since you will continue to see the blue screen, error message over and over even if you restart your PC.

BSOD-Windows-10
BSOD Windows 10

Versions to Be Careful With

It was discovered that, this problems usually affect the following Kaspersky products;

  • Kaspersky Anti-Virus version 6
  • Kaspersky Anti-Virus version 8

Troubleshooting Kaspersky Causing Blue Screen

Time Needed : 30 minutes

When the blue screen occurs do not panic, just follow the steps below to quickly and easily fix Kaspersky Causing Blue Screen.

  1. Automatic Repair / Advanced Options

    The first thing to do is, restart your PC in safe mode. To do this, from your blue screen of death window, just restart your PC (using hard power off with your power button if necessary) until you see a window with a title ”Automatic Repair” having 2 buttons namely;The ”Restart” button on the left and the ”Advanced Options” button on the right.Windows 10 OS will automatically launch the ”Automatic Repair” window after 3 times of Boot Up failure or after 3 times of Blue Screen of Death error. When this window pops up, you will have to click on the ”Advanced Options” button on the right, as seen in the image below.Avast BSOD Windows 10!!! How to Fix Easily and Quickly

  2. Choose an Option / Troubleshoot

    After clicking the ”Advanced Options” button, another window with the title ”Chose an Option” will pop up. When this window appears you should see 3 options namely;The ”Continue” button on top, the ”Troubleshoot” button in the middle and the ”Turn off your PC” button at the bottom.Click on the ”Troubleshoot” button in the middle as shown in the image below.Avast-BSOD-Windows-10-How-to-Fix-Easily-and-Quickly-50

  3. Troubleshoot / Advanced Options

    The ”Troubleshoot” window is the next window that will pop up after having clicked the ”Troubleshoot” button on the previous window.At this point, 2 buttons will appear namely;The ”Reset This PC” button at the top, and the ”Advanced Options” button below. Click on the ”Advanced Options” button below, as shown in the following image.Avast BSOD Windows 10!!! How to Fix Easily and Quickly

  4. Advanced Options / Startup Settings

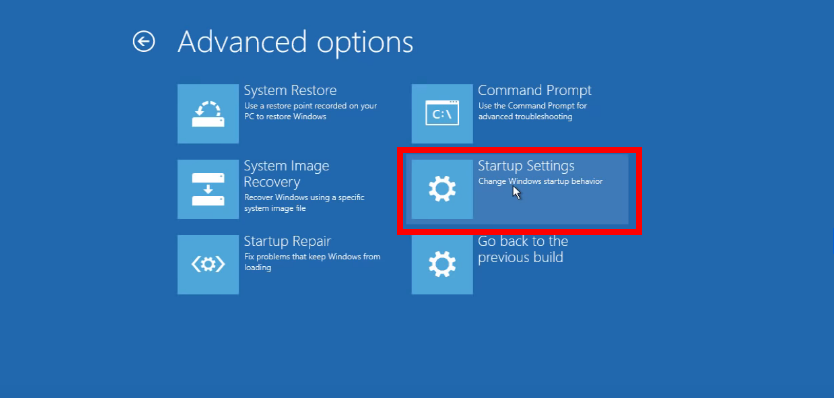
    The ”Advanced Options” window is going to pop up next, after having clicked the ”Advanced Options” button on the previous window.Alright! at this point, 6 buttons will appear and the one you will choose will be the ”Startup Settings” button, found in the middle on the right as illustrated in the image below.Avast BSOD Windows 10!!! How to Fix Easily and Quickly

  5. Startup Settings / Restart

    After clicking the ”Startup Settings” button, the ”Startup Settings” window will pop up. When this window appears you should see a list of the 7 Boot Up modes which Windows 10 OS provides and the ”Restart” button at the bottom right.Clicking on the ”Restart” button at the bottom right, will proceed to restarting the PC and preparing all the Boot Up modes for Windows 10 OS. Click on the ”Restart” Button, as shown below.

  6. Startup Settings / Enable Safe Mode

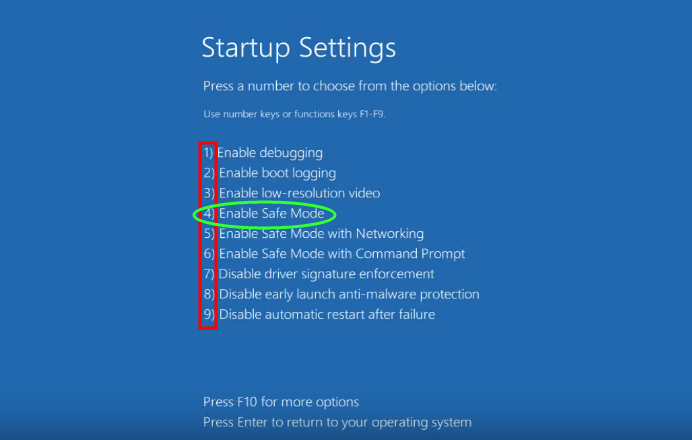
    After clicking the ”Restart” button the PC will restart and the ”Startup Settings” window will pop up again, but this time labeling each Boot Up mode with a number.To Boot Up in safe mode, just press ”4” on your number pad, or press ”’F4” on your function key pad. Note that some PCs will require you to press and hold the ”Fn” key while you press the ”F4” key.

  7. Sign in Windows OS

    After booting up using ”Safe Mode”, Windows OS will Boot Up with its minimum functions. At a certain point, you should see your lock screen.If there is more than 1 user profile, make sure you select the user profile which has administrator rights. If you use a password, then you will have to use it to sign in as usual.After you login to your desktop you may also want to ensure that no other applications are running before you continue the next step.

  8. Start Menu

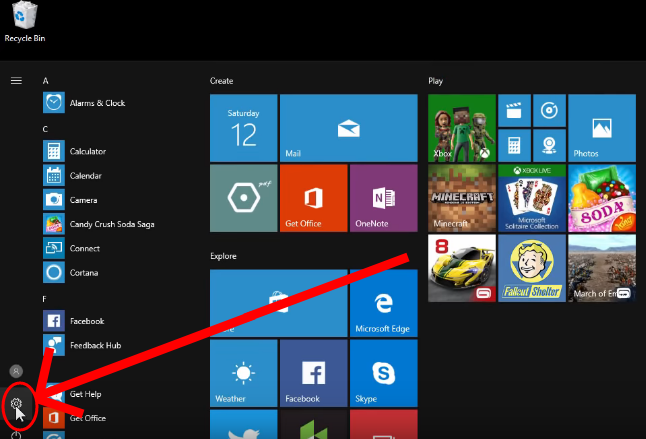
    Open the ”Start” menu by either pressing the ”Windows” key on your keyboard, or by clicking the ”Start” button on the bottom left (on the task bar) of your desktop.Once the ”Start Menu” is opened, click on the ”Settings” button (the gear-like icon) which is just above the power button as illustrated in the image below.

  9. Settings / Apps

    After clicking on the ”Settings” button, the settings panel will pop up with 10 different options in it. Just choose the ”Apps” option, found at the top right corner of the window, as shown in the image below.

  10. Apps and Features / Uninstalling Kaspersky

    Once in the ”Apps and Features” menu, search for the Kaspersky antivirus application and click on it. A dialog box is going to pop up, showing the ”Modify” button on its bottom left and ”Uninstall” button on its bottom right.Click the uninstall button found on the dialog box’s bottom right, to launch uninstallation procedure. If administrator rights are requested by Kaspersky, accept and continue.

  11. Uninstalling Kaspersky Proper

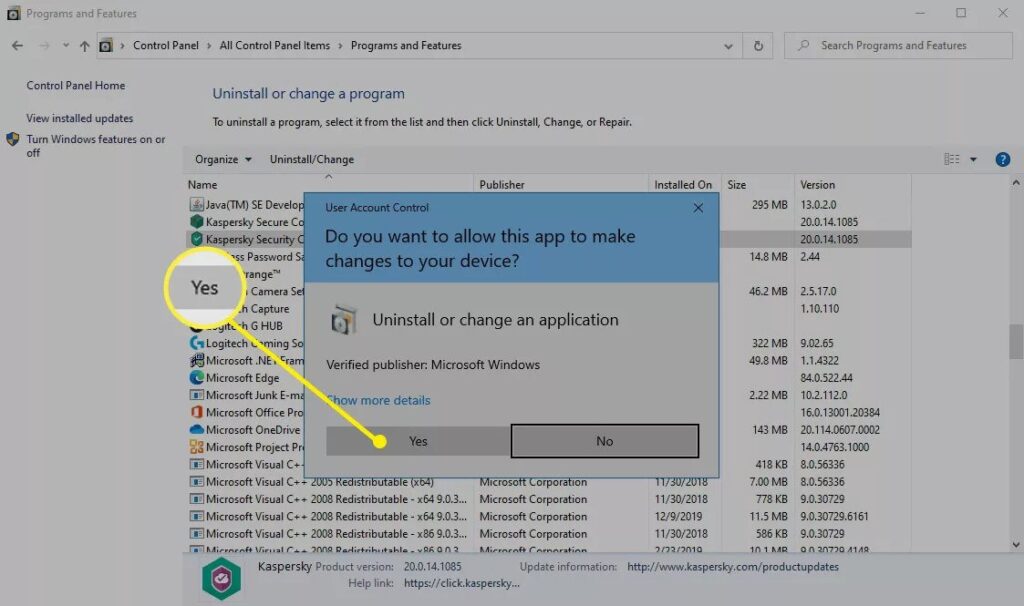
    After validating administrator rights in the pop-up window, the Kaspersky setup wizard will launch. When the wizard launches an ”uninstall” button will be found at the bottom of the setup window.This uninstallation procedure will be most applicable to the following Kaspersky products;Kaspersky Anti-Virus version 6Kaspersky Anti-Virus version 8Click the ”Uninstall” button to remove all Kaspersky files and make sure you click ”Yes” on the dialog box that follows immediately after, as shown in the image below.

  12. Uninstalling Process

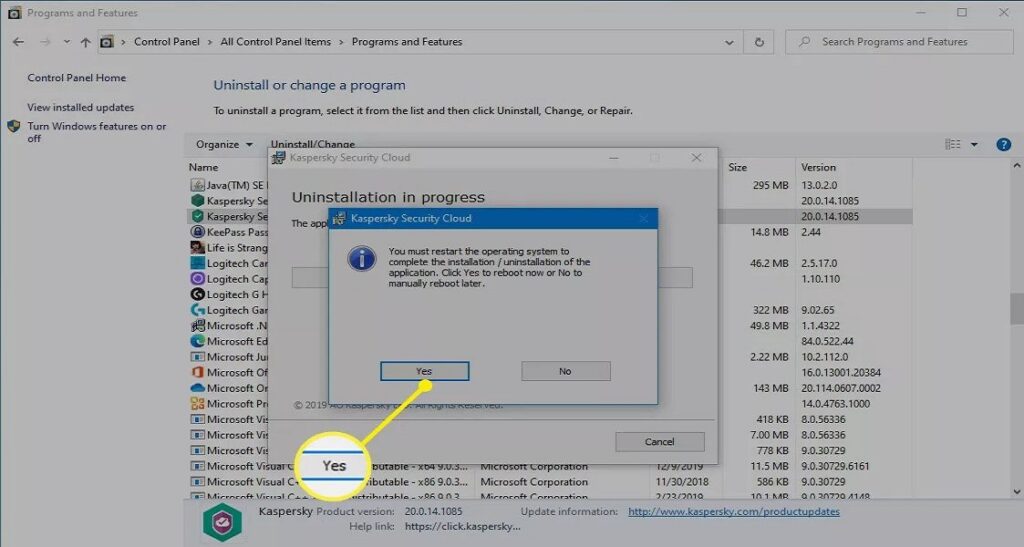
    After clicking the ”Uninstall” button and the ”Yes” button in the resulting dialog box, the uninstalling process will begin and its progress will be indicated with a progress bar.

Conclusion

After restarting your PC, it should be fine and ready for use. We have also answered some commonly asked questions below, so you might want to take a look at them to further understand this problem.

More Info on This Problem Can Be Found Here

So, what do you think about this problem?

Have you ever encountered it?

Did you succeed to fix it?

Feel free to tell us in the comment section.

References

Other Interesting Articles

Some Frequently Asked Questions and Their Answers

  1. What causes blue screen crash dump?

    It is caused by a hardware device, its driver, or any related software.

  2. How do I fix Kaspersky installation error?

    a) Create a restore point.b) Get your activation code for your Kaspersky product.c) Delete all files of previously installed product versions.d) Finally, re-install your Kaspersky anti-virus and re-activate it using your activation code.

  3. Can Kaspersky cause blue screen?

    Yes, when there is an incompatibility between your Kasperky version and your current Windows, the installation of Kaspersky can cause blue screen error (BSOD).

  4. Has Kaspersky fixed this issue?

    Yes, Kaspersky released a patch that fixed this problem and makes it safe to perform an online installation of their anti-virus on any Windows PC.

  5. What causes blue screen of death (BSOD) when installing Kaspersky anti-virus?

    This issue is mostly caused by incompatibilities between the user’s current version of windows and the user’s installed version of Kaspersky. To avoid any issues, always install your Kaspersky using an online setup, so as to enable Kaspersky to detect your system’s version and auto-download the most compatible version of Kaspersky which can work with your system. Avoid trying to manually download Kaspersky and install offline.

  6. Can other installed anti-viruses cause Kasperky to cause blue screen of death (BSOD) of death?

    Yes, as far as Kaspersky is concerned, any other anti-virus installed at the same time with Kaspersky may cause this error, due to incompatibility.

  7. Is Ksaperky compatible with windows defender?

    No, windows defender will deactivate itself when any other anti-virus is installed to avoid incompatibility issues.

Touchjet Wave + Lily: Turn A Screen Into Touch Screen

0
Touchjet Wave + Lily
Touchjet Wave + Lily Image Source: Daily Mail

Touchjet Wave + Lily

Introduction

As tech lovers, we at TERRA-X are all in for anything tech and the world is getting flooded with new and innovative ideas everyday.

Some are just surprising while others are just so mind racking that they beat the entire default logic.

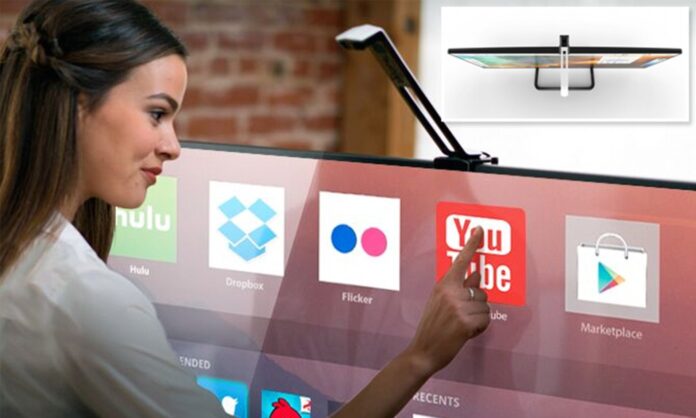
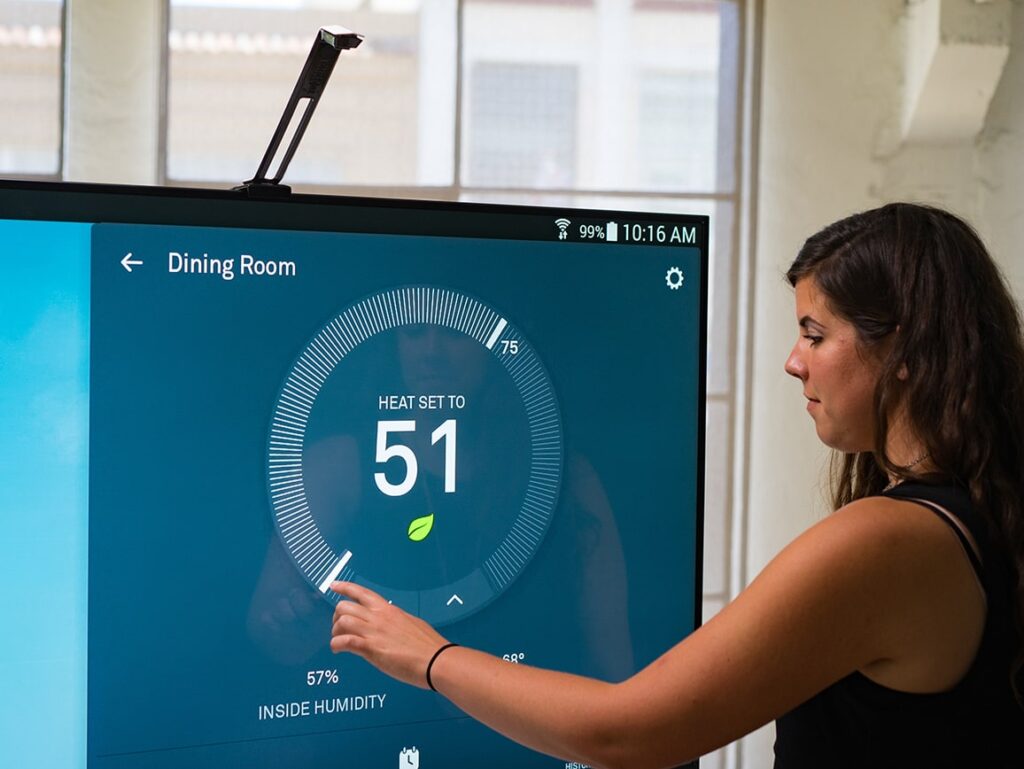
Ever heard of a device that can turn your TV into a big tablet? Probably not, which is where Touchjet wave comes along. Let’s see how it holds up.


  • Touchjet Wave + Lily5
  • Touchjet Wave + Lily7

What Makes Touchjet Wave + Lily So Fantastic?

As earlier mentioned, turning your TV into a big touch screen should be a game-winner all by itself.

Nevertheless, it gives your phone access to get in on the fun too through its personal app. so basically you can manipulate your phone from your TV screen. Mind-blowing right?.

Seeing how the touch screen feature of the smartphone has been its major selling point amongst other things Touchjet Wave + Lily, allows your TV regardless of whether it’s a smart TV or not to obtain this feature.

How Does Touchjet Wave + Lily Work?

There are basically three components involved:

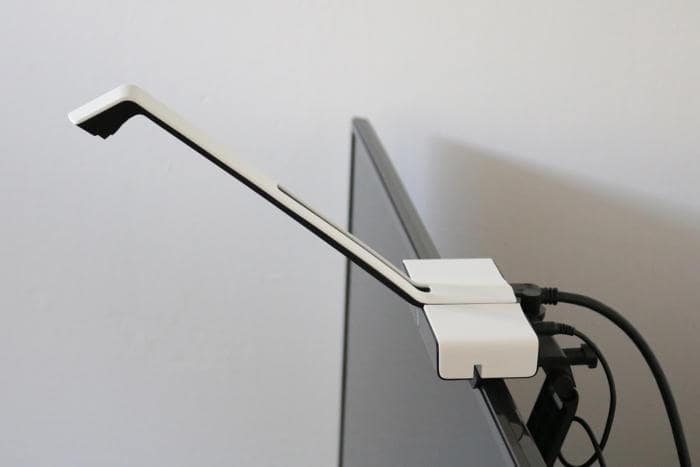
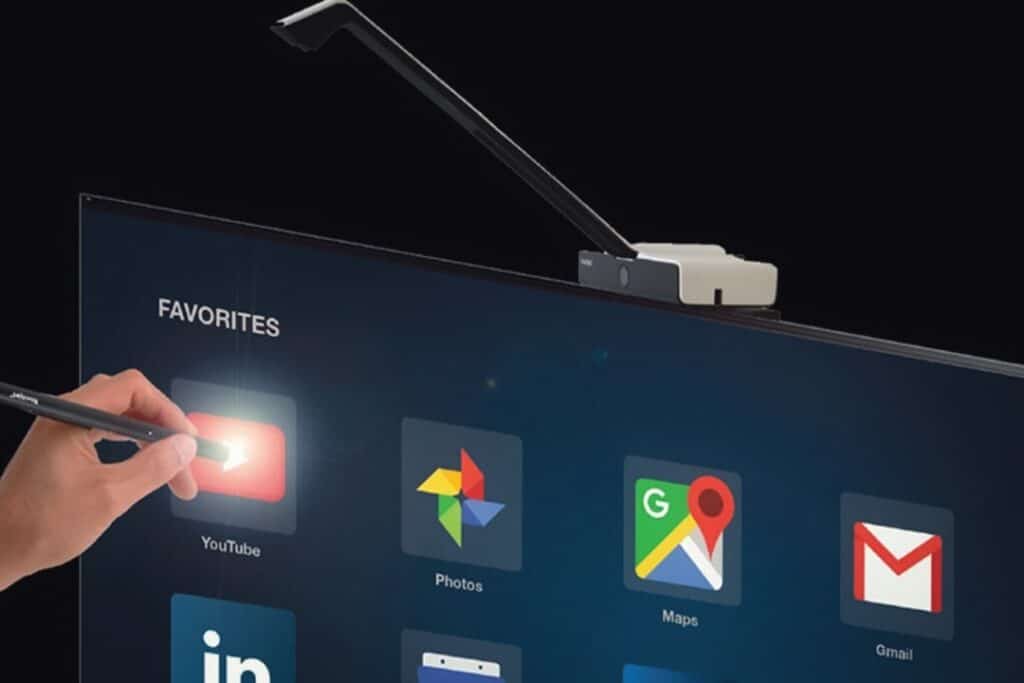
  • The Android box that sits on top of the TV.
  • An infrared emitter, which attaches to the top of the Android box.
  • An infrared sensor, that attaches to the TV’s bezel at the bottom of the display.

The Wave’s touch function basically works by reading the interruption of the infrared beam caused by your hand or fingers.

We have provided a full break down of how you can set up your Touchjet Wave + Lily on your own, cheers.

Image Source: Touchjet
Touchjet Wave + Lily

Getting Started With Touchjet Wave + Lily

  • Gently clean the screen, frame and back of your TV to remove any dust or dirt before installing the Touchjet Wave + Lily.
  • Find the center of your TV. Many models have their logo centered at the top or bottom, which you can use for reference.
  • Twist the Angle Adjustment Knob on the top of the Android Box clockwise until it clicks, then about one-half rotation back counterclockwise.
  • Twist the Bracing Knob on the side of the Stabilizing Arm 2-3 rotations counterclockwise so that the Bracing Rod can move freely.
  • Add the Velcro Tape to the Velcro Pad. Do not remove the Protective Film yet.

Centralise and Secure the Android Box

  • Align and hold the Android Box centered on top of your television. The white arrow on the base below the box indicates the center of the unit to help with this. Press the base fat against the TV frame and hold the box in place for the next step.
  • Slide the Alignment Tool underneath one side of the Android Box with its foot flat against your screen. A snug ft means that the laser projectors in the WAVE unit are correctly aligned with the screen of your TV.
  • Press the Bracing Rod firmly onto the back of the TV. There should be no gap. Tighten the Bracing Knob to fasten the rod in place.
  • Remove the Protective Film from the Velcro Tape attached to the Velcro Pad and keeping the Android Box in place. Press it firmly onto the back of your TV.
  • Slide the Alignment Tool out from underneath the box to remove it.

Connect HDMI and Power Supply

HDMI

Insert one end of your HDMI cable into the HDMI Port on the back of the Android
Box, and the other into an HDMI Port on your TV. Note: the plug will not go all the way into the box, do not try to push it in further once the red power light comes on.

Power Supply

  • Insert the DC plug on the WAVE AC Adapter cord into the DC Input connector on the back of the Android Box.
  • Insert the AC plug into a 120V AC power outlet. Note: we recommend plugging your WAVE into a power strip so that you can easily turn the device on and off.

Connect the Touchjet Wave + Lily Arm and Align the Infrared Wall

  • Connect the Touchjet Wave + Lily Arm to the top of the Android Box by carefully place the lip at the base of the arm into the rectangular opening atop the box. The Touchjet Wave + Lily Arm should snap into place so that there is no gap between the arm and the box.
  • Green Light – indicates that the Android Box is in the correct position.
  • No Light – ensure that the WAVE arm is snapped into place tightly and that the Alignment Tool can still fit between the box and the TV.
  • Yellow Light – can indicate that you have adjusted too far. Twist the Angle Adjustment Knob clockwise until the light turns green.
  • Red Light – slowly turn the Angle Adjustment Knob counterclockwise until the sensor.
Touchjet Wave + Lily
Image Source: Pinterest

Pairing Your Phone or Tablet With the WAVE

  • Download the free Touchjet App using your smartphone or tablet. You will use this as a smart remote to complete the setup process for the WAVE.
  • Turn on your TV and set its input source to the HDMI channel connected to the WAVE.
  • Go to your phone or tablet’s Wi-Fi settings menu and connect to the Wi-Fi hotspot broadcast by your WAVE (see left and center images below). Note: The name of this network should also appear in the top right corner of the WAVE screen.
  • Open the Touchjet App on your smartphone or tablet. Under Touchjet Devices, you will see your WAVE listed. Tap Touchjet WAVE-XXXX to connect the two devices (see right image). You may need to refresh the page using the button in the top right corner and wait a moment for the WAVE to appear on the device list.

Adjust Your Screen Size

  • Using the app menu within the Touchjet App on your phone or tablet, launch the WAVE’s display Settings app.
  • Using the touch pad function, select Display Position.
  • Now tap the – / + to adjust the screen size until it fits your TV screen.

Touch Screen Calibration

  • In the Settings menu of the Touchjet App, press Start Calibration.
  • You can now set aside your phone or tablet, as the next few steps will be done directly on your TV screen using touch.
  • You are about to teach your WAVE where it will find the borders of your screen and what to
  • perceive as touch. As such, it is important to avoid sending the WAVE unwanted IR signals during calibration. You should make sure no very bright lights shine on your screen during the process, and that you minimize movements off to the sides of the TV until you finish.
  • For best results, stand in front of your TV and press the indicated circles on the screen with one finger, straight on.
Video Source: Sam’s CyberZone
Touchjet Wave + Lily

What Users Say About the Touchjet Wave + Lily?

Despite its ingenuity and unique nature, most customers don’t appear too happy with the end product. We gathered some of the most common praise points and areas of criticism below.

Pros

  • Great way to let kids play games.
  • Very helpful in a presentation as simply tapping on the screen is miles better than clicking on your computer.

Cons

  • The sensor isn’t accurate enough and often misses the mark by an inch or two.
  • Difficult to set up.
  • Very noisy.
  • Very few apps that it can support.
  • not very affordable

Requirements

Below are some extra information on the Touchjet Wave + Lily.

Hardware Requirements

  • 2.0GHz Quad-Core ARM Cortex-A9.
  • 2GB DDR3 Memory.
  • 16GB Flash Storage.
  • Optical Touch Sensor built in.
  • Wi-Fi (802.11 b/g/n).
  • Bluetooth 4.0 BLE.
  • An optical touch sensor built in, supports four touchpoints.
  • 2 LILY Digital Pens.

Software Requirements

  • Touchjet UI.
  • Android 4.4 Kitkat.
  • Use Touchjet App on Smartphone (iOS / Android) for Remote Control.
  • Touchjet Present for Interactive Presentations (Access PDF, Powerpoint and Video files).

Display Requirements

  • HDMI input.
  • Display between 20″ – 65″ capable of 1080p or 720p at 60/50Hz, 4K @ 24/25/30Hz.
  • Note: Bright ambient light will cause false touch signals.
  • Ports.
  • HDMI output.
  • 2 USB 2.0 host port.

TV Requirements

  • Flat-screen TV or monitor with HDMI port up to 65 inches.
  • The top of the TV (where WAVE clamps onto) should be less than 2 inches thick.
Touchjet Wave + Lily6
Touchjet Wave + Lily6 Image
Source: BXBK | Urban Outdoor Survival Magazine

Conclusion on Touchjet Wave + Lily

As we mentioned earlier, we’re all in with tech and love to see innovative ideas come to life.

The Touchjet Wave + Lily definitely has a brilliant Idea with poor implementation and their customer service isn’t really good coupled with the steep price so as of now it’s not worth the sacrifice.

References of Touchjet Wave + Lily

Other Interesting Articles

Frequently Asked Questions And Their Answers

  1. What is the price of the Touchjet Wave + Lily on Amazon

    Touchjet Wave + Lily costs $215.00 on Amazon

  2. What is the price of the Touchjet Wave + Lily on eBay?

    Touchjet Wave + Lily costs $199.00 on ebay.

Ultracapacitors VS Batteries: Difference, Performance…

0
Ultracapacitors VS Batteries

Ultracapacitors VS Batteries

Introduction

Well for some time now, batteries have always seemed to be the way to portable power. But what about Ultracapacitors, do they have what it takes to provide the kind of power we are looking for? That’s what we are about to find out.

As seen before, fastest ultrasonic screens have an exceptionally quick action time of just a couple of nanoseconds, sufficient time to read out the reaction times of a regular lithium-ion battery, and also reaction times of up to one hundred nanoseconds for high-performance batteries.


https://www.youtube.com/watch?v=ysf519Le3uk
Video Source: How To Guys
Ultracapacitor VS Batteries

Comparison Between Ultracapacitors & Batteries

Ultracapacitors often tend to be an extra economical choice for applications calling for short bursts of energy. Ultracapacitors are typically made use of in applications needing long-lasting storage space of power, such as nuclear power plant, generators and electric cars, as well as in high-performance electronics. Ultracapacitors not only bill as well as release faster than batteries, they additionally do not struggle with the negative effects such as high power consumption, low voltage.

Ultracapacitor energy storage devices are highly reversible procedures based on the movement of ions in and out of an electrolyte. The fastest ultrasonic displays have a very fast feedback time of simply a few milliseconds, sufficient time to read out the feedback times of a regular lithium-ion battery, and also response times of approximately one hundred nanoseconds for high-performance batteries.

Batteries need to be refined with high energy density, however slow-moving billing/releasing cycles as well as low energy/weight ratios and also high charging/ discharging proportions.

The major reason why ultracapacitors outperform batteries in performance and also integrity is that energy that can be saved and also released in chemical reactions in general as well as power in the form of electricity specifically is much faster than batteries. This permits them to release energy much quicker than batteries.

Ultracapacitors can survive much longer charging/ releasing cycles than batteries and this is an important element for their efficiency as well as effectiveness.

Ultracapacitors, particularly ultracapacitors, discharge practically immediately as well as can only keep a little amount of energy. This implies that they are likewise extra price than batteries, but they can keep a lot more power each of energy than other energy sources.

Ultracapacitors VS Batteries
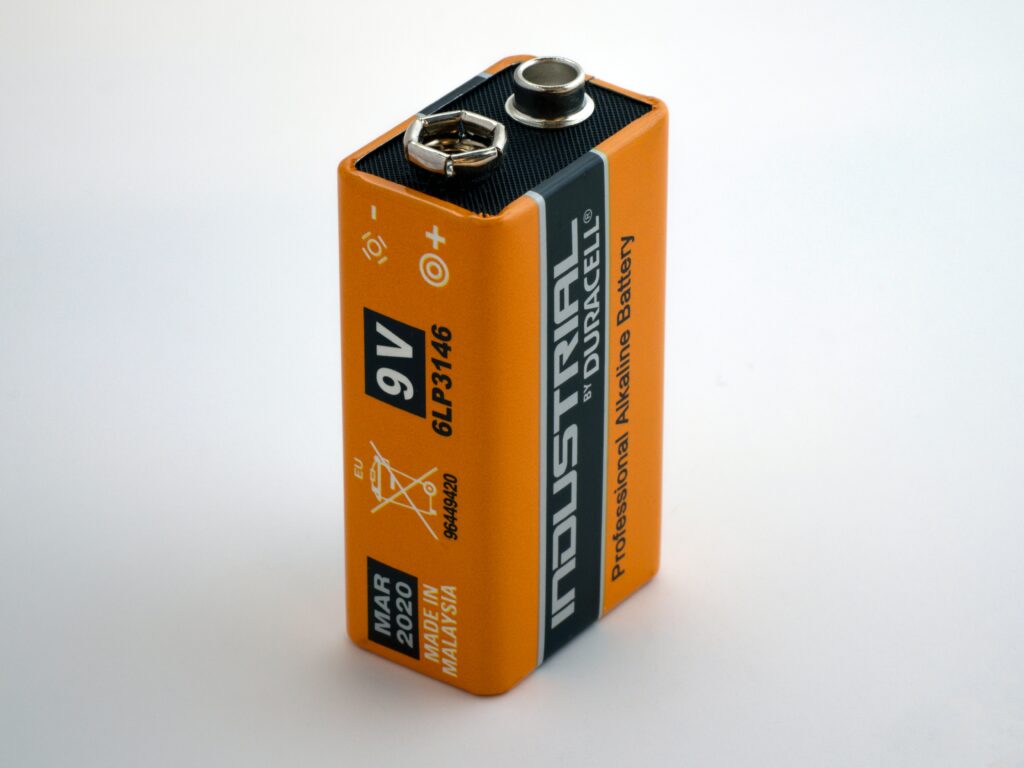
Image Source: Unsplash
Ultracapacitors VS Batteries

If supercapacitors can ultimately store enough energy to take on batteries, they have vital advantages, including the fact that they provide high performance and also can be utilized for numerous cycles.

Kaner

If an UltrACAPACitor can run accurately over numerous thousands of cycles, it can lower the cycle load of lithium-ion packs as well as permit them to prioritize power thickness overpower density.

The United States space company NASA is also investigating unique nanomaterials that can be made use of to improve energy storage for applications precede travel. The company anticipates that the ultra-thin framework of graphene will enable home plates of the material to stack to enhance the kept energy, potentially doubling the current ability of ultracapacitors. An enlarged area can improve storage capability to the point where storage is restricted by the ion electrolyte.

Conventional ultracapacitors, which have the benefit of providing fast rises and also can be recharged without significant capacity loss, are as well expensive as well as store inadequate power to change batteries. The high failure price of lead-acid NiMH batteries utilized for peak performance – can likewise enhance the price of vehicles, as they cause too much demand for battery replacement

If a system needs to bill quickly and also keep electrical energy for a very long time, ultracapacitors are the best remedy. Fast-charging and also durable ultracapacitors, such as those offered may quickly surpass lithium-ion batteries and even most other types of batteries in regards to power storage, space and price.

They run with nearly 100% efficiency, have an extremely long service life, are much lighter and less unpredictable than batteries, and also have actually just recently come to be appealing forms of power storage space due to their low price as well as high efficiency. Ultracapacitors are additionally a lot more long-lasting than conventional batteries in terms of their sturdiness.

The high charging and releasing of Ultracapacitors and their inexpensive nature are significant benefits over batteries, which will contribute substantially to their durable market growth.

By the next year, this innovation’s energy height is anticipated to increase, allowing it to take on lithium-ion batteries in the power storage space market and potentially quickly eclipse them.

Conclusion on Ultracapacitors & Batteries

When it comes to saving as well as releasing huge amounts of power fairly quickly, batteries are still king. This makes it tough to keep them for lengthy periods of time, which is why batteries have actually been a preferred product for numerous decades.

Utracapacitors run with virtually on 100% performance, have a very long service life, are much lighter and also less unstable than batteries, and have just recently become eye-catching kinds of power storage due to their low price and also high efficiency.

By next year, modern technology’s power thickness is expected to double, allowing it to compete with lithium-ion batteries in the power storage market – as well as perhaps soon eclipse them.

Ultracapacitors can be paired with other power storage systems and can replace existing energy storage systems. Reaction speed, power density and effectiveness would make good sense as a quick and powerful energy storage space system that can be used along with lithium-ion storage systems.

Ultracapacitors VS Batteries
Image Source: Unsplash
Ultracapacitors VS Batteries

References

Other Interesting Articles

Frequently Asked Questions And Their Answers

  1. What is a capacitor?

    A capacitor is a device that stores electrical energy in an electric field.

  2. What is a battery?

    A battery is a device that converts chemical energy contained within its active materials directly into electric energy by means of an electrochemical substance.

  3. Are capacitors better than batteries?

    Batteries can have a lot of energy stored in them for their size, so can give high current for a long time. Capacitors are very different, they can’t store much.

  4. Are supercapacitors better than batteries?

    While a supercapacitor that is the same weight as a battery can hold more power, its Watts/kg Power Density is up to ten times better.

  5. Is there a battery better than lithium ion?

    Sodium-sulphur batteries have a longer lifespan than their lithium-ion counterparts, with lifetimes of around 15 years compared to the two or three years expected from lithium batteries.

  6. Difference between ultracapacitor and battery?

    The difference comes from the fact that ultracapacitors store energy in an electric field, rather than in a chemical reaction, like batteries.

  7. How to connect supercapacitor to battery?

    Whether you are connecting to the battery, amp, or a distribution block of some kind, you need to connect the positive terminal of the capacitor to the positive terminal of the other component by running a wire between them.

  8. What is the difference between a calcium battery and a lead acid battery?

    Lead acid battery has a lead electrode inside the battery whereas the lead calcium battery has calcium along with lead as the electrode inside the battery.

  9. What is the difference between gel and lead acid battery?

    AGM (absorbed glass mat) uses special design glass mat designed to wick the battery electrolyte between the battery plates, while Gel Cell batteries contain a silica type gel that the battery electrolyte is suspended in, this thick paste like material allows electrons to flow between plates but will not leak from the battery if the case is broken.

  10. Which is better calcium battery vs lead acid?

    Calcium batteries are the most commonly fitted battery.

  11. Are capacitors better than batteries?

    In general batteries provide higher energy density for storage, while capacitors have more rapid charge and discharge capabilities.

Cowin E7 Active Noise Cancelling Headphones Review

0
Cowin E7 Active Noise Cancelling Bluetooth Headphones Review

Cowin E7 [Specs & Review]

Introduction

With the evolution of technology, more and more polyvalent earpieces are released at cheaper prices, to match up to consumer taste and needs. If you are looking for such earpieces, then you are in the right place looking at the Cowin E7 active noise-cancelling headphones.


  • Cowin E7 Active Noise Cancelling Bluetooth Headphones Review
  • Cowin E7 Active Noise Cancelling Bluetooth Headphones Review50

Why You May Want To Buy Cowin E7

Below we are going to give you 7 solid reasons why you may want to of buying the Cowin E7 headphones now, even though it was released on the 15th of December 2015.

Sound Quality

The Cowin E7 Bluetooth headphones possess Hi-Fi stereo sound technology, which produces excellent sound quality, very much appreciated by users. These Hi-Fi functionalities are used both for multimedia and calling purposes.

They also have an in-built microphone, which can be used in applications, for calling or for multimedia purposes. This microphone is high definition and produces a crystal clear sound on a counterpart speaker when used.

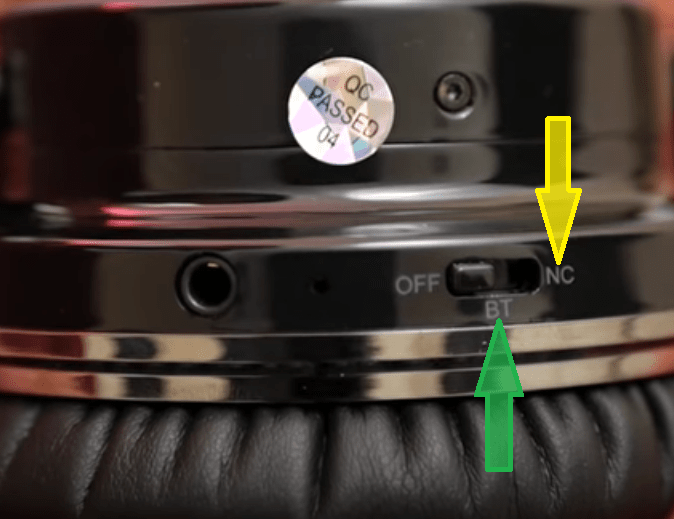
These headphones have two main audio modes, which are Bluetooth mode and noise canceling mode.

The Bluetooth mode is the default earpiece mode and will produce just the default high-quality audio output which you will expect from this kind of earpiece, with features like High Definition stereo sound through two 10 watts 45 mm Dynamic Drivers, crystal clear sound with Hybrid Active Noise-cancelling, dual Equalizer mode, and deep Bass generated through Graphene drivers.

In the Bluetooth mode, noise cancelling is active, but it focuses on cancelling out low-frequency external sounds from the environment. Sounds generated from things like cars, planes, trains and so on, will be cancelled out. This is what the Cowin E7 manufacturers refer to as Active Noise cancelling.

This mode is really cool, but one little down side I found with it is that, at full or high volume, the sound quality slightly depreciates. The base becomes weak, and the treble overshadows most of the other sounds.

When the noise cancelling mode is activated the noise from the entire surrounding is suppressed, it is as if by putting on your headphones, you just put off the world around you. Both the high and the low-frequency sounds are cancelled out.

Well, at first glance it should seem great for you, but there is a small price to pay for that. Given that surrounding sound is suppressed, the Lows (Base) tend to have more presence in the sound you are listening to, causing the Highs and Mids to drop. So, don’t be surprised to experience a drop in your Highs and Mids.

Secondly, you may not like to use the Noice Cancelling mode when you are driving, walking on the street or doing anything that requires you to be attentive to the surrounding sound, given that you may not hear anything.

Image Source: Modest Box
Cowin E7 Active Noise Cancelling Headphones Review

Build Quality & Design

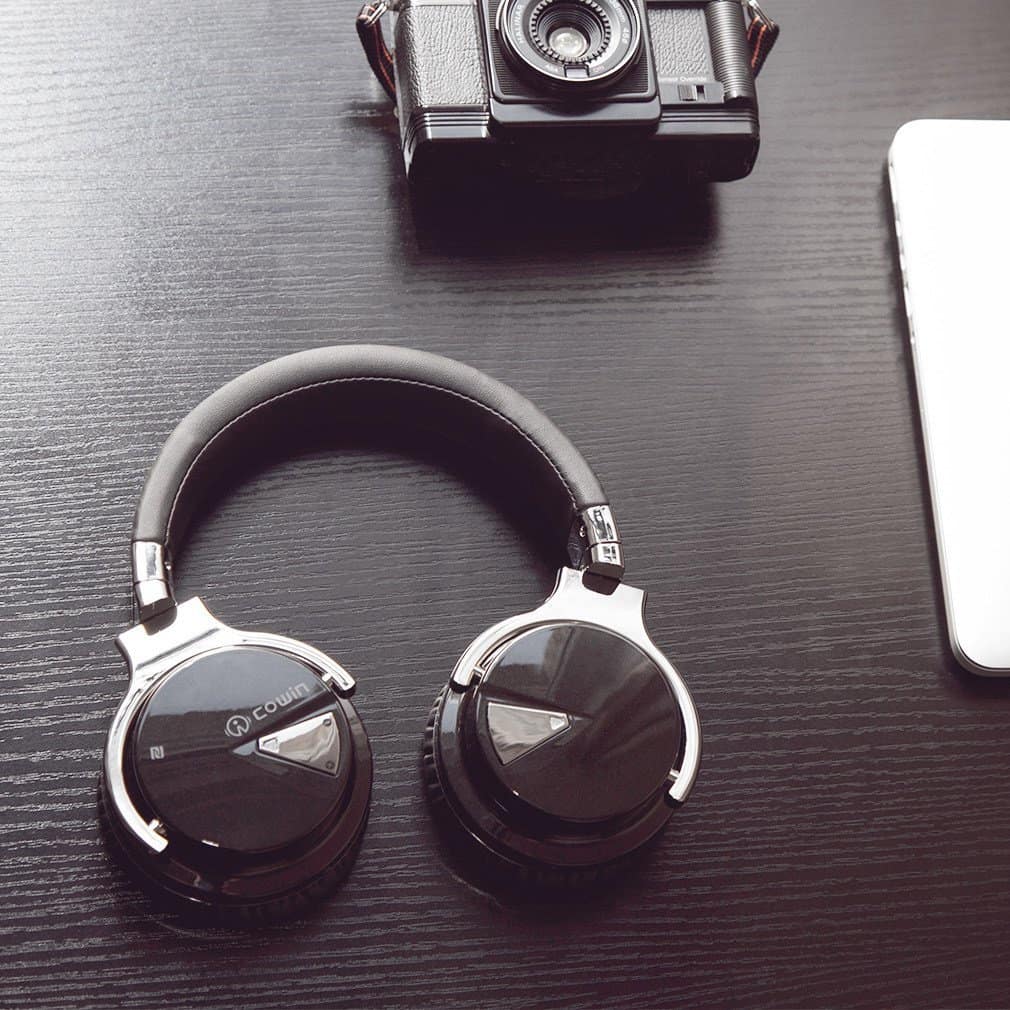
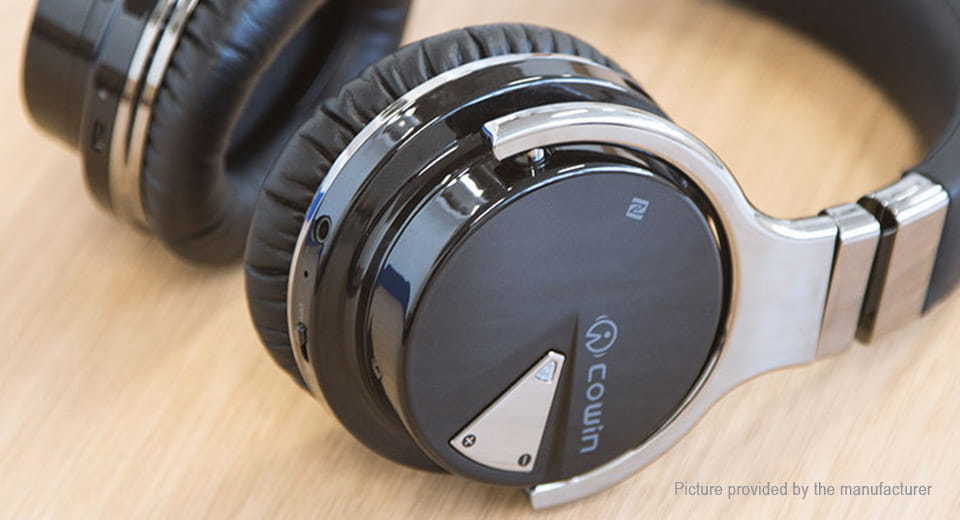
The Cowin E7 headphone has a very attractive look. It has both a black and a silver colour. The earcup holders of these headphones are glossy silver.

The earcup section of the Cowin E7 is glossy black. The glossy texture of the earcup holders and the earcups themselves give an overall shiny and attractive appearance to these headphones.

The headband of these headphones are black and are made up of a kind of leather which is soft and squishy (like the sponge material). The earcups too of the Cowin E7 are soft and do not put any pressure on the user’s ears. They feel comfortable and can be worn ear for a long period of time.

The Cowin E7 earcup holders are both rotatable, adjustable (their length can be adjusted) and have left and right indicators on them. The earcup holders, the earcups and the entire casing of the Cowin E7 headphones are made up of a solid plastic, which can withstand falls of about one meter.

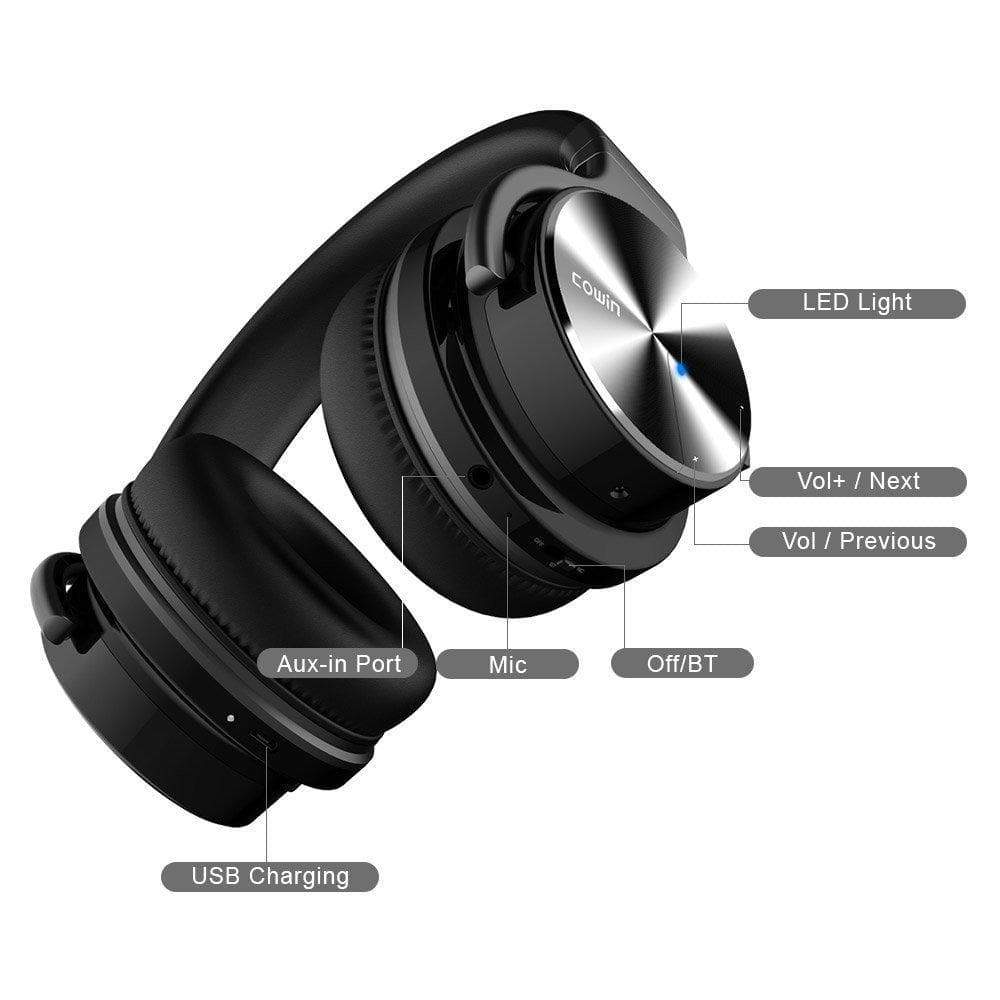
The Cowin E7 headphones have a Bluetooth indicator and a set of hard control buttons found on the right earcup. These control buttons can answer calls, drop calls, play tracks, pause tracks, increase volume, reduce the volume and skip tracks both forward and backward. The control buttons also let you pick and drop calls.

Time Needed : 00 days 00 hours 05 minutes

So as you can see from above, the control buttons of the Cowin E7 are versatile and do many things, so, you may be asking yourself how? Well, you might get a glimpse of how it works below.

  1. Play Tracks

    To play tracks on a playlist, press the ” ” multi_function button (middle button).

  2. Pause Tracks

    To pause tracks on a playlist, press the ” ” multi_function button (middle button).

  3. Answer Call

    To answer a call, press the ” ” multi_function button (middle button), during the call

  4. End Call

    To end a call, press the ” ” multi_function button (middle button), during the call

  5. Decline Incoming Call

    To decline an incoming call, press and hold the ” ” multi_function button (middle button), for 2 seconds, while the call is incoming

  6. Answer Second Incoming Call

    To put the current call on hold and answer a second incoming call, press the ” ” multi_function button (middle button), twice, while on a call

  7. Decline Second Incoming Call

    To decline a second incoming call, press the ” ” multi_function button (middle button), for 2 seconds, while the call is incoming

  8. Switch Between 2 Calls

    To switch between 2 active calls, press the ” ” multi_function button (middle button), twice, while on a call

  9. Increase Volume

    To increase the volume you have to press and maintain the ” + ” button until your desired volume is attained.

  10. Reduce Volume

    To reduce the volume you have to press and maintain the ” – ” button until your desired volume is attained.

  11. Skip to Next Track

    To skip to the next track on your playlist you have to press the ” + ” button without maintaining until your desired track is reached.

  12. Skip to Previous Track

    To skip to the previous track on your playlist you have to press the ” – ” button without maintaining until your desired track is reached.

Infact, the controls should be pretty much familiar for anyone who uses wireless headphones or earbuds.

These headphones have a good size for headphones, with dimensions of about 17.8 x 18.2 x 7.6 cm, but feel somehow just a little heavy. They have a weight of about 300 Grams.

In addition to all the good stuff that we have seen about the build quality and design of the Cowin E7 headphones, they still have some other Pros.

They have an index rating of IPX5, which means they are sweat and waterproof. So you may feel free to take them to a beach or swimming party, but be careful not to let them prolongly immersed in water (maximum 2 minutes immersion).

Image Source: GetAHeadphone
Cowin E7 Active Noise Cancelling Bluetooth Headphones Review

Connectivity

When it comes to connectivity, the Cowin E7 Bluetooth headphones have an edge on many other headphones. They have 3 connection modes. They can channel sound wirelessly through Bluetooth, NFC and also wired through cable.

These wireless SP8 headphones easily pair with other devices as soon as they are switched on, and this thanks to Bluetooth 4.0 and NFC technology.

The NFC pairing process is very quick and easy. To pair your NFC device with these headphones, all you need to do is to switch on the NFC function on your target device and place it on the earcup which has the NFC logo printed on it. It will then proceed to pair automatically.

The NFC connection range is about 1 m or less. It typically has a reduced power consumption, as compared to Bluetooth.

The Bluetooth pairing process is a little slower and a little more complicated than NFC but is still easy.

To pair your Bluetooth device with these headphones, all you need to do is to switch on the Bluetooth function on both your target device and your headphones. Then proceed to pair both devices.

The Bluetooth connection range is about 10 m. It typically has an increased power consumption, as compared to NFC, but will provide more range and more versatility by connecting to many more type of devices, than NFC will.

When these headphones are powered on, the Bluetooth indicator flashes with a light blue colour. When the headphones are paired, the Bluetooth indicator lights up and stays on (without flashing) with a light blue colour. Finally, when noise cancelling is on, the Bluetooth indicator turns light white.

Well, as earlier said, they can also be connected through a 3.5 mm cable. Personally, I think the 3.5 mm cable is mainly for emergency, to connect with devices that might not support Bluetooth or to wirely share sound with other speakers or headsets.

The operating system compatibility of the Cowin E7 headphones is excellent, given that they are compatible with windows, mackintosh, android and IOS (which is usually a very reserved operating system not accepting many devices). So, if you are an iPhone user, don’t worry, the Cowin E7 headphones got your back.

Few Bluetooth Tips & Tricks

The following are some few difficulties people usually encounter, while dealing with the Cowin E7’s bluetooth.

Disconnect Cowin E7 from a mobile device
  • Use the Bluetooth menu on your mobile device to disconnect your mobile device.
  • Power off headphones.
Reconnect Cowin E7 to a mobile device
  • When powered on, the headphones try to reconnect with the last paired device.
  • Note: The devices must be within a 9 m range and powered on.
Connect Cowin E7 to another mobile device
  • 1.Disconnected on your first mobile device.
  • 2.Connected on your second mobile device.
  • Note: You only can connect one device at a time
Clear Cowin E7 headphone pairing list
  • 1. Press + and – simultaneously and hold for 5 seconds.
  • 2. Delete your headphones from the Bluetooth list on your mobile device. All devices are cleared and the headphones are ready to
  • connect.
Video Source: CEONTHEMAKING
Cowin E7 Active Noise Cancelling Headphones Review

Cowin E7 Battery

The Cowin E7 Bluetooth headphones have a strong domination over many other headphones in the market when it comes to battery life.

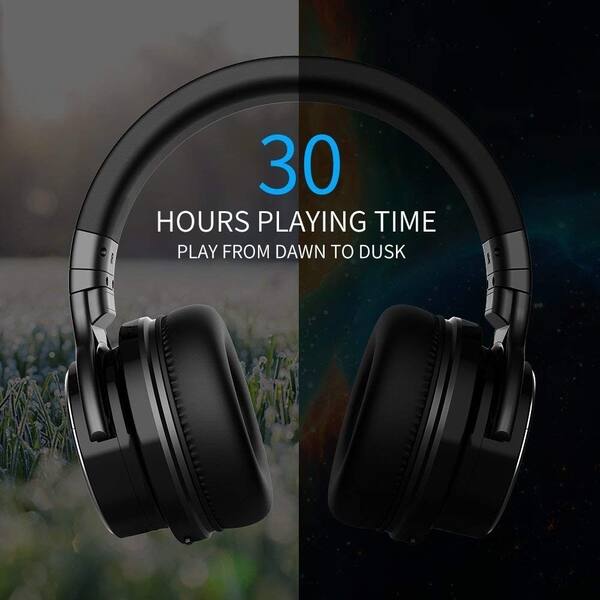
The Cowin E7 Bluetooth headphones have a battery life of about 30 hours of playtime without the noise-cancelling mode and about 20 hours of playtime with the noise-cancelling mode activated.

The battery life of the Cowin E7 headphones makes it very appropriate for people who like listening to music while travelling, without worrying about battery life.

Charging System

The Cowin E7 headphones charge using a micro-USB connector which is plugged in, on the left earcup and also plugged into a USB wall charger, power bank or powered on PC on the other end.

These headphones have an internal 750 mAh rechargeable battery, which, yes, is very massive for a headphone. With this kind of battery, well, the price to pay as usual will be a long charge time. The Cowin E7 headphones can take up to 4 hours to get a full charge.

While your headphones are connected to charge, to know whether your battery is fully charged or not, you can use the LED battery indicator. If the indicator is red, then the battery is not yet full. If the indicator is off, then the battery is fully charged. Note that the Cowin E7 headphones will not play while charging.

Cowin E7 Price & Package

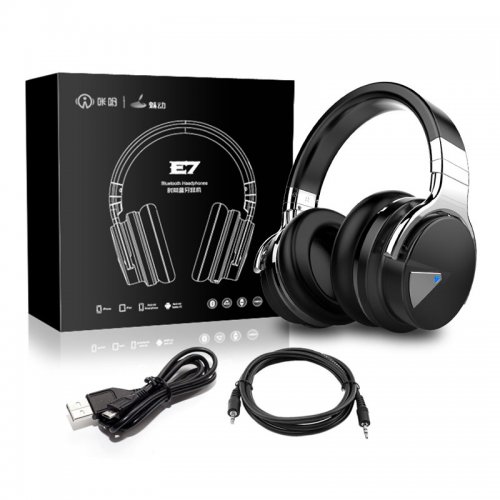
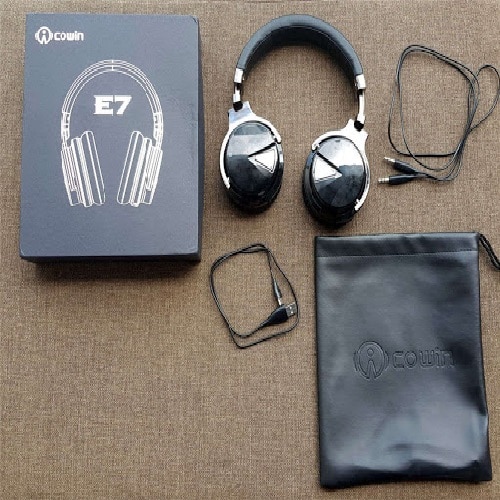
The Cowin E7 Bluetooth headphones come with a micro USB cable, a 3.5 mm audio cable, all packaged in a carry case.

These headphones are of great quality, but also very affordable. If you feel like you want good quality headphones then you will rejoice by seeing that they cost under $ 80.

What Users May Not Like About The Cowin E7 Bluetooth Headphones

  • The overall sound quality decreases when the volume is pushed very high.
  • The overall sound quality decreases when the headphones are set to noise-cancelling mode.
  • Due to very high noise cancelling, this may not be the type of headphones a user might want to take a street walk with.

Cowin E7 Summary

Well, there has been a lot to take in since the beginning of this article, so, we have summarised everything which has been said throughout in this section.

Overall Rating of the Cowin E7 Bluetooth Headphones

Based on analysis, these headphones have been given an average rating of 8.4 / 10.

Pros

  • Excellent sound quality.
  • Excellent build/design quality.
  • Excellent connectivity.
  • Excellent battery.
  • Good portability.
  • Good charge system.
  • Affordable price.

Cons

  • Sound quality decreases when the volume is pushed very high.
  • Sound quality decreases when the headphones are set to noise cancelling mode.
  • May not be suitable for taking a street walk with.

Pros & Cons Summary

ProsCons
Excellent sound qualityMay not be suitable for taking a street walk with
Excellent build/design qualitySound quality decreases when the volume is pushed very high
Excellent connectivitySound quality decreases when the headphones are set to noise cancelling mode
Excellent battery
Good portability
Good charge system
Affordable price
Cowin E7 Active Noise Cancelling Headphones Review

Cowin E7 User Manual         

For users who need to properly learn how to use the Cowin E7 Bluetooth headphones, their user manual can be found here.

Cowin E7 Active Noise Cancelling Bluetooth Headphones Review
Image Source: Audio Mastered
Cowin E7 Active Noise Cancelling Headphones Review

Conclusion

The Cowin E7 headphones are very polyvalent and will suite most of your needs, as far as producing sound is concerned.

These headphones are appropriate for travelling, or any long playtime necessities, given that they have long battery life and are able to block surrounding sound.

These headphones will also adequate for gamers, given their polyvalence when it comes to connecting them with different devices, operating systems andalso using their microphones in apps.

If you have had any experiences with these headphones, please kindly leave them in the comment section, your experiences might help someone.

References

Other Interesting Articles

Some Common Questions & Answers

  1. Cowin E7 headphones not powering on

    Charge the battery.

  2. Cowin E7 headphones don’t connect with your mobile device

    Disconnect the back-up audio cable.Disconnect the USB charging cable.Clear the headphone pairing listOn your target device:– Disable the Bluetooth feature and then re-enable.– Delete your Cowin E7 from the Bluetooth list on your device.Move your mobile device closer to the headphones and away from anyinterference or obstructions.

  3. Cowin E7 headphones poor sound quality

    Use a different music source.Connect another mobile device.Disconnect the second device.Move your mobile device closer to the headphones and away from any interference or obstructions.

  4. Cowin E7 headphones bad Bluetooth connect

    If the Bluetooth signal is weak, out of range or interferes, the Bluetooth wireless connection may fail or the sound cuts in and out. Please see the information below to improve signal quality and reduce the possibility of interference.The Bluetooth wireless connection may fail or the sound will continue to cut in and out. These due to weak Bluetooth signals or external signal interference. Please away from any interference or obstructions.Bluetooth headphone and device distance are less than 15M, Bluetooth and mobile phone are in the same direction. Move your mobile device closer to the headphones.The battery is running out of power, use it after charging.Check if the network signal is OK (whether the player is in buffer).The compatibility between the headphone and the Bluetooth device is not good, replace the device with a higher Bluetooth version.

  5. Cowin E7 headphones no sound

    Power on the headphones and charge the battery.Check the state of the status indicators.Increase the volume on your headphones, your mobile device and music source.Slide the Power/Bluetooth switch to the right and release to hear the connected device. Make sure you are using the correct device.Move your mobile device closer to the headphones and away from any interference or obstructions.Use a different music source.Connect another mobile device

  6. Cowin E7 headphones cannot hear on a call

    Check if the headphones and the connected device.Turn up the volume of the connected device if it is too low.Check the audio settings of the Bluetooth device to make sure the sound comes from the headphones during a call.Re-establish the connection using the Bluetooth device.While listening to music with the headphones, stop playback and press the button on the right or left unit to respond to an incoming call.

  7. Cowin E7 headphones noise beeping

    Due to weak Bluetooth signals or external signal interference. In this case, move away from wireless routers or microwaves and move your headphone closer to the Bluetooth device.Avoid using the headphones for a long time, otherwise the sound will be intermittent, please reuse after a period of rest.

  8. Cowin E7 headphonesl isten to music when the battery is discharged

    Even in wired mode, the battery power need to use, the headphones do not support the use of no power.

  9. Cowin E7 headphones no sound from a device connected by the back-up audio cable

    Secure the ends of the back-up audio cable.Increase the volume on your headphones, your mobile device and music source.Connect to another device.

  10. Cowin E7 headphones poor sound quality from a device connected by audio cable

    Secure the ends of the back-up audio cable.Connect another device.

  11. Cowin E7 headphones battery won’t charge

    Secure the ends of the USB charging cable.Try another charging source.If your headphones have been exposed to high or low temperatures, let the headphones return to room temperature and try charging again.

  12. Cowin E7 headphones noise cancelling function doesn’t work

    Make sure that the noise-cancelling function is turned on.Are the ears all wrapped and re-equipped? Adjust the earpad position to fit your ears. If the earmuffs are loose, re-set the ear.Eliminate low-frequency noise. The noise-cancelling function is effective in low-frequency ranges such as airplanes, trains, offices, near air-conditioning, and is not as effective for higher frequencies, such as human voices.

YANGHX Floating Globe: Magnetic Levitation Globe

0
YANGHX Floating Globe

YANGHX Floating Globe

Introduction

In the immortal words of Julius Caeser “Experience is the teacher of all things”. This is true because nobody understands a situation better than someone who’s been there already and with companies bringing forth products to make our everyday life more comfortable, the dilemma induced can be colossal.

Luckily for you, we at Terra-X take time to bring forth tech reviews, so you can easily decide if it’s worth it. So, join me as I give an honest review of YANGHX Levitation Floating Globe (4 inches).


  • YANGHX Floating Globe

Review

To put it simply, it is a globe which floats and does so using maglev (to know more about maglev click here) to give you the feeling of seeing the Earth seemingly rotating on its axis. In this review, we’ll be getting to know its design/appearance, build quality, dimensions/weight, power supply and sales /packaging.

1 – Design and Appearance

The 4-inch globe, which is a colourful and detailed representation of the Earth comes with a ring-shaped base which is the part responsible for the globe’s ability to float.

It is designed in such a way that the globe suspends under the confinements of its base with the inside of the globe containing magnets top and bottom which cooperate with the base’s magnet to keep it suspended about 0.4 inches to 0.8 inches high not just made to levitate above it as with most maglev tech, it equally has LED lights which can be turned on in the dark to make for awesome scenery.

The ring-shaped base contains a multi functional power button responsible for switching the base on and equally for turning on the LED lights when pressed once and twice respectively. This multi-functional button is rather convenient.

Video Source: Gleagle Team
Senders Floating Globe

2 – Build Quality of the YANGHX Floating Globe

The material used to make the system is called ABS (Acrylonitrile Butadiene Styrene) to make it portable and tough so it doesn’t break on any given impact on the base in the case of a failure in placing the globe properly or an accidental knockdown.

3 – Dimensions Weight

The globe diameter is 4 inches and the entire product’s dimensions are 9.4 x 4.7 x 9.4 inches. The product weighs in at roughly 0.6kg.

4 – Power Supply System

The power supply system comprises of a conducting wire and an adapter which can support alternating currents between 100-240 V and produces a direct current of 12V. There’s the secret to this magic trick as the magnetic system behind it is electrically controlled.

Sales And Packaging

The package type is a gift box which contains the following:

  • 1 globe
  • 1 base
  • 1 AC power charger adapter
  • 1 user manual
YANGHX Floating Globe
Image Source: Walmart
YANGHX Floating Globe

Getting Started With The YANGHX Floating Globe

Before you can have your own floating world you must have to set it up. However, before I walk you through the steps you must know a few things:

  • Due to the whole system containing very powerful magnets, it’s best to keep sensitive things like credit cards and pacemakers well clear of the system.
  • The system must be placed on a flat smooth surface to ensure it doesn’t tilt and fall due to it being on an uneven surface.
  • Don’t be discouraged if you can’t get it done on your first try keep pushing and it will eventually succeed.

Time Needed : 10 minutes

OK then without further ado, let’s go through a step by step guide to getting your floating world up and floating.

  1. Power On

    Turn on the power and place the base horizontally on the table (or any flat and smooth surface).

  2. Place Within

    Hold the globe from the center of the base and gradually take it to the top of the base making sure the globe is still horizontal.

  3. Keep Adjusting

    When the globe is about 0.8 inches below the top (or when you begin to feel a strong force push towards the globe, slowly release your hands.

  4. Release to Levitate

    If you feel the globe has shifted in the wrong direction you can adjust it by hand until you feel there aren’t any more problems, then you can let go.

What Users May Not Like

The globe spins faster than expected which isn’t something someone who just wants to enjoy the scenery would love.

Overall About YANGHX Floating Globe

From all that has been discussed, this product receives a 7.2/10 rating. The reason will probably be clearer in the overview of the pros and cons below. As we all know every good product is bound to have bad traits let’s look into them now.

Pros of the YANGHX Floating Globe

  • A very attractive decorative piece for your office or home.
  • It’s very portable.
  • A multi-functional button reduces complexity.
  • When the LED lights are on, they can act as a night light.

Cons of the YANGHX Floating Globe

  • Not easy to set up
  • The wired connection takes away some of the glitter
  • The globe spins faster than expected.

Conclusion

With more tech being born with time as far as thing go this product is a very good gift for a loved one and actually delivers as it promised. Have you used this product before? What was your experience? Let us know in the comments.

Some Frequently Asked Questions and Their Answers

  1. What level of detail is there? Can you see states and cities or only countries?

    You can only see countries given as it’s a 4-inch globe.

  2. Will it still levitate if it’s not plugged in?

    No, It would not. YANGHX Floating Globe uses electromagnets to levitate, and these magnets require electricity to work.

References

Other Interesting Articles

Lerou Head Massaging Robot: Portable Massage Machine

0
Lerou head massaging robot

Lerou Head Massaging Robot

Introduction

It is no secret that scalp massage therapies can assist in decreasing the stress and anxiety of the day as well as promote a sensation of leisure. Enjoy the video clip below to discover more information about the LEROU head massage robot at work.


Video Source: LepHome Store
Lerou Head Massaging Robot

Why You Should Buy A Head Massaging Robot

The American Massage therapy Treatment Association reports that massage may assist in lowering the intensity, duration and also frequency of stress and migraines. In addition to the sensational satisfaction a body massage therapy can provide, the head massage therapy, in particular, can minimize stress, ease symptoms of migraines, stimulate hair growth and promote hair follicle growth.

Usually, most of us book for massage therapies with experts. But, sometimes it can be expensive, and moreover, most massage therapies done by professionals are done in their centres and not at home.

In the case where you either can’t afford to pay for a massage or you are far away from the closest massage centre, you may have to acquire a vibrating head massage robot such as the Lerou head massaging robot, which you can take with you when you take a trip away, especially if you take trips a lot.

Lerou head massaging robot
Image Source: Kickstarter
Lerou head massaging robot

Few Thoughts About Lerou Head Massaging Robot

Vibrating head massagers can be found in a range of forms, colours and dimensions, in addition to electrical and non-electric. You can likewise explore the different sorts of head massages readily available on the marketplace today. You can additionally readjust rate as well as settings with electrical massagers, to make sure that you get a convenient strength from the massager.

When you activate the Lerou head massaging robot, it instantly adapts to the head angle and fixes problems such as whether the message is too hard or too soft. You just have to place the Lerou head massager on your head and put it on to do work for you.

The magic of the Lerou head massage robot is its very soft pointer, like a finger that massages face, neck, or head. The massager can function as you would certainly with your fingertips, as it can diligently massage your scalp.

Even though it does not 100% assure faster hair development, a scalp massage can be an extremely helpful tool if you want to take care of the general health and wellness of your hair.

Lack of scalp massage can result in headaches in the rear of the head as well as trigger stressed muscles in this location. Neck pain can be treated with a scalp massage, using Lerou head massaging robot.

One more notable feature is that the Lerou head massaging robot can give a massage therapy at the corner of the eye to avoid or eliminate the development of crow’s feet. Most users describe the Lerou head massaging robot as the fingertips of a beautician massaging the corners of your eyes.

Lerou head massaging robot
Image Source: Startup Selfie
Lerou head massaging robot

A person who experiences hair loss due to blood circulation can benefit from utilizing scalp massage therapy.

Fusco

He recommends patients with thinner hair to use it together with applied products such as scalp products, but it can additionally be used in the shower or in hair shampoo to boost blood flow to the scalp glands. Luckily for these kinds of patients, the Lerou head massaging robot is highly adequate for carrying out this kind of massage.

Be sure that the Learou head massager can work exactly as desired, given that it has an excellent array of movement to massage all head and neck areas you intend it to. While various other electric massagers ought to only be utilized in completely dry air, the Lerou head massager can be used under the shower.

The LEROUhead massager uses both mechanical and physical transmission, which enables the mechanism to replicate a finger massage therapy, bringing you right into a very loosened up state without negative effects.

Once the gadget is positioned on the head, it becomes fixed and secured, in order to stop the massager from dropping down. The Lerou head massager functions when continuous spring stress is applied, so once it’s spring is released it stops, so it functions finest if you function at high pressure for a short time before stopping.

There are no constraints on when or where you can use the Lerou head massager, so it can be utilized whenever you wish to loosen up. The LOROU head massager functions best when you are loosened up, however, there are lots of means you can use it when and where you want, such as on the couch, in the shower or on the bed.

Lerou head massaging robot
Image Source: Harpel news
Lerou head massaging robot

Conclusion On Lerou Head Massaging Robot

This product is a definite <<GO FOR>> product, especially for those who go through a lot of physical and mental stress daily. It will definitely help you relax and rest, while it treats your exhausted muscles.

Have you ever used thie Lerou head massager? What was your experience? Tell us in the comment section.

If you have any questions, suggestions worries or contributions, you can put them in the comment section below, we will respond as soon as we see them.

Some Common Questions And Their Answers

  1. Lerou head massager price in india?

    Lerou head massager costs 13,676 Indian Rupee.

  2. Lerou head massager price?

    Lerou head massager costs 200 Dollars.

  3. Where to buy lerou massager?

    Lerou head massaging robot can be bought from Amazon or eBay

References

Other Interesting Articles

Senders Floating Globe: C Shape Magnetic Levitation Globe

0
Senders Floating Globe C Shape

Senders Floating Globe

Introduction

Technology has brought us a plethora of gadgets most of which have brought us a good deal of convenience and made our everyday life look cooler and feel better. However, in this sea of tech, we only need the best regardless of the category hence comparisons between tech showing up everywhere.

Knowing that someone must have had an experience with tech in order to criticize it, We at TERRA-X have put together some reviews for certain gadgets so you don’t have to learn things the hard way. So join me as I give a full overview of the Senders Floating C shaped Globe.


Review

The Senders Floating C shaped Globe is in fact one the many maglev inspired gadgets around. If you wish to know about Magnetic Levitation feel free to check it out here.

1 – Design and Appearance

The product mainly comprises of a globe and a stand. However, there’s something more unique and obvious about the stand other than the fact that it helps the globe to float, that feature is its C shape. The edges of the stand contain magnets which work with the magnets in the globe to keep the globe afloat.

The 3inch globe contains all countries and the continents in which they can be located. Sadly, it doesn’t contain cities and towns so unfortunately you can’t savor the pleasure of pinpointing your house on it.

Video Source: Ben Koorengevel
Senders Floating Globe

2 – Build Quality of The Senders Floating Globe

As with a plethora of the gadgets we portray on Terra-X, its build quality is impressive to say the least. Keeping the all so cool Maglev tech aside, the globe’s design is convenient the colors used don’t overlap each other so you can easily and conveniently see the names of the various countries and continents.

The stand equally rocks a cool black shade and features 4 different colors of LED lights which could double down as a night light, a very cool night light.

3 – Dimensions and Weight

The globe is 3 inches in diameter with the entire product’s dimensions being 8.9 x 7.9 x 4.4 inches and weighing approximately 0.41 kg.

4 – Power Supply System

The magnetic system which allows the globe to float is electrically controlled and hence the stand must be connected to a power source in order to realize your dream of seeing a floating globe. The adapter used for this gadget receives a DC of 12V and an AC of 100mA.

Sales and Packaging

The senders is sold on many e-commerce companies such as Amazon for an asking price of about 29.99 USD and the components contained in the package are as follows:

  • 1x C shape frame.
  • 1x 3inches globe.
  • 1x 12V, 100 mA adapter.
  • 1x User manual.
Image Source: Shopee
Senders Floating Globe

Getting Started With The Senders Floating Globe

More often than not, people don’t get things done perfectly on their first try so if you can’t get it up and running on your first go just try again it’ll work out eventually patience is a virtue you know.

Senders Floating Globe C Shape
Image Source: Wish
Senders Floating Globe

Time Needed : 20 minutes

Now without further ado, let’s get a step by step rundown of how you can get your globe floating the right and sensible way no Voodoo experience required.

  1. Connection

    Connect the stand to a power source and hold the globe keeping it upright and balanced in the top center of the stand.

  2. Estimation

    Put the globe about 1.5 cm from the top then you’ll feel a strong pulling force to support it.

  3. Levitation

    Move your hands slowly to let it float.

  4. Rotation

    Stir the bottom of the globe gently to make it spin slowly.

What users may not like About Senders Floating Globe

As Nalo Hopkinson said “Beauty and ingenuity beat perfection every time”. Despite this inspiring and wonderful quote, as customers we must be critics to avoid having product whose imperfections seem intolerable. Here are some of those complaints below.

  • Some customers were not satisfied with the most plastic composition. Its plastic composition doesn’t go without justification though as it makes it lighter and more portable.
  • The wired sector takes some of the coolness factors off even though we already know the reason behind it.

Overall About Senders Floating Globe

From all that has been discussed, this product receives a 7.6/10 rating. The reason will probably be clearer in the overview of the pros and cons below.

Pros

  • Cool design that will beautify any home.
  • Very portable.
  • Can serve as a night light.

Cons

  • The globe is not well detailed owing to its small size.
  • Provides additional electricity consumption though small.
  • Given there’s information on all sides of the globe, the top can’t be seen due to it being too close to the stand.

Conclusion On About Senders Floating Globe

The Woodlev globe is an absolute splendour of artwork combined with science and technology to produce the futuristic appearance of gadgets which we could only dream of when watching Sci-Fi movies.

This gadget will be an excellent decoration and can also serve as a cool night lighting effect at your home.

Some Frequently Asked Questions and Their Answers

  1. What should I do if the globe does not float even after finding the equilibrium spot?

    Hold the globe under the equilibrium spot for about 10 seconds without moving. This will trigger an inactive equilibrium spot to start working.

  2. How do I switch off this gadget safely?

    To turn off everything, make sure you remove the globe first, then disconnect the globe from the AC socket. This avoids the globe from smashing the base when disconnected.

References

Other Interesting Articles

LYFE Flower Pot Review [Magnetic Levitation]

0
Maglev LYFE Flower Pot Review

Maglev LYFE Flower Pot Review

Introduction

Plants, tools of beauty for the earth. The very core of mother nature. It needs to be treated with the utmost care. Mankind has constantly developed ways to ensure plants have the best of treatments. One of such green creations has FLYTE to thank for its origin. Below is a full review for the LYFE, a levitating plant planter.


  • Maglev LYFE Flower Pot Review
  • Maglev LYFE Flower Pot Review

Review

On the Surface, it pretty much looks like a levitating plant planter. Its innards however are reasons to adopt a different view. It levitates with the use of Magnetic levitation.

1 – Design

With a glut of different gadgets and creations which serve a similar purpose how does the LYFE stand out? We’ve put together the key features that makes it unique amongst its peers:

  • It comes in 2 compartments, the base and the planter itself.
  • The base is made of Oak which houses the magnets that enable it to be a support for levitation.
  • The planter is made from silicon allowing easy grip and is very tactile. It also has magnets at its bottom to assist in levitation.

2 – Build Quality of The LYFE Flower Pot Review

As highlighted earlier, the LYFE is definitely not just a levitating flower planter.

  • Its use of magnetics provides a magnetic field that is without a doubt useful to your plants as per a study carried out in 2018
  • It boasts of a cool drainage system which stores the excess water in a little built-in reservoir.
  • The planter rotates as it levitates allowing 360-degree exposure to sunlight for the plants.
  • The LYFE does not need soil as a medium for plant nourishment.
Video Source: Wiplabs
LYFE Flower Pot Review

3 – Dimensions and Weight

The base is 6 inches wide and 1.5 inches thick and weighs in at 1.3 KG. The planter is 3.1 inches wide and 3.9 inches high and weighs in at 0.24KG.

4 – Power Supply System

Its ability to levitate not only relies on magnets, it equally needs electricity to work. The electric adapter for the LYFE has as input: 100-240V, 50/60hz. And as output: 15V 1A.

5 – Sales And Packaging

The LYFE sells on Amazon for $248 .42 and on FLYTE for $299 with each package containing the following:

  • 1 planter.
  • 1 base.
  • 1 user manual.
  • 1 adapter.

Getting Started With The LYFE Flower Pot Review

Time needed: 15 minutes

Sometimes even the easiest of tasks can’t be completed due to inaccurate guidance don’t be disappointed if you can’t get it right in your first try. On that note here’s a step-by-step guide to setting up the LYFE.

  1. Plant and Pot

    Fit your plant in the planter.

  2. Power Supply

    Connect the base to the power supply.

  3. Levitation

    Hold the planter (already containing the plant) around 0.5 inches over the base.

  4. Adjustment

    Raise the planter upwards slowly until you can feel a pull force then gently release.

Image Source: Kickstarter
Maglev LYFE Flower Pot Review

Things Users May Not Like About The LYFE Flower Pot Review

In the scale of things, there exists good in bad and bad in good meaning there is nothing 100% appealing to everyone. We’ve assembled a list of the not-so-appealing side of the LYFE according to some users:

  • It doesn’t spin 360 degrees naturally, need a touch every now and then.
  • The wired set up though vital for the levitation process, takes away a bit of the cool factor.
  • Only tiny plants can fit in.

Overall

From the information above, the LYFE receives an 7.4/10 rating properly simplified in a pro/con summary below.

Pros of The LYFE Flower Pot

  • Perfect design to serve as a decoration for your home or office.
  • The magnetic fields have a nutritive effect on the plants.

Cons of The LYFE Flower Pot

  • Only tiny plants can fit in it.
  • Consumes electricity though small.

Conclusion

The LYFE Flower Pot is an absolute splendour of artwork combined with science and technology to produce the futuristic appearance of a gadget which we could only dream of when watching Sci-Fi movies.

This gadget will be an excellent decoration and can also serve as a cool flower pot in your home or Green House.

Maglev LYFE Flower Pot Review
Image Source: Kickstarter
Maglev LYFE Flower Pot Review

Some Frequently Asked Questions

Here are some questions personally answered by FLYTE.

How high does it float empty?

When it’s empty, it levitates 2cm.

Is it Europe plug electricity voltage?

Your multi adapter comes with four different plugs including one for the EU plug.

Does it work with 220 volts?

Yes it does, it has a multi adapter that works globally.

What is the warranty for this product?

All our products have a one-year warranty in the US and all non-EU territories.

References

Other Interesting Articles