
Manipulate Videos with OpenCV
Introduction
When diving into the realm of computer vision and machine learning, the ability to convey your findings and progress is paramount. Static images might not always capture the essence of your work. In this comprehensive guide, we’ll explore the art of creating captivating videos using OpenCV, focusing on the renowned Ken Burns effect.
Video Manipulation
Understanding the Ken Burns Effect
What is the Ken Burns Effect?
Named after the filmmaker Ken Burns, this technique involves dynamically panning and zooming across images. Instead of presenting a stagnant photo, the Ken Burns effect brings life to your visuals by zooming into details and smoothly panning across the image.
Creating the Ken Burns Animation with OpenCV
Cropping Magic with OpenCV
The essence of the Ken Burns effect lies in the art of cropping. Each frame in the video is essentially a cropped version of the original image, zoomed to fill the screen. With OpenCV and its powerful numpy arrays, this becomes an elegant dance.
def crop(img, x, y, w, h): x0, y0 = max(0, x - w//2), max(0, y - h//2) x1, y1 = x0 + w, y0 + h return img[y0:y1, x0:x1]
The Pan and Zoom Choreography with OpenCV
To orchestrate the dance of pan and zoom, we need to define our constants:
video_dim = (1280, 720) fps = 25 duration = 2.0 start_center = (0.4, 0.6) end_center = (0.5, 0.5) start_scale = 0.7 end_scale = 1.0
Now, with these parameters, we can create a mesmerizing video. For each frame, we calculate the crop coordinates, adjust for aspect ratio, and resize the cropped image.
num_frames = int(fps * duration) frames = [] for alpha in np.linspace(0, 1, num_frames): rx = end_center[0] * alpha + start_center[0] * (1 - alpha) ry = end_center[1] * alpha + start_center[1] * (1 - alpha) x = int(orig_shape[1] * rx) y = int(orig_shape[0] * ry) scale = end_scale * alpha + start_scale * (1 - alpha) # determine how to crop based on the aspect ratio of width/height if orig_shape[1] / orig_shape[0] > video_dim[0] / video_dim[1]: h = int(orig_shape[0] * scale) w = int(h * video_dim[0] / video_dim[1]) else: w = int(orig_shape[1] * scale) h = int(w * video_dim[1] / video_dim[0]) # crop, scale to video size, and save the frame cropped = crop(img, x, y, w, h) scaled = cv2.resize(cropped, dsize=video_dim, interpolation=cv2.INTER_LINEAR) frames.append(scaled)
Bringing the Frames to Life
The final act involves putting all these frames together into a seamless video. OpenCV’s VideoWriter comes to our rescue.
# write to MP4 file vidwriter = cv2.VideoWriter("output.mp4", cv2.VideoWriter_fourcc(*"mp4v"), fps, video_dim) for frame in frames: vidwriter.write(frame) vidwriter.release()
Getting Started
To demonstrate this effect, let’s begin with a high-resolution image, like the football picture available here. This image, in all its 1600 x 1067 pixels, will be our canvas.

Creating Videos from Images with OpenCV
Time Needed : 00 hours 30 minutes
Carefully follow the next series of instructions to get the best results from this tutorial. This is going to be interesting, so, grab a cup of coffee, and let’s get started.
Step 1: Importing Necessary Libraries
To begin, we import the OpenCV library with the following line of code:import cv2The above operations can be done as shown in the following image:

Step 2: Define the Function
Define the function
ken_burns_effect()which takes the input image path, output video path, duration, and zoom factor as parameters. The function can be defined as follows:def ken_burns_effect(image_path, output_path, duration=5, zoom=1.2):# Function code will go hereThe above operations can be done as shown in the following image:
Step 3: Read the Input image
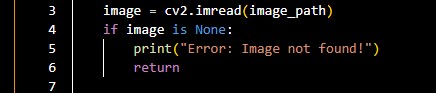
Get the image you earlier downloaded, to use within your OpenCV program, using the following code:
image = cv2.imread(image_path) if image is None: print("Error: Image not found!") returnThe above operations can be done as shown in the following image:
Step 4: Get the Dimensions of the Input Image
Get the dimensions of the image you earlier imported into your program, using the following code:
height, width = image.shape[:2]The above operations can be done as shown in the following image:
Step 5: Define the Starting and Ending Scale
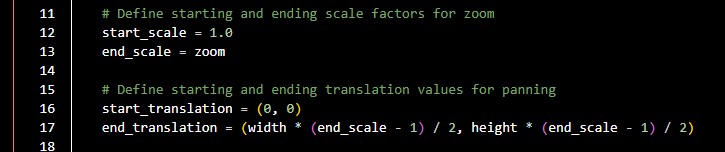
Define starting and ending scale factors for zooming and starting and ending translation values for panning, with the following code:
start_scale = 1.0 end_scale = zoom start_translation = (0, 0) end_translation = (width * (end_scale - 1) / 2, height * (end_scale - 1) / 2)The above operations can be done as shown in the following image:
Step 6: Define the Frames
Define the total number of frames for the video based on the specified duration, using the following code:
num_frames = duration * 25 # Assuming 25 frames per secondThe above operations can be done as shown in the following image:
Step 7: Create a Video Writer Object
Create a video writer object to save the Ken Burns effect video, using the following code:
fourcc = cv2.VideoWriter_fourcc(*'mp4v') video_writer = cv2.VideoWriter(output_path, fourcc, 25, (width, height))The above operations can be done as shown in the following image:
Step 8: Apply the Ken Burns Effect
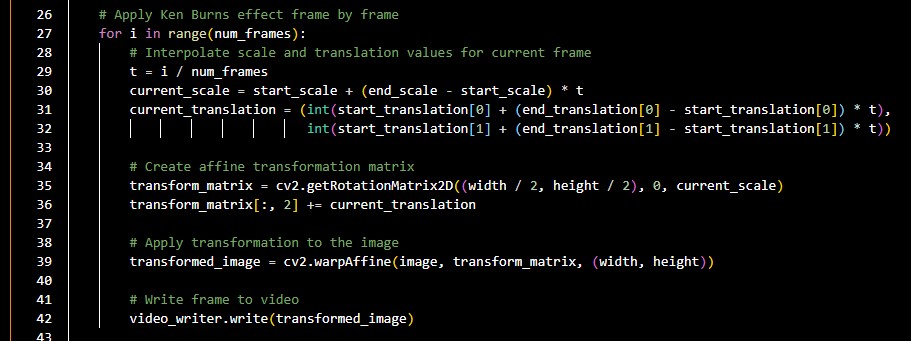
Apply the Ken Burns effect frame by frame by interpolating scale and translation values, using the following code:
for i in range(num_frames): t = i / num_frames current_scale = start_scale + (end_scale - start_scale) * t current_translation = (int(start_translation[0] + (end_translation[0] - start_translation[0]) * t), int(start_translation[1] + (end_translation[1] - start_translation[1]) * t)) transform_matrix = cv2.getRotationMatrix2D((width / 2, height / 2), 0, current_scale) transform_matrix[:, 2] += current_translation transformed_image = cv2.warpAffine(image, transform_matrix, (width, height)) video_writer.write(transformed_image)The above operations can be done as shown in the following image:
Step 9: Release the Video Writer
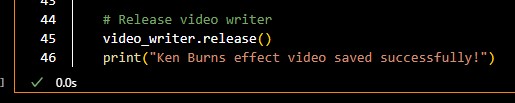
Release the video writer, using the following code:
video_writer.release() print("Ken Burns effect video saved successfully!")The above operations can be done as shown in the following image:
Step 10: Define Input Image and Output Video Paths
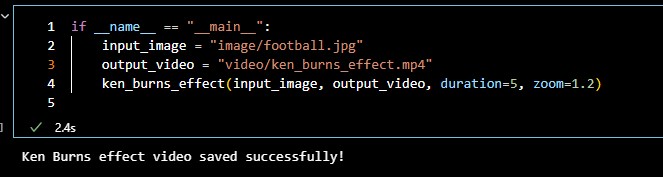
Define the input image path, and output video path, and call the
ken_burns_effect()function with desired parameters, using the following code:if name == "main":input_image = "input_image.jpg"output_video = "ken_burns_effect.mp4"ken_burns_effect(input_image, output_video, duration=5, zoom=1.2)The above operations can be done as shown in the following image: If everything goes fine, you should see a message saying that the video was saved successfully, and you’ll also see the video saved in its respective directory.


 If everything goes fine, you should see a message saying that the video was saved successfully, and you’ll also see the video saved in its respective directory.
The resulting video from the above program looks as follows:
How to Create Videos From Images with OpenCV
In case you prefer copying parts of the code, or reading the full content of the downloaded source file before extracting and running it, check out the raw source code below.
Also, the code was written in a Jupyter Notebook, not with the default Python file, you might have to take note of that, as it determines how the code should be compiled to avoid any worries. (within Jupyter Notebook or Jupyter Lab) and not using the default Python compiler.
def ken_burns_effect(image_path, output_path, duration=5, zoom=1.2):
    # Read the image
    image = cv2.imread(image_path)
    if image is None:
        print("Error: Image not found!")
        return

    # Get image dimensions
    height, width = image.shape[:2]

    # Define starting and ending scale factors for zoom
    start_scale = 1.0
    end_scale = zoom

    # Define starting and ending translation values for panning
    start_translation = (0, 0)
    end_translation = (width * (end_scale - 1) / 2, height * (end_scale - 1) / 2)

    # Define total number of frames
    num_frames = duration * 25  # Assuming 25 frames per second

    # Create video writer object
    fourcc = cv2.VideoWriter_fourcc(*'mp4v')
    video_writer = cv2.VideoWriter(output_path, fourcc, 25, (width, height))

    # Apply Ken Burns effect frame by frame
    for i in range(num_frames):
        # Interpolate scale and translation values for current frame
        t = i / num_frames
        current_scale = start_scale + (end_scale - start_scale) * t
        current_translation = (int(start_translation[0] + (end_translation[0] - start_translation[0]) * t),
                               int(start_translation[1] + (end_translation[1] - start_translation[1]) * t))

        # Create affine transformation matrix
        transform_matrix = cv2.getRotationMatrix2D((width / 2, height / 2), 0, current_scale)
        transform_matrix[:, 2] += current_translation

        # Apply transformation to the image
        transformed_image = cv2.warpAffine(image, transform_matrix, (width, height))

        # Write frame to video
        video_writer.write(transformed_image)

    # Release video writer
    video_writer.release()
print("Ken Burns effect video saved successfully!")if __name__ == "__main__":
input_image = "image/football.jpg"
output_video = "video/ken_burns_effect.mp4"
ken_burns_effect(input_image, output_video, duration=5, zoom=1.2)Conclusion
Congratulations! You’ve just mastered the art of creating visually stunning videos with the Ken Burns effect using OpenCV. This technique not only showcases your work more dynamically but also adds a layer of professionalism to your presentations. Dive into the world of computer vision, armed with the ability to tell your story through captivating visuals.
Some Frequently Asked Questions and Their Answers
What is OpenCV and how does it relate to image manipulation?
OpenCV is a powerful computer vision library widely used for image processing.
Can you provide practical examples of image processing using OpenCV?
Yes, there are practical examples demonstrating image preprocessing with OpenCV.
How can OpenCV be used for real-time image manipulation in Python?
OpenCV allows real-time image manipulation by capturing frames and applying edits in Python.
What are the essential concepts in computer vision and image processing for beginners?
A beginner’s guide to computer vision and image processing with OpenCV simplifies essential concepts in these cutting-edge fields.
OpenCV References
- medium.com: Real-Time Image Manipulation in Python…
- opencv organisation: Computer Vision and Image Processing: A Beginner’s Guide…
- analyticsvidhya.com: Image Processing – With Practical Examples…
- analyticsvidhya.com: A Beginner’s Guide to Image Processing and Python…
Other Interesting Articles
- A Comprehensive Guide on How to Use Stable Diffusion Seeds: Master Stable Diffusion Seeds for precise AI-generated images. Learn to control, find specific Seeds, and make nuanced…
- OpenCV Beginner’s Guide: Explore official OpenCV Tutorials for in-depth learning on installation, core functionality, and image processing. Dive into OpenCV-Python…